Stolen Tech: The Soviet Shuttle

The US Space Shuttle program is dead and buried. The orbiters can now be found in their permanent homes in the Air and Space Museum, Kennedy Space Center, and the California Science Center. The launch pads used by the shuttles over a career of 135 launches are being repurposed for vehicles from SpaceX and the Space Launch System. Yes, some of the hardware and technology will be reused for NASA’s next generation of heavy launch vehicles, but the orbiter – a beautiful brick of a space plane – is forever grounded.

The Space Shuttle was a product of the cold war, and although the orbiters themselves were never purely military craft, the choices made during the design of the Space Shuttle were heavily influenced by the US Air Force. The Soviet Union was keenly aware the United States was building a ‘space bomber’ and quickly began development of their own manned spaceplane.

While this Soviet Shuttle would not be as successful as its American counterpart — the single completed craft would only fly once, unmanned — the story of this spaceplane is one of the greatest tales of espionage ever told. And it ends with a spaceship that was arguably even more capable than its American twin.

Continue reading “Stolen Tech: The Soviet Shuttle”

Current Meter Shows Current Time

This isn’t the first of its type, but [Daniel]’s MSP430 based Analog Gauge Clock certainly ticks off the “hack” quotient. He admits an earlier Voltmeter Clock we featured a while back inspired him to build his version.

[Daniel] was taking an Embedded systems class, and needed to build an MSP430G2553 microcontroller based final project. Which is why he decided to implement the real time clock using the micro-controller itself, instead of using an external RTC module. This also simplified the hardware used – the microcontroller, a crystal, three analog ammeters, and a few passives were all that he needed. Other than the Ammeters, everything else came from his parts bin. Fresh face plates were put on the ammeters, and the circuit was assembled on a piece of strip board. A piece of bent steel plate served as the housing.

The interesting part is the software. He wrote all of it in bare C, without resorting to using the Energia IDE. He walks through all of the important parts of his code on his blog post. Setting load capacitance for the timing crystal was important, so he experimented with an oscilloscope to see which value worked best. And TI’s Application Note on MSP430 32-kHz Crystal Oscillators (PDF) proved to be a useful resource. Three PWM output’s run the three ammeters which indicate hours, minutes and seconds. Push-button switches let him set the clock. See a short demo of the clock in the video below.

Continue reading “Current Meter Shows Current Time”

IR Remote For Smartphone Via Bluetooth Adapter

Quite often, the raison d’être for building a project is to learn and hone one’s skills. In which case it doesn’t matter if the end use seems a bit frivolous. [indiantinker] built BlueIR, a device to control Bluetooth A2DP devices using an archaic IR Remote using a BT-Aux Adapter.

Sounds convoluted? Let’s try again. He uses an old IR remote to send data to a MSP430-series  microcontroller, which is connected over serial to a USB Bluetooth Receiver Adapter, which in turn is connected to a set of wired speakers. The Bluetooth adapter is paired with his phone. The IR remote allows him to control the audio player commands on his phone from a far greater distance compared to the bluetooth adapter.

He begins by breaking open the BT adapter to find that the markings on the chip have been erased. What he did find instead, were two pads promisingly marked as TX and RX, but he still did not know the baud rate or the command set. Digging around the Internet, he figured out that the chip used was the OVC3860 Bluetooth 2.0 + EDR Stereo Audio Processor and found its list of AT Commands. After some tests using a serial console he figured out that it worked at 115600 baud. Soon enough, he had it hooked up to the MSP430 Launchpad and was able to communicate. Next up, he built a small PCB, using the toner transfer method. The board consists of the MSP430G2553 micro controller, IR receiver, LED, some decoupling capacitors and a few pull up resistors. He leached power from the 3.3V regulator on the host BT adapter. The assembled PCB is piggy backed on top of the BT adapter for the time being, and a 3d printed housing is on his to-do list. His code is available at the BlueIR Github repo and the video below shows it in action.

Continue reading “IR Remote For Smartphone Via Bluetooth Adapter”

Energia Multitasking Uses RTOS On MSP432

We keep wondering where the Arduino world is headed with the hardware getting more and more powerful. If the IDE doesn’t keep up what’s the point? Now we have at least one answer to that problem. Energia is the Arduino-like-framework for Texas Instruments based boards. They just came out with a multitasking system built into Energia targeted at the ARM Cortex-M4F based MSP432 Launchpad which we covered a few weeks back.

The announcement post gives a couple of examples of uses for multitasking. The simplest is blinking LEDs at different rates. If you wanted to do this closer to the metal you’re talking about multiple timers, or multiple compares on a single timer, perhaps a interrupt-driven-system-tick that has a high enough resolution for a wide range of your blinking needs. But these are not always easy to set up unless you are intimately comfortable with this particular architecture. The Energia multitasking will handle this for you. It’s upon the TI Real Time Operating System (TI-RTOS) but wraped in the familiar IDE.

The UI divorces you from thinking about the hardware at all. You simply launch a new tab and start coding as if you’re using a completely separate piece of hardware. The announcement post linked above mentions that these Sketches are running “in parallel”. Well… we know it’s not a multi-core system like the Propeller but we’ll let it slide. It is certainly easier than building your own scheduler for this type of hardware.

[Thanks MycoWx]

The CC3200 dev board with Energia

Energia On The CC3200

If you’re looking to connect things to the internet, with the goal of building some sort of “Internet of Things,” the new CC3200 chip from TI is an interesting option. Now you can get started quickly with the Energia development environment for the CC3200.

We discussed the CC3200 previously on Hackaday. The chip gives you an ARM Cortex M4 processor with a built-in WiFi stack and radio. It supports things like web servers and SSL out of the box.

Energia is an Arduino-like development environment for TI chips. It makes writing firmware for these devices easier, since a lot of the work is already done. The collection of libraries aids in getting prototypes running quickly. You can even debug Energia sketches using TI’s fully featured IDE.

With this new release of Energia, the existing Energia WiFi library supports the built-in WiFi radio on the CC3200. This should make prototyping of WiFi devices easier, and cheaper since the CC3200 Launchpad retails for $30.

Proper Debugging For Energia Sketches

Moving a sketch from Energia to Code Composer Studio

Energia is a tool that brings the Arduino and Wiring framework to Texas Instruments’ MSP430 microcontrollers and the MSP430 Launchpad development board. This allows for easy development in an Arduino-like environment while targeting a different microcontroller family.

One problem with Energia and Arduino is the difficulty of debugging. Usually, we’re stuck putting a Serial.println(); and watching the serial port to trace what our program is doing. Other options include blinking LEDs, or using external displays.

Code Composer Studio, TI’s official development tool, allows for line-by-line debugging of applications. You can set breakpoints, watch the value of variables, and step through an application one instruction at a time.

The good news is that the latest version of Code Composer Studio supports importing Energia sketches. Once imported, you can step through the code and easily debug your application. This is a huge help to people developing more complex software using Energia, such as libraries.

TI gives us an overview of the new feature in a video after the break.

[Thanks to Adrian for the tip!]

Continue reading “Proper Debugging For Energia Sketches”

New Version Of Energia Supports Wolverine And Connected

Energia Update
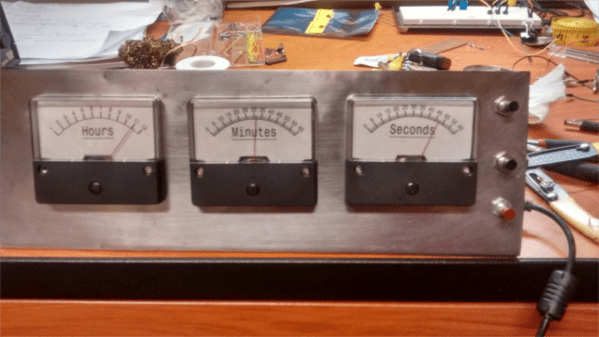
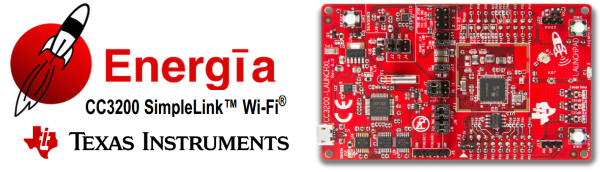
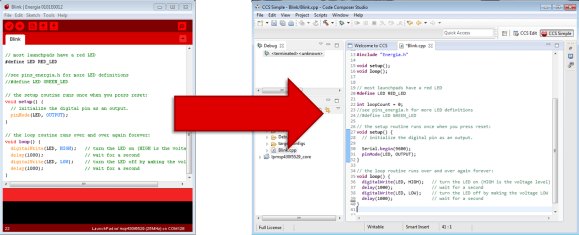
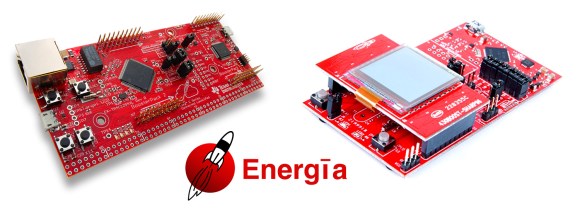
There is something to be said about how easy it is to write Arduino code. For those of who you are big fans of the MSP430 and Texas Instrument’s LaunchPad series, an upcoming release of Energia brings Arduino style coding to the two newest member of the LaunchPad family: the TivaC Connected LaunchPad EK-TM4C1294XL and Wolverine FRAM LaunchPad MSP-EXP430FR5969LP.

“Energia is an open-source electronics prototyping platform … with the goal to bring the Wiring and Arduino framework to the Texas Instruments MSP430 based LaunchPad.” The newest release of Energia is exciting for the sole reason that the new TivaC Connected LaunchPad and Wolverine FRAM LaunchPad are supported. The TivaC Connected LaunchPad is a $20 development board for TI’s low-power ARM processors that has Ethernet connectivity. The MSP430 at the heart of the Wolverine FRAM LaunchPad uses up to 250x less power than flash based MCUs at low speeds in addition to many other cool benefits.

Be sure to keep an eye out for the new version of Energia, it should be arriving sometime next week. Now is a better time than ever to try out the Tiva C or the MSP430 MCUs!