Ballpoint Switch Is Oh-So Satisfying

Alright, here’s your quick and dirty hack for the day. The astute among you may recall [Peter Waldraff]’s bookshelf train build of a few days ago, and the fact that he used a switch made from a dead ballpoint pen to light up the scene. Fortunately, [Peter] wrote in to give us the details of this low-voltage sub-build, which you can see in the video after the break.

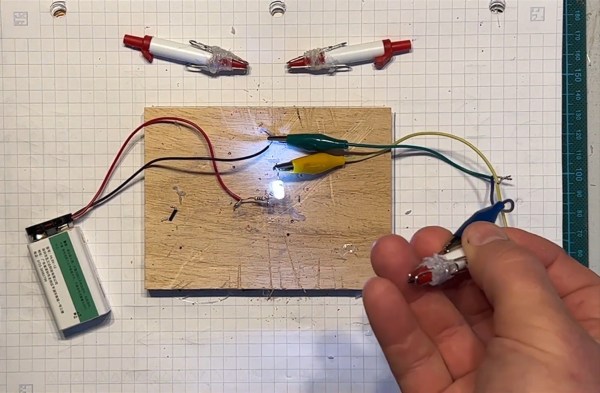
Essentially, [Peter] starts by making a shortened version of the pen. He modifies nearly every bit of it, including cutting down the ink cartridge, so if you try this, make sure the thing is all dried up first. Then, as he is screwing the point holder back on the barrel, he wraps elastic cord around the inside barrel in lieu of having sewing thread lying around. This cord along with some hot glue will hold a pair of paper clips to the sides of the point holder. When the pen is clicked into the writing position, it makes a connection between the paper clips and closes the circuit on whatever is wired into it.

What types of little hacks like this have gotten you through the build? Let us know in the comments, or better yet, write it up and drop us a tip. By the way, here is that bookshelf train build in case you missed it.

Continue reading “Ballpoint Switch Is Oh-So Satisfying”

ESP8266 Socket Is A Snap-Fit, Breadboard-Friendly Wonder

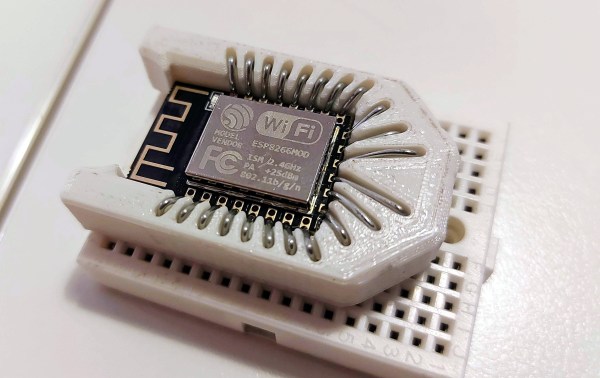
It all started with wanting to program an ESP-12 variant of an ESP8266 module without involving any solder. Displeased with all the socket offerings on Thingiverse, [tweeto] set out to design their own breadboard-friendly snap-fit socket.

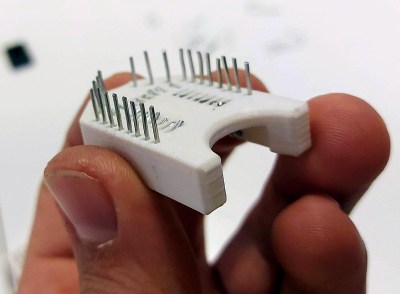
This certainly looks like a handy solution. All you have to do is print the thing, add all the wires, and stick your ESP in there. Even that wire is easy to find; [tweeto] used 0.8 mm paper clips which are sturdy, conductive, and haunting the darkest corners of every desk drawer. They’re also a little bit on the thick side, so [tweeto] plans to test out 0.6mm copper wire in the future.

The challenge with this type of print is to design something that will stand up to repeated breadboardings without losing legs or falling apart. [tweeto]’s elegant solution is a tiny groove for each wire in the bottom of the socket — it keeps the wire in place by countering the play caused by inserting it into and removing it from a breadboard. See how [tweeto] bends the paper clips in the short video after the break.

There’s more than one way to use 3D printing to your circuit-building advantage, even in permanent circuits — just take a look at this PCB-free Arduboy.

Continue reading “ESP8266 Socket Is A Snap-Fit, Breadboard-Friendly Wonder”

A Walking Robot With A Single Servo

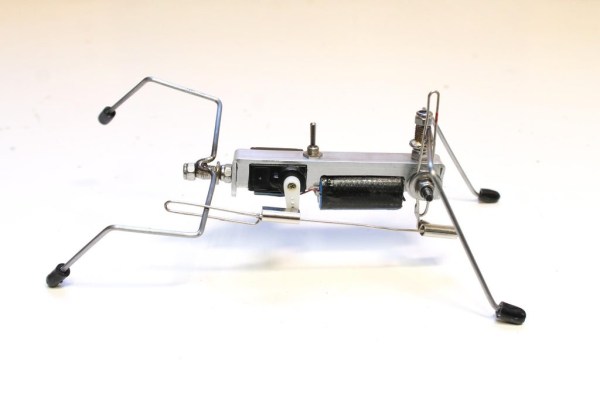
We’ve all been there — you see somebody do something cool on YouTube and you just have to give it a go. For [lonesoulsurfer], the drop-everything-and-build happened to be a little four-legged walker robot that runs on a single servo. Though it may be simple, there really is nothing like seeing a robot you created take its first steps.

[lonesoulsurfer]’s walker is made mostly from scrap aluminium and other scavenged parts like coat hangers, paper clips and the metal bits and bobs from banana jacks. The Dremeled and bent body would likely be the hardest to imitate for a first-time builder, but any sturdy chassis that allows for things screwed and bolted to it should work. Also, don’t expect it to work right away. It will take a bit of tuning to get the gait right, but it’s all part of the fun. So is modifying a 180° servo for continuous rotation.

We really like the way this robot walks — it saunters around like a long bulldog and looks like it can handle almost any terrain. Watch it walk after the break, and stick around for the build video.

There’s just something about simple robots without microcontrollers. If you’ve never heard of BEAM robots, cut your teeth on this ‘bot with circular legs.

Continue reading “A Walking Robot With A Single Servo”

Penny And Paper Clip Heat Sinks

A bunch of audio heads over at the Head-Fi forum were discussing handy and quick heat sinking methods, leading to much speculation and conjecture. This finally prompted [tangentsoft] to take matters in his own hands and run some tests on DIY Heat Sinks.

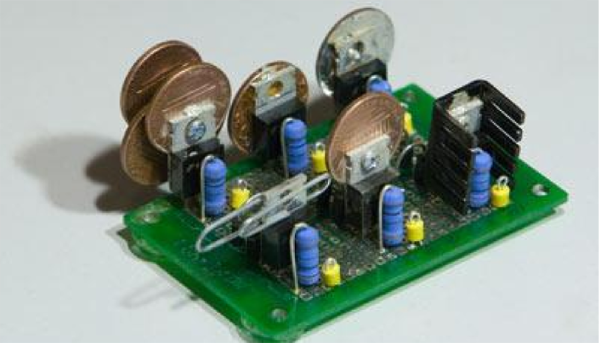
The question that sparked this debate was if a paper clip is a good enough heat sink to be used for a TO220 package. Some folks suggested copper pennies (old ones minted 1981 and earlier – the new ones are zinc with copper plating and won’t help much). [tangentsoft] built a jig to test six LM317 regulators in constant current mode set to 0.125A and 2w dissipation. The six configurations were a paper clip, a single penny bolted to the regulator, a regular Aavid TO220 heat sink, a set of 4 pennies bolted, a single penny epoxy glued and finally a single penny soldered directly to the regulator.

The results were pretty interesting. The paper clip scored better than any of the single pennies! The quad-penny and the Aavid heat sink fared above all the other configurations, and almost at par with each other. [tangentsoft] posts his review of each configurations performance and also provides details of his test method, in case someone else wants to replicate his tests to corroborate the results. He tested each configuration independently for one hour, gathering just over 10000 readings for each setup. Other nearby heat sources were turned off, and he placed strategic barriers around the test circuit to isolate it from the effects of other cooling / heating sources. He even removed himself from the test area and monitored his data logging remotely from another room. When he noticed a couple of suspect deviations, he restarted the test.

[tangentsoft] put all the data through Mathematica and plotted his results for analysis, available at this link [pdf, 2.8MB]. So the next time you want to heat sink a regulator for cheap, just hunt for Clippy in your box of office supplies. Do remember that these methods will work for only a couple of watts dissipation. If you would like to cast and build your own heat sinks out of aluminum, check out this post about DIY Aluminum heat sink casting. And if you need help calculating heat sink parameters, jump to 12:00 minutes in this video from [Dave]’s EEVBlog episode on Dummy loads and heat sinks.

Thanks to [Greg] for sending in this tip.