Colored Filament From A Can

On the last day of MRRF, the guys from Lulzbot were printing a vase with some clear Taulman t-glase on their TAZ 6 prototype. It was probably the third or fourth one they had printed, but I was compelled to go over there because they were painting the filament with a blue Sharpie right before it went into the extruder.

It immediately made me think of this video that hit our tips line last fall and fell through the cracks—a short one from [Angus] at Maker’s Muse about creating your own colored filament by spraying clear PLA with cheap spray paint. This is a neat alternative to painting a finished print because the color isn’t going to rub off. The pigment fuses with the PLA in the hot end, providing consistent coloring.

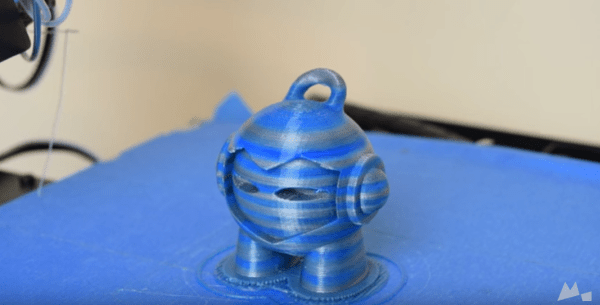
Disclaimer time: [Angus] ran his spray-painted PLA through a WANHAO i3, which is a cheap, modified Prusa that actually has pretty good reviews. The point is, he doesn’t care if the nozzle gets clogged. But the nozzle didn’t clog. Nothing bad happened at all, and the prints turned out great. As you can see in the video after the break, he tried silver and blue separately on short lengths of filament, and then alternated the colors to make the striped Marvin in the main image. [Angus]’ main concern is that the paint probably affects the strength of the print.

Have you tried spray painting filament? How did it go? Let us know in the comments. If you long to print in any color on the cheap but don’t want to seriously risk clogging your hot end, there’s always the drilled-out Sharpie method.

Continue reading “Colored Filament From A Can”

Automated Picasso Coming To A Ceiling Near You

It’s not a day too late to switch your career from engineering to art or vice-versa! While some of us tend far towards one end or the other, some like [Chris] show us just how cool it is to walk the line… er, ceiling in this case. [Chris] took a cue from his fiancée’s latest mural project to create an automated painting jig he calls ARTbOT.

Spraying the ceiling with ARTbOT sounds like fun, but it’s a dream [Chris] needed to realize with only his spare time and small budget. Constraints aside, he’s pulled it off elegantly with a cluster of extruded aluminum tubing, a few paint sprayers, and a LabView-driven Fet triggered by encoder ticks on the drop wheel. To pain the image, it’s first binarized and scaled to accommodate ARTbOT’s 8-inch pixel size. ARTbOT then gets a boost from a scissor-lift where it can then track it’s linear position with the drop wheel to spray the pixel-pattern correctly.

[Chris] pulled this rig together to help his fiancée and her art company tackle huge canvases, in this case, large freeway underpasses. With preliminary studio tests running smoothly with ARTbOT proudly printing its name, we can’t wait to see the final piece. In the meantime, have a look at this edgy handheld alternative. Watch out mural artists! There’s an 8-bit contender in the ring these days.

Continue reading “Automated Picasso Coming To A Ceiling Near You”

Fail Of The Week: Silicone Molding That Won’t Cure

fotw-uncured-silicone

Mold making is a hacking skill we see pop up around here from time to time. But rarely do we hear about problems in the process, and they must happen. Here’s proof. This Fail of the Week focuses on [Michael’s] unfortunate experience with failed mold making due to uncured silicone around the master mold. It’s worse than it may sound, since he lost about a pound of silicone to the fail, and we’re unsure of whether he can even use the master again (how do you clean uncured silicone off of something?). Not to mention the time lost from setting up the pour and waiting 20 hours for it to cure.

Soon after the issue presented itself [Michael] started researching to see what had gone awry and noticed that the master should have been sealed with acrylic lacquer. This gave him the opportunity to test several different finishes before making a run at the full mold once again. He picked up a variety of the paint products he could find locally, used them to coat some scraps, and globbed on some silicone to see which worked the best.  He found a couple of different primers worked well, as did both glossy and matte acrylic coatings.

If you’ve never had a reason for mold making before, keep it in mind. You’d be surprised what kind of factory-production-type things can be pulled off by 3D printing a master, and casting a silicone mold of it.


2013-09-05-Hackaday-Fail-tips-tileFail of the Week is a Hackaday column which runs every Wednesday. Help keep the fun rolling by writing about your past failures and sending us a link to the story — or sending in links to fail write ups you find in your Internet travels.

Laser Cutter Helps Make Dual Sided PCBs

laser-cutter-dual-sided-pcb

[Rich Olson] wrote in to share his technique for making dual-sided printed circuit boards using a laser cutter. Unfortunately this still depends on etching copper clad boards with chemicals. But his process makes it really easy to produce well-defined and precisely aligned etch resist on both sides of the board all at once.

This can be really tough to do with the toner transfer method. The most common way would be to use a light box to align the two printouts of resist, taping them together before putting the copper clad in between and sending the whole thing though a laminator. [Rich] uses a scrap of acrylic to ensure alignment. He tapes it to the bed of his Epilog laser cutter and cuts the board outline out (that’s the void you see in the image). He removes the scrap and uses it as a stencil for cutting out the copper clad. After prepping the board he coats both sides and sends it through the laser cutter to burn away the paint where he wants to remove copper. Don’t miss his video embedded after the break.

The acrylic outline trick is similar to the laser cutter fence we heard about several weeks back.

Continue reading “Laser Cutter Helps Make Dual Sided PCBs”

High Contrast Laser Etching

high-contrast-laser-etching

The problem with laser etching dark materials is that the areas burnt away by the intense light don’t really stand out from the rest of the surface. [The 5th Fool] is taking a roundabout way of correcting this by topping his laser engravings with contrasting paint. The technique is still pretty simple and we think it looks great!

Basically he’s etching a layer of painter’s tape which becomes a stencil. But the surface it is masking also gets etched so the paint has an area below to the surface which it can fill in. We figure this will help with durability issues.

After etching the painters tape the design gets a few coatings of a high-contrast paint color and is left to dry. To remove the stencil, duct tape is applied to the entire area. This helps quite a bit in removing the tiny bits of tape from an intricate design.

This Diy Fume Extractor Will Be A Showpiece For Your Workbench

We have no idea how well this diy fume extractor works, but it sure does look great! We’ve been thinking that it’s time to stop trying to blow away the solder fumes while working on project and this might be just the kind of motivation we need. The 6″ cube doesn’t get in the way of your work, and since it includes a carbon filter it should keep the smell of burning flux to a minimum.

[Jeff’s] project basically brings together a 120mm PC cooling fan with a power source. The fan mounts inside of a steel enclosure he picked up from Digikey. The face plates that come with it were modified to accept the fan, as well as the grill hardware that goes with it. Before assembling he painted the box with some Rustoleum “Hammered” black spray paint. This gives it a texture that will hide any imperfections in your application.

We’re a bit hazy on how this is being powered. It sounds like he’s plugging the cord into mains but we don’t see any type of regulator to feed what must be a 12V DC fan. There are build instruction available but they didn’t clear up our confusion.

Make Your Own Spray Paint Cans

[Mikeasaurus] found a way to build his own refillable spraypaint canister. The donor vessel used here is a plastic soda bottle. It’s a great choice since it is engineered to house a pressurized liquid and you can find them for free by intercepting a satisfied soda consumer before they reach the recycling bin.

He repurposed the spray nozzle from a commercial spray paint can. By first releasing all of the pressure from the empty paint he could then use a hack saw to remove the top disk. He used Sugru to attach it to the bottle cap which has a hole drilled in the center to accept the feed straw. We wonder if there wouldn’t be a better way to attach this from the inside of the cap for better resistance to bottle pressure?

The final piece of hardware is a Shrader valve from a bicycle inner tube. This lets you pump up the pressure in the bottle. You’ll need to dilute the paint you use to make it sprayer-friendly. [Mikeasaurus] diluted his six to one which might have been a bit too much judging from the drips seen in the video after the break.

Continue reading “Make Your Own Spray Paint Cans”