RepTrap Keeps Watch Over Our Cold-Blooded Friends

Wait a second, read that title again. This isn’t a throwback 3D printing project at all. That’s “RepTrap” as in reptile trap, and it’s a pretty clever way to study our cold-blooded friends in their natural habitat.

Now, game cameras — or trail cameras, if you’re less interested in eating what you see — are pretty much reduced to practice. For not that much money you can pick up one of these battery-powered devices, strap it to a tree, and have it automatically snap high-quality pictures of whatever wildlife happens to wander past. But nearly all of the commercially available game cameras have pyroelectric infrared sensors, which trigger on the temperature difference between a warm-blooded animal and the ambient temperature of the background. But what to do when you’re more interested in cold-blooded critters?

Enter [Mirko], who stumbled upon this problem while working with a conservation group in Peru. The group wanted to study snakes, insects, and other ectothermic animals, which are traditionally studied by trapping with pitfalls and other invasive techniques. Unable to rely on PIR, [Mirko] rigged up what amounts to a battery-powered light curtain using a VL53L4CD laser time-of-flight sensor. Mounted above the likely path of an animal, the sensor monitors the height of everything in its field of view. When an animal comes along, cold-blooded or otherwise, RepTrap triggers a remote camera and snaps a picture. Based on the brief video below, it’s pretty sensitive, too.

[Mirko] started out this project using an RP2040 but switched to an ESP32 to take advantage of Bluetooth camera triggering. The need for weatherproofing was also a big driver for the build; [Mirko] is shooting for an IP68 rating, which led to his interesting use of a Hall sensor and external magnet as a power switch.

Continue reading “RepTrap Keeps Watch Over Our Cold-Blooded Friends”
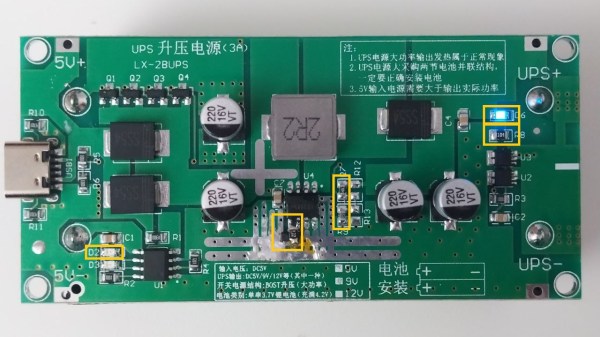
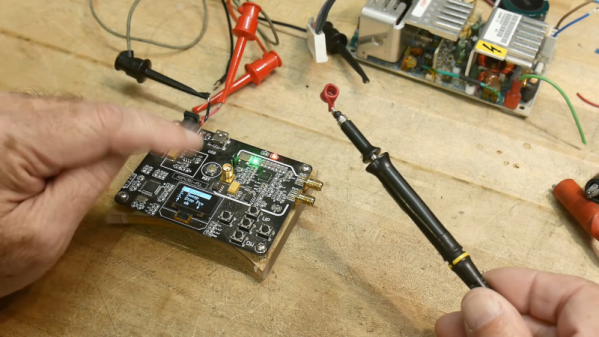
Tokyo Atacama Observatory Opens As World’s Highest Altitude Infrared Telescope

Cerro Chajnantor, site of TAO

Although we have a gaggle of space telescopes floating around these days, there is still a lot of value in ground-based telescopes. These generally operate in the visible light spectrum, but infrared ground-based telescopes can also work on Earth, assuming that you put them somewhere high in an area where the atmosphere is short on infrared-radiation absorbing moisture. The newly opened Universe of Tokyo Atacama Observatory (TAO) with its 6.5 meter silver-coated primary mirror is therefore placed on the summit of Cerro Chajnantor at 5,640 meters, in the Atacama desert in Chile.

This puts it only a few kilometers away from the Atacama Large Millimeter Array (ALMA), but at a higher altitude by about 580 meters. As noted on the University of Tokyo project site (in Japanese), the project began in 1998, with a miniTAO 1 meter mirror version being constructed in 2009 to provide data for the 6.5 meter version. TAO features two instruments (SWIMS and MIMIZUKU), each with a specific mission profile, but both focused on deciphering the clues about the Universe’s early history, a task for which infrared is significantly more suitable due to redshift.

Peering Inside The Tang FPGA

[Greg] has been working with the Tang Nano 9K FPGA board. He wanted to use the Gowin Analysis Oscilloscope (GAO) to build an internal monitor into the device for probing internal points. The problem is that the documentation is a bit lacking, so he made a video showing how to make it work to help us all out.

The idea for this isn’t unique, although for some vendors, getting this capability requires you to buy a license or the free versions are limited. We were disappointed, as was [Greg], that he had to run Windows to get the software to work.

Continue reading “Peering Inside The Tang FPGA”

Retrotechtacular: How Not To Use Hand Tools

Whatever you’re doing with your hand tools, by the US Army’s lights, you’re probably doing it wrong. That seems to be the “Green Machine’s” attitude on pliers and screwdrivers, at least, the main stars of this 1943 War Department training film on the horrors of tool abuse.

As kitschy as the film might be, they weren’t wrong. That’s especially true about the dreaded slip-joint pliers, which seem to find their way onto everyone’s list of unloved tools and are shown being used for their true purpose — turning nuts and bolt heads from hexagons into circles. Once that gore is wrapped up, we’re treated to the proper uses of pliers, including the fascinating Bernard-style parallel jaw pliers. We can recall these beauties kicking around the bottom of Dad’s tool kit and being entranced by the mechanism used to keep the jaws parallel and amplify the force applied. Sadly, those pliers are long gone now; Tubalcain did a great review of these pliers a few years back if you need a refresher.

A selection of screwdrivers gets the same treatment, complete with dire warnings against using them as prybars and chisels. Also against the Army Way is using the wrong size screwdriver for the job, lest you strip the head of the screw or break the tool itself. It has to be said that the Plomb Tool Company of Los Angeles, which produced the film, made some fantastic-looking screwdrivers back in the day. The square shanks on some of those straight screwdrivers are enormous, and the wooden handles look so much more comfortable than the greebled-up plastic nonsense manufacturers seem to favor these days. Also interesting is the reference to the new-fangled Phillips screw, not to mention the appearance of a Yankee-style spiral ratcheting screwdriver, another of Dad’s prized acquisitions that thankfully is still around to this day.

What strikes us about these military training films is how many of them were produced. No subject seemed too mundane to get a training film made about it, and so many were made that one is left wondering how there was any time left for soldiering after watching all these films. But really, it’s not much different today, when we routinely pull up a random YouTube video to get a quick visual demo of how to do something we’ve never tried before. The medium may have changed, but visual learning is still a thing.

Continue reading “Retrotechtacular: How Not To Use Hand Tools”

Upgrading A Cheap LX-2BUPS UPS Board To Fix Fatal Flaws

Cheap uninterruptable power supply (UPS) boards that take Li-ion cells of some description seem to have cropped up everywhere the past years. Finding use in applications such as keeping single-board computers ticking along in the case of a power failure, they would seem to be a panacea. Unfortunately most of these boards come with a series of fatal flaws, such as those that [MisterHW] found in an LX-2BUPS board obtained from AliExpress. Worst of all was the deep discharge of the Li-ion cells to below 2 V, which took some ingenuity and hard work to fix this and other problems.

The patched up XR2981 boost IC with MCP809 reset IC installed. (Credit: [MisterHW])
This particular board is rated for 5V at 3A, featuring the all too common TP4056 as charging IC and the XYSemi XR2981 boost converter. Since there is no off-switch or other protections on the board, the XR2981 will happily keep operating until around 2.6V, at a rather astoundingly high idle power consumption. Because of this the fixes mostly concentrated on optimizing the XR2981, by using better resistor values (R7, R8, R9), as well as adding a 3.15V MCP809 reset IC, to reduce idle power usage of the boost converter and disable it below a safe cell voltage.

The final coup de grâce was the eviction of the red LED (D6) and replacing it with the blue LED from D2, to stop the former from draining the cell as well. With these changes in place, no-load power usage dropped from nearly 900 µA to just over 200 µA, while preventing deep discharge. Although this board now has a second life, it does raise the question of what the point of these cheap UPS boards is if you have to spend money and time on reworking them before they’re somewhat acceptable. What is your go-to solution for these boards?

Non Contact Scope Probe Costs Nearly Nothing

[IMSAI Guy] wants you to build a non-contact scope probe. The cost? Assuming you have a bit of wire and a regular scope probe, it won’t cost you anything. Why do you want such a thing? You can see what he does with it in the video below.

The probe is really just a coil with little slip-over coils that grab it. You can stick it on and remove it just as easily, so you don’t have to sacrifice the probe for normal use. It won’t give you high-accuracy readings, but if you want to sniff around a circuit without directly connecting to it, it will do the trick. If you are too lazy to make a coil, you can even clip a ground lead to the probe tip, although that won’t work quite as well.

Continue reading “Non Contact Scope Probe Costs Nearly Nothing”

Retrogadgets: The Ageia PhysX Card

Old computers meant for big jobs often had an external unit to crunch data in specific ways. A computer doing weather prediction, for example, might have an SIMD (single instruction multiple data) vector unit that could multiply a bunch of numbers by a constant in one swoop. These days, there are many computers crunching physics equations so you can play your favorite high-end computer game. Instead of vector processors, we have video cards. These cards have many processing units that can execute “kernels” or small programs on large groups of data at once.

Awkward Years

However, there was that awkward in-between stage when personal computers needed fast physics simulation, but it wasn’t feasible to put array processing and video graphics on the same board. Around 2006, a company called Ageia produced the PhysX card, which promised to give PCs the ability to do sophisticated physics simulations without relying on a video card.

Keep in mind that when this was built, multi-core CPUs were an expensive oddity and games were struggling to manage everything they needed to with limited memory and compute resources. The PhysX card was a “PPU” or Physics Processor Unit and used the PCI bus. Like many companies, Ageia made the chips and expected other companies — notably Asus — to make the actual board you’d plug into your computer.

Continue reading “Retrogadgets: The Ageia PhysX Card”