Here’s a pretty clever method [Dung3onlord] used to capture 3D scenes from a PlayStation 5 without needing any specialized software. All that’s needed is a series of high-resolution screenshots, and a few software tools.
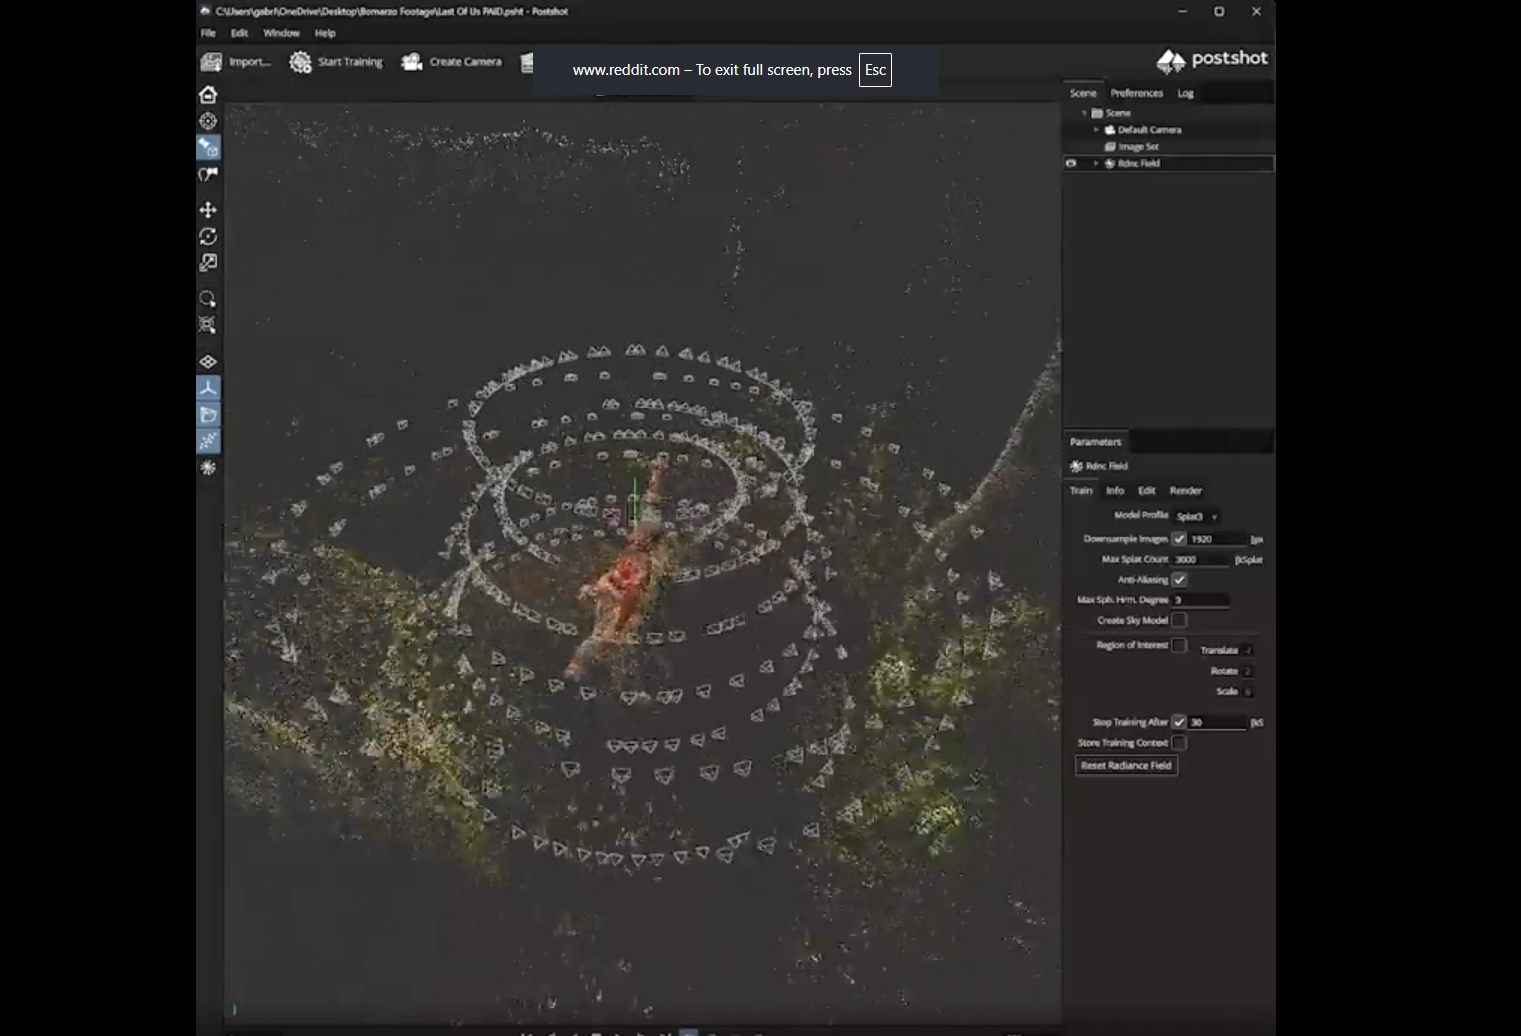
Instead of sneakily yanking 3D assets from the runtime, he fires up the game’s photo mode on his PS5. By capturing an orbiting video of a static scene (making sure to hide the game’s user interface, something photo mode in games is good for) he ends up with a video file whose content — essentially a series of screenshots — can be used to reconstruct the original 3D scene. The workflow [Dung3onlord] uses has rather more steps, but conceptually that’s all there is to it.
The whole process is remarkably similar to photogrammetry, a method of turning a bunch of photographs from different angles into a 3D point cloud. We’ve seen photogrammetry used to digitize objects because point clouds can be turned into 3D models, essentially allowing one to 3D scan an object using little more than a digital camera.
Continue reading “Extract 3D Video Game Content By Firing Up Photo Mode”