Debugging MSP430 Using Eclipse

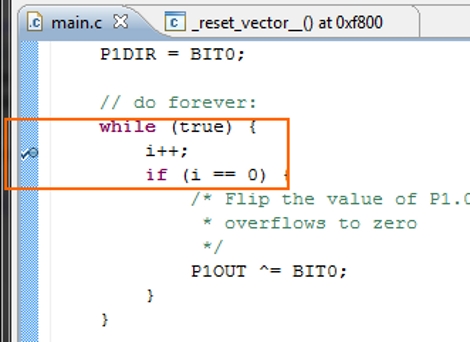
[Springuin] just posted a tutorial about debugging MSP430 projects using Eclipse. He read our feature about debugging under IAR, a proprietary IDE which TI offers as a code-limited freebie with the TI Launchpad. In that writeup we wondered if anyone would put together a tutorial using open source tools like DDD and GDB to make debugging easier for those that choose to use operating systems other than Windows. Even though he didn’t directly use those particular packages, this should work just as well.

Eclipse is a popular IDE for many different languages like C, C++, Java, and others. We’ve already seen it used to develop for the TI Evalbot on Linux systems. [Springuin] is using the Java-based IDE on a Windows system, and this is the first time we recall seeing directions on using an open-source alternative for programming with the TI Launchpad under Windows. That being said, the only real Windows specific parts are the steps necessary for communicating with the programmer. Since this method uses MSP-GCC and msp430-gdbproxy, it should be easy to do this under Linux as well. Use our tutorial to set up those tools if you haven’t already, then follow this one for a setting up and debugging in the Eclipse environment.

Der Wafflemeister 3000

der_wafflemeister3000

When people think about robots, a few different things come to mind. We like robots because they take care of tedious work. Robots are great for accomplishing tasks in hazardous environments too. When the [Chalmers Robotics Society] thinks about robots however, they think, “Breakfast!”

The CRS constructed a sweet automatic waffle cooking machine known as the Wafflemeister3000. It can produce up to 5 waffles at a time, cooking them to a nice golden brown in a little over 3 minutes. Think about that for a second – that’s about 90 waffles an hour!

This project isn’t exactly new, with the second iteration having been completed in 2007. However, since the third version features a 400% increase in production volume, we thought it was worth a mention.

Be sure to check out the video below of the Wafflemeister3000 doing its thing.

[via Neatorama]

Continue reading “Der Wafflemeister 3000”

Vanishing Point Robot Guidance

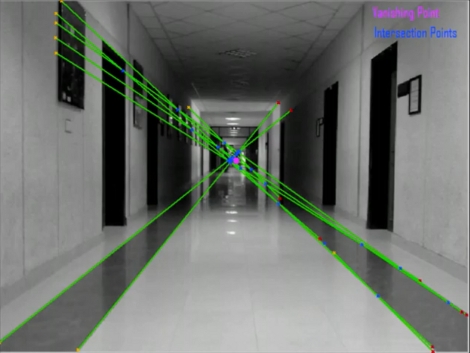
Students at the National University of Computer and Emerging Sciences in Pakistan have been working on a robot to assist the visually impaired. It looks pretty simple, just a mobile base that carries a laptop and a webcam. The bot doesn’t have a map of its environment, but instead uses vanishing point guidance. As you can see in the image above, each captured frame is analyzed for indicators of perspective, which can be extrapolated all the way to the vanishing point where the green lines above intersect. Here it’s using stripes on the floor, as well as the corners where the walls meet the ceiling to establish these lines. From the video after the break you can see that this method works, and perhaps with a little bit of averaging they could get the bot to drive straight with less zig-zagging.

Similar work on vanishing point navigation is being done at the University of Minnesota. [Pratap R. Tokekar’s] robot can also be seen after the break, zipping along the corridor and even making turns when it runs out of hallway.

Continue reading “Vanishing Point Robot Guidance”

Machine Pushes Cellphone Buttons From Anywhere In The World

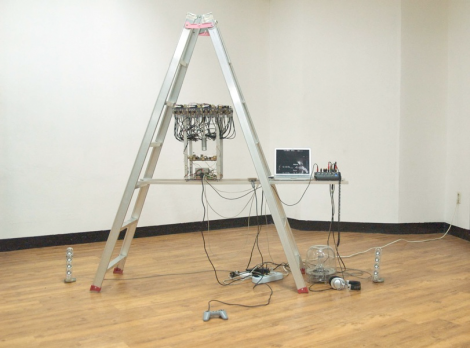
[Mok Young Bacq] works on the weekends for mobile game monitoring service. He has three cellphones that he uses for work, and although you would think this means he could work from anywhere in the world, the roaming charges are a killer. His solution was to build an incredibly intricate machine that can use three different cellphones (PDF) on his behalf.

Above you can see it perched underneath the apex of the ladder, but you’re definitely going to want to watch the video after the break. This interface method uses a camera to look at each phone. It’s hung pointing downward and moves like a pendulum to look at one of the three screens at a time. Each phone has one servo motor for each button, which uses a flexible cable as an actuator. Now he can take trips abroad, just checking in over the Internet for his two 17-hour weekend shifts (10am to 3am the next morning) working the phones.

This reminds us of the cellphone endurance tests. What happens when a button stops working?

Continue reading “Machine Pushes Cellphone Buttons From Anywhere In The World”

Let There Be Light Inside Picture Frames

[Limpkin] picked up a beautiful painting of Budda while in Bali because he thought it would react well with different colors of lighting. His overall goal was to create a picture frame with built-in LEDs. The major design specification for the project was to provide an indirect light source that would not shine in the viewers eyes. He got down to business designing a frame using SolidWorks for his modelling. The final design has a separate track from the paining with small dividers for each diode.

After about four hours on the CNC machine it was time to get down to soldering. [Limpkin] had 576 RGB LEDs on hand. He’s not looking to drive them individually, just to have independent control of each color. This makes the soldering a bit easier as there will be just three MOSFETs to drive each color. The final product looks great and can display any mix of colored light. Not bad for 50 hours of soldering.

Heat Gun GPU Reflow Fixes Laptop

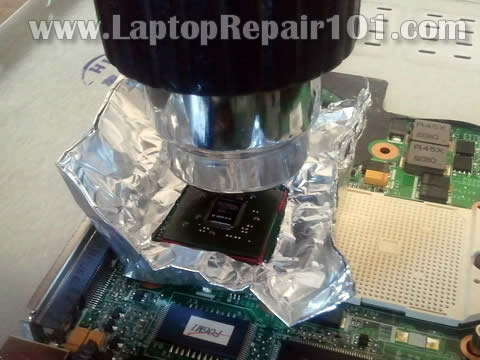
Solder connections on processors seem to be a very common failure point in modern electronics. Consider the Red Ring of Death (RRoD) on Xbox 360 or the Yellow Light of Death (YLoD) on PlayStation 3. This time around the problem is a malfunctioning Nvidia GPU on an HP Pavilion TX2000 laptop. The video is sometimes a jumbled mess and other times there’s no video at all. If the hardware is older, and the alternative to fixing it is to throw it away, you should try to reflow the solder connections on the chip.

This method uses a heat gun, which we’ve seen repair PCBs in the past. The goal here is to be much less destructive and that’s why the first step is to test out how well your heat gun will melt the solder. Place a chunk of solder on a penny, hold the heat gun one inch above it and record how long it takes the solder to flow. Once you have the timing right, mask off the motherboard (already removed from the case) so that just the chip in question is accessible. Reflow with the same spacing and timing as you did during the penny test. Hopefully once things cool down you’ll have a working laptop or gaming console again.

Magnetic SMD Pick And Place

magnetic_pick_and_place

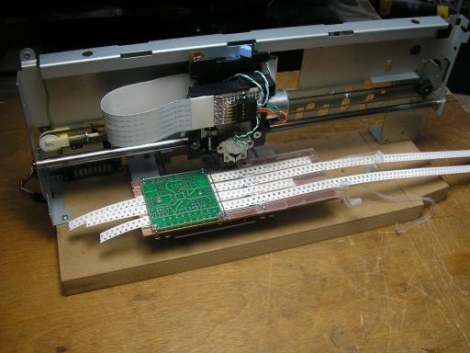
[svofski] sent us this pick and place robot (Google translation) that he found , and it’s quite unique. The majority of the components that make up this pick and place have been recycled from old computer equipment. The X-axis motion is accomplished using old printer parts, while an old CD-ROM drive was gutted to provide motion along the Y-axis. Floppy drive components were ultimately chosen to give the pick and place Z-axis motility.

What makes this pick and place unique however is the way in which components are moved. Most pick and place devices we have seen rely on suction in order to lift and carry components, but this one uses a magnet instead. The machine is used to build small circuit boards for a robotics platform offered on the builder’s web site, which primarily utilizes SMD parts. Once they realized that the majority of their small components were ferromagnetic, they built a hand-wound electromagnet to lift them. While the design limits the usage of the device to strictly ferromagnetic parts, they have a very specific need, which this fills perfectly.

Another unique aspect of this pick and place is the grooved table that sits under the workpiece. It is used to route up to four reels of SMD components, with the placement head providing all of the reel motion instead of relying on separate motors.

If you have a few minutes, be sure to check out the video of the pick and place at work.