Magic: The Gathering Nixie Life Counter

Someone sent in a tip that pointed us to this Magic: The Gathering forum thread where a user named [DistortedDesigns] made a life counter for Magic: The Gathering out of Nixie tubes. While there’s not many details for this build, it’s just too cool to be forgotten in a single forum.

The project began by etching some plexiglas. There’s some earlier examples of [DistortedDesigns]’ work that look very professional. The electronic are extremely simple – the 25 LEDs run off of 2 AA cells, and the nixies run off of 2 C cells. We were wondering when [DistortedDesigns] would drop the A-bomb, but it looks like this build doesn’t use a microcontroller.

Continue reading “Magic: The Gathering Nixie Life Counter”

Power Tool Battery Charger Repair

drill_battery_charger_repair

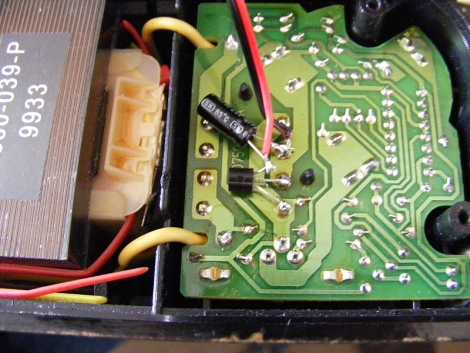
[Webby] inherited a cordless drill from his dad and when he finally got around to using it, found that the charger was dead in the water. He disassembled it and narrowed the issue down to the charger’s primary transformer, but didn’t know where to go from there. A friend suggested that the coil’s thermal fuse might have blown, and upon further investigation, [Webby] discovered that his friend was right.

He removed the dead fuse and soldered in a piece of wire just for testing – not surprisingly the charger sprang to life. He picked up a new thermal fuse to replace the old one, but he wasn’t quite satisfied with the fix just yet. If the fuse burned out once already, there’s little to stop it from happening again, so he decided that installing a small cooling fan would be a good idea. He mounted the fan on the outside of the case after cutting some vent holes, leeching power from the charger itself.

While simply adding a fan to the charger might not be everyone’s idea of a perfect solution, it has worked out quite well for [Webby] in the past, so if it isn’t broken…

[via HackedGadgets]

Demystifying PID Control With A Look At The New Arduino PID Library

We’ve been hiding away in air-conditioned comfort to wait out the hot weather afflicting most of the US right now. Luckily we’re keeping busy with the great links coming into our tips box.

[Brett] sent us a note about his work on the new Arduino PID library. He is the author of the original library and recently decided it was time for a ground-up rewrite. But along the way he took the time to explain PID control and the choices he made during development.

We see a lot of PID controllers around here, like this router based espresso machine add-on. Proportional-Integral-Derivative Controllers are a way to make sure the control you intended to get from your devices is actually achieved in practice. They monitor a process and accumulate results over time in order to account for future events. From what we’ve just described you can see why the subject needs to be demystified.

Get yourself elbow-deep into [Brett’s] article. He does a great job of discussing each issue, and uses a multitude of easily understandable graphs to show the hurdles each portion of code is meant to overcome.

Intro To DC Motor Control Using The SN754410

So your electronic hobby skills are coming along quite nicely but you’re not very comfortable doing more than blinking a few LEDs. Now’s a good time to try something new by driving a couple of DC motors.

You probably know that you can’t just hook these up to the pins of your favorite uC and call it good. The motors draw a lot of current (especially if they’re strained in lifting a heavy load) which would burn out your logic circuitry. Add to this the excess induced current that is generated when a spinning motor is shut off and you’re going to need a control system that can handle these dangers.

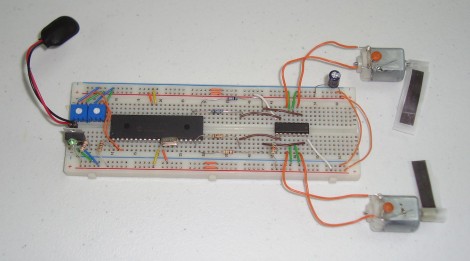
Enter the h-bridge motor driver. [Chris] has guided us through the process of building and using a H-bridge in the past. This time he’s using a motor controller that has four half H-bridges built into it. He hooks up the SN754410 to two motors, giving him speed and direction control for both based on the duty cycle of a PWM signal entering the chip for less than $2.50. Check out the video after the break for an overview of his methodology, then work your way through the multi-page post that he recently published.

Continue reading “Intro To DC Motor Control Using The SN754410”

LG TV Hacking Via Serial Connection Or IR Codes

[Brendan Robert] has been sending us forum thread links outlining the things he’s learned while hacking LG televisions. They were a bit hard to follow for the uninitiated, so we asked if he could give us an overview of what he’s been working on. Not only did he do that, but he made a little Hackaday shout-out seen above by adding the skull and cross-wrenches as one of the menu overlays.

He’s using a TV as his computer monitor, which he picked up at a discount because it was a display model. Without the original remote, and wanting to have features like power-saving mode which is standard on monitors but not on this TV, he decided to see what he could accomplish. A couple of things made this quite a bit easier. First, there’s an RS232 port built into the back which removes the need to investigate and solder your own onto the board. Secondly, since LG built on the Linux kernel for the set, you can download some of the firmware sources from their website.

What he came up with is a script that will find and communicate with the TV over the serial connection. The test script used during development polled every possible command, looking for valid return values. Once [Brendan] established which commands work and what they do, he was able to take command of the unit, writing scripts to adjust brightness based on the ambient light in the room as seen from the computer’s webcam. Make sure you check out the sub-pages to his post that detail the brightness adjustments, stand-by functionality, custom overlay graphics, and the extra commands he uncovered.

Bypassing Manufacturer-imposed Battery Lockouts

sony_battery_cell_swapping

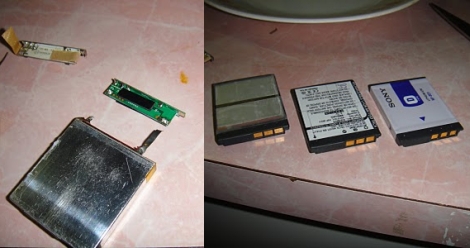
When [Barret] went to use his camera the other day it kept shutting down on him, and upon inspecting the battery, he found that it was a bit swollen. Knowing that he needed a replacement, he turned to an aftermarket battery he had sitting around, but grew pretty annoyed when his Sony Cybershot camera would not accept it.

Apparently a recent firmware update causes his camera to reject non-Sony batteries, a situation he describes as “battery DRM”. There was no way he was going to pony up another $50 to Sony instead of using the perfectly good $10 battery he already had, so he decided to rectify the issue himself.

He stripped both batteries of their plastic coatings, revealing the lithium cells and their charging circuits. He desoldered the PCB from his Sony battery, transplanting it to his aftermarket battery after a little bit of trimming. He wrapped everything up with some tape and gave his franken-battery a spin. It worked a treat, and he was so satisfied with it that he did a similar swap in his aging Logitech mouse.

As more and more companies lock competitors out of the user-replaceable consumables market, these sorts of hacks are certain to become more and more prevalent.

Controlling An Infuriating Game With An Accelerometer

[Daniel] just made a motion controlled game controller to go with his infuriating game. Thankfully, [Daniel] posted the source for this game so first time players already know the level select codes.

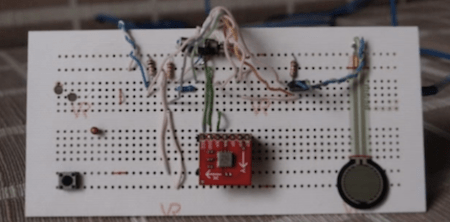
The controller is based on an Arduino Uno with what looks to be a Sparkfun 2-axis accelerometer providing the tilt sensing. A similarly sourced half-inch force sensitive resistor and temperature sensor control the ‘jump pads’ in the game. A small vibrating pager motor strapped onto the controller as a rumble pack.

Continue reading “Controlling An Infuriating Game With An Accelerometer”