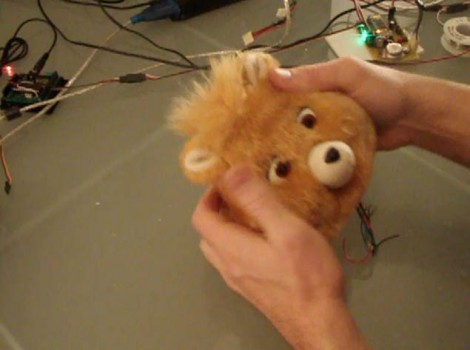
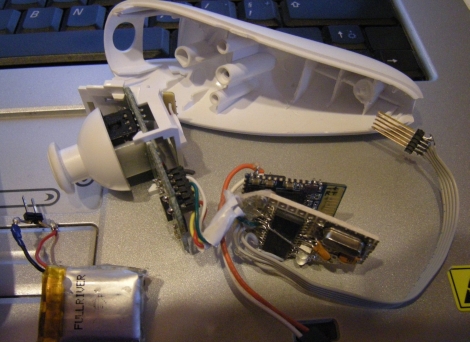
[DJ Sures] got his hands on a broken Teddy Ruxpin doll and decided to give it a new robotic life. You may want to ask the children to leave the room before viewing the video after the break. It starts right off with little Teddy having his throat slashed in order to get at the parts in the head. After retrofitting the eyes, mouth, neck, and arms with servos, Teddy gets a Bluetooth upgrade that lets you control his movements wirelessly. [DJ Sures] even has plans to get the little guy up and walking, far exceeding the original capabilities.
Year: 2011
Valentine’s Gift Counts The Days Spent Together

[Vegard Paulsen] dug deep down to the romantic geek at his core and built this box that counts the days he’s spent together with his Valentine. As you can see, it uses a four-digit seven segment display installed in the lid of a wooden box. An Arduino mini is responsible for driving the display, but as you might already know, to keep accurate time you’re going to need a reliable clock source. Instead of using a temperature compensated crystal oscillator like the ChronoDot he decided to pull time data from the Internet via a pair of RF modules.
His closing comments mention that this display will only work for around 27 years but he figures he can always build a bigger display. We’d keep this around, physically unaltered for sentimental value, but switch to a hexadecimal readout to track just over 179 years. Maybe that’s a bit too geeky.
Sniff Ethernet With A Throwing Star
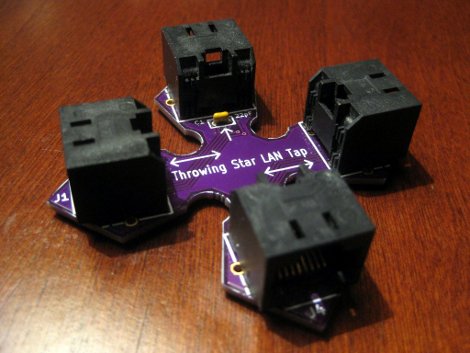
[Michael Ossmann] came up with a nifty little device that arranges RJ45 plugs into a plus shape for the intent of sniffing Ethernet packets, and named it the “Throwing Star LAN Tap”. While the original design worked fine it does suffer some limitations such as being limited to 10/100 base networks, and one way only. This new version of the “Throwing Star LAN Tap” fixes those and adds some much needed convenience.
Gone are the male plugs, which requires couplers and are prone to break, and fiddly splices in favor of a throwing star shaped pcb, and female sockets. 1000 base networks are supported, but due to the workings of 1000 base and wanting to keep the device passive, capacitors are added to filter out the signal and force the network to drop down to 100 base. Sure, it may be an ugly hack, but it’s an ugly hack that fits in your pocket.
Bluetooth-enabled Wii Nunchuck
The wireless controller for the Nintendo Wii has been used in many a hack due to its simple to use Bluetooth interface. The nunchuck portion of the controller however, has always required a physical tether to the wireless controller, or an aftermarket wireless dongle. [Rousselmanu] is looking to change that with his Bluetooth-enabled wireless Wii nunchuck. He is able to retrieve a slew of data from the nunchuck, including information from all of the accelerometers, buttons, as well as the joystick. The data is read into a PIC MCU and relayed via serial to a Bluetooth module he purchased online.
The Bluetooth module looks fairly easy to interface in Linux, and [Rousselmanu] has a video showing off how well the nunchuck can be used to interact with 3D models. He admits that the controller is a bit ugly at the moment as all the components don’t quite fit so well, but future revisions will surely remedy that.
Keep reading to see a video of the nunchuck in action.
Brain Car Interface

The AutoNOMOS labs project has found a new way to maneuver its vehicles, your brain. We have looked at a previous version that uses a mostly computerized van under remote control from an iPhone. This one however, named “Brain Driver”, places the operator in the driver’s seat with an EEG strapped to their head.
Going for a more sporty look, the current vehicle is a drive-by-wire Volkswagen Passat wagon filled to the brim with fun toys like LIDAR/ RADAR sensor technology, cameras, and a specialized GPS. The EEG interface is a commercially available Emotiv model, and after a few rounds of training on safe ground, the driver is placed in control of the car.
In one demonstration the car approaches a 4 way intersection, the driver only has to think left or right and the car (intelligently) navigates the turn after coming to a proper stop, and checking for obstacles. In the second demo car and driver are let loose on an unused airport to test responsiveness.
If you like brains, cars, robots, and spinning lasers join us after the break for a video.
[youtube=http://www.youtube.com/watch?v=iDV_62QoHjY&w=450] Continue reading “Brain Car Interface”
Simple Household Status System
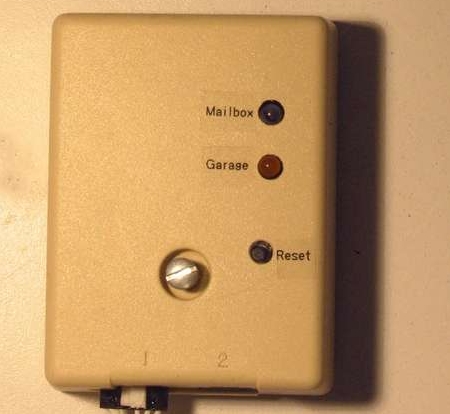
[BrianH] decided that he no longer wanted to venture outside on cold or rainy days just to check if the mail had come, so he built himself a notification system that would alert him if the postman had stopped by. Additionally, he admits to being forgetful on occasion and wanted a way to monitor whether or not he forgot to close the garage door. His Instructable details how he accomplished both of these tasks with the household monitor he built around an ATmega168. His project uses a mailbox mounted photoresistor to determine when the mailbox has been opened, and a reed switch that is triggered when the garage door has been opened. If either of these things occur, a beep is emitted from his notifier, and the appropriate status LED is lit. Simply monitoring whether the garage door has been opened is not all that helpful, so he programmed his notifier to beep persistently at 10-minute intervals if the garage has been left open for more than an hour.
His hack is pretty useful, but he does mention that there is an inordinate amount of wiring that needs to be laid, citing his driveway repaving as a great opportunity to do so.
Molded Parts: Prusa Mendel In 30 Minutes
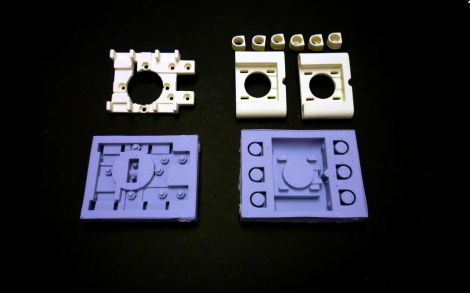
This set of white RepRap parts were created in molds, instead of being printed by another RepRap. [Mark A. Ganter] of the University of Washington admits that this breaks the idea of a 3D printer that is self-replicating. But the molds – which were created by tweaking Prusa Mendel parts to be mold friendly – have the ability to produce every plastic part necessary to build your own RepRap and they can do it much faster. Once the molds were completed [Mark] and his students were able to produce a full set of parts in just 30 minutes, cutting as much as 14 hours off of the time it would have taken to print the parts. Still not convinced? How about this: the molds can be created by a 3D printer or by using a high-resolution power printing method like they have here.
The process starts by printing master parts, then creating a silicone RTV mold from them. Once the molds are ready, [Mark’s] team pours polyurethane into them and waits for it to harden. They plan to share the STL files in less than a week so that you can make your own molds to use to build your RepRap army.

