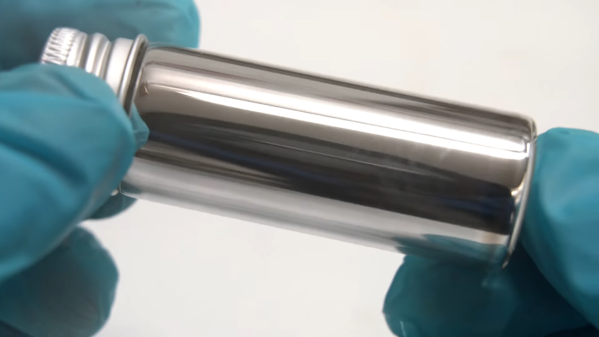
We’ve all got our favorite hand tools, and while the selection criteria are usually pretty subjective, it usually boils down to a combination of looks and feel. In our opinion, the king of both these categories when it comes to screwdrivers is those clear, hard acetate plastic handles, which are a joy to use — at least until the plastic starts to degrade and exude a characteristically funky aroma.
But perhaps we can change that if these experiments on screwdriver “mange” hold up. That’s [357magdad]’s unappealing but accurate description of the chemical changes that eventually occur in the strong, hard, crystal-clear handles of your favorite screwdrivers. The polymer used for these handles is cellulose acetate butyrate, or CAB, which is mostly the same cellulose acetate that replaced the more explode-y cellulose nitrate in things like pool balls and movie film, except with some of the acetate groups replaced with a little butyric acid. The polymer is fine at first, but add a little UV light and over time the outer layer of CAB decomposes into a white flaky cellulose residue while the butyric acid volatilizes, creating the characteristic odor of vomitus. Lovely.
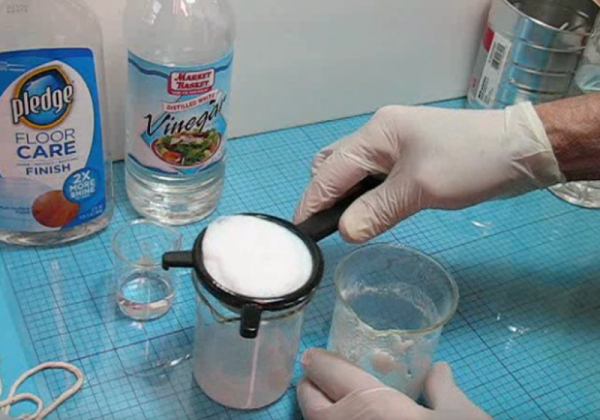
In the video below, [357magdad] takes a look at different concoctions that all allegedly cure the mange. TL, DW; it was a dunk in household ammonia that performed the best, well ahead of other common agents like vinegar and bleach. The ammonia — or more precisely, ammonium hydroxide — works very quickly on the cellulose residue, dissolving it readily and leaving the handle mange-free and looking nearly new after some light scrubbing. None of the other agents came close, although acetone did manage to clear up the mange a bit, at the cost of softening the underlying CAB in a process that’s probably similar to acetone smoothing ABS prints.
As for the funky smell, well, the results were less encouraging. Nothing really got rid of the pukey smell, even a roll in baking soda. We suspect there won’t be much for that, since humans can detect it down to 10 parts per million. Consider it the price to pay for a nice-looking screwdriver that feels so good in your hand. Continue reading “Fighting The Scourge Of “Screwdriver Mange””