LED Cyber Eyes; More Nerdy Than Just Taping Your Glasses

Regular glasses are okay, but these light up and respond to your movement. [Dr. Iguana] is at it again, designing a very interestingly shaped PCB to augment your visual augmentation devices.

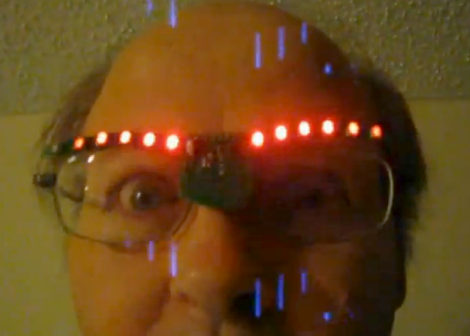
The circuit board has two thin curving wings which conform to the shape of a pair of glasses. In the middle there’s a larger area that holds most of the components but it’s still smaller than a common coin cell battery that powers the device. Over each eye there are a half dozen red LEDs which are driven by a PIC 12F1840. It can flash a bunch of patterns the but the interactivity is the real gem of the project. The doctor included an MMA8450 3-axis accelerometer. As you can see in the clip after the break, shaking your head this way and that will be reflected in the pattern of lights.

Continue reading “LED Cyber Eyes; More Nerdy Than Just Taping Your Glasses”

[Ian’s] Global Geek Tour: New York

[Ian Lesnet], founder of Dangerous Prototypes and Hackaday alumnus, entertains us once again with his Global Geek Tour. This time around he’s visited New York City for the Open Source Hardware Summit, Maker Faire, and a tour of the geeky attractions the city has to offer.

There’s a 25-minute video embedded after the break. [Ian] starts off with an homage to [Anthony Bourdain] but don’t worry, that subsides after a couple of minutes. This year he skipped the hotel and rented an apartment in the village for the same price. After making a survey of the local food offerings he heads off to the OSH Summit. There are interviews with a lot of big names in the industry, as well as a look at some distillery hardware and a mobile hackerspace built in an old ambulance acquired from Craig’s list (go figure). Next it’s a tour of Hack Manhattan, a hackerspace from which the screenshot above was pulled. We loved seeing the box labeled “abandoned projects” and were surprised to see the hackerspace is keeping bees. Are there any other spaces doing this? Before heading over to the Maker Faire [Ian] checks out some of the local shops. There’s a stop a Radio Shack, the Makerbot store where even the display cases are 3D printed, and finally a tour of some local component shops.

We’re always entertained by these world travelling videos. Here’s one he did in Seoul, South Korea.

Another Automatic Air Freshener Use

air-freshener-leds-red-on

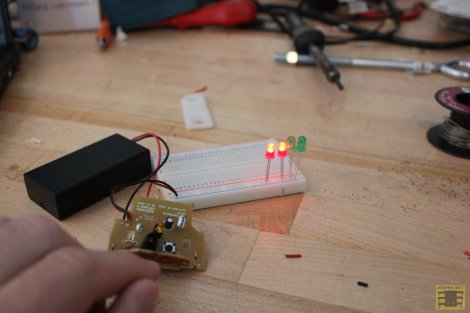
We’ve seen air fresheners used for many hacks here at hackaday. This one is a bit different as it uses the PIR sensor assembly to turn on LEDs in sequence, rather than reversing a motor. Generally, the motor would be reversed by the fact that this assembly is reversing the voltage on a motor (see [H Bridge] on Wikipedia), but instead it turns on one set of LEDs and then the other.

This works because a diode (the “D” in LED) only allows current to flow one way. The LEDs are reversed with respect to the voltage source, making them come on in sequence. An Arduino or other microprocessor could of course be used to accomplish the same thing (see this [HAD] post about harvesting the PIR sensor only). However, if you had $10 or less to start your hardware hacking career, this is yet another way an air freshener can be hacked up to do your bidding.

Be sure to see the video of this simple hack after the break, used to “LED-ify” a Star Wars AT-ST painting. If you’re interested in using the gears and motor of an air fresher as well, why not check out this post on remotely triggering a camera with the internals from a time-based model? Continue reading “Another Automatic Air Freshener Use”

A JavaScript Interpreter For ARM ‘micros

When programming a microcontroller to do your bidding, you only have two choices. You could write your code in a proper language such as C and cross-compile your source into a piece of firmware easily understood by a micro. Alternatively, your could load an interpreter on your microcontroller and write code via a serial connection. Interpreters are a really fast and easy method to dig in to the hardware but unfortunately most microcontroller interpreters available are based on BASIC or Forth.

[Gordon] figured it’s not 1980 anymore, and interpreters for these relatively low-level languages aren’t a good fit with the microcontrollers of today. To solve this problem, he created Espruino, a JavaScript interpreter for the new batch of ARM development boards that have been cropping up.

Espruino is designed for the STM32VL Discovery board, although [Gordon] plans on porting his interpreter to the Arduino Due when he can get his hands on one. Installation is as easy as uploading any other piece of firmware, and even though [Gordon]’s STM32VL doesn’t have a USB port for a serial terminal, it’s a snap to connect a USB to TTL converter and get this interpreter working.

Espruino isn’t open source yet, only because [Gordon] would like to clean up his code and write a bit of documentation. He’d also like to make Espruino profitable so he can work on it full-time, so if anyone has an idea on how [Gordon] can do that, leave a note in the comments.

LED Illuminated Isomorphic Keyboard Looks As Good As It Sounds

Unlike the traditional ebony and ivory found on pianos, isomorphic keyboards arrange buttons on a grid. This makes every chord the same shape, and to transpose a piece it’s simply a matter of moving your fingers a few places to the left or right. [Brett Park] sent in an isomorphic keyboard he built loaded up with LEDs, and we’re thinking it the perfect instrument for musicians looking to move up from playing their MacBook.

The body of [Brett]’s keyboard is made out of a sheet of acrylic. After drilling 64 holes for each of the clear arcade buttons, [Brett] bent the sides of his hexagonal keyboard into a very sturdy-looking enclosure.

On the hardware side, [Brett] used a 64 button Arduino shield and a Sparkfun MIDI shield. The RGB LEDs behind each button are controlled via MIDI sysex messages generated outside the instrument, making it perfect for a little bit of visual feedback from whatever soft synth you desire.

In the videos after the break, you can check out the light patterns in action along with one of [Brett]’s improvs. Notice how all the chords are the same shape, and changing the key only requires [Brett] to move his hands slightly to the side.

Continue reading “LED Illuminated Isomorphic Keyboard Looks As Good As It Sounds”

Jailbreaking The Kindle Paperwhite

The Kindle Paperwhite, Amazon’s newest e-ink reader featuring a touch interface with a higher contrast display, is now officially jailbroken.

[geekmaster], the geek master behind this hack, based his jailbreak off [Yifan]’s previous hack  to jailbreak the Kindle Touch. Installation is a snap, and only requires you to upload the data.stgz file to the root directory of the Paperwhite and restart the device. On the next boot, the Paperwhite will be jailbroken, allowing you to do tons of cool stuff with a tiny Linux device connected to an e-ink screen.

We’ve already seen a few really cool uses for jailbroken Kindles including a weather station display and a serial terminal for your Raspberry Pi. Cracking the newer and better Kindle Paperwhite means those e-ink projects you’ve been thinking about building just became much more attractive.

One word of warning from [geekmaster], though: USB downloader mode isn’t yet enabled. If you brick your device, you’ll need to connect your Kindle to a serial port. This shouldn’t be a problem for Hackaday readers, but it is something to watch out for.

Making A Nostalgic Apple Mouse Wireless

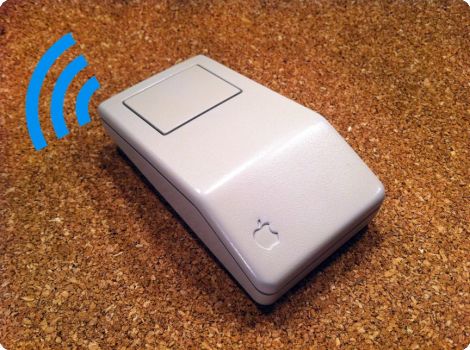
If you’ve got an old mouse sitting around that has that perfect retro look why not start using it again? We’d bet there’s just enough room in there to turn the input device wireless.

The hack does away with everything but the case. The guts from a brand new wireless laser mouse are used as replacements. For the most part this is a simple process of making room for the new board and laying it in place. It involves cutting off a few plastic case nubs, enlarging the hole on the bottom so that the laser has a clear line of sight to the desktop, and hot gluing the thing in place. The button cover had a bit of plastic glued in place so that it lines up correctly with the replacement mouse’s switch.

The only thing that didn’t work out well is the battery situation. The AA cell that the mouse needs was too big for the retrofit so it was swapped with an AAA. These have a lower capacity which means more frequent replacement.

[via Make]