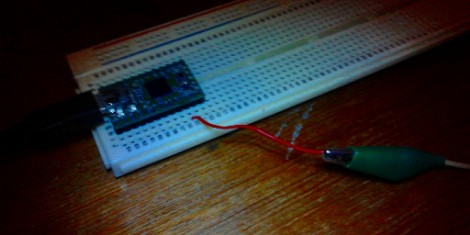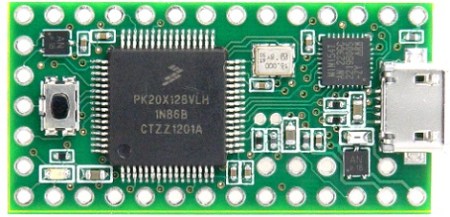
Meet The Teensy 3.0

[Paul Stoffregen], the brains behind the popular and very capable Arduino-compatible Teensy development board, has offered his contribution to the explosion of ARM-powered boards with the Teensy 3.0.

The original Teensy is an AVR-based development board that goes far beyond the official Arduino offerings. The new and improved Teensy 3.0 improves upon an already wonderful platform with a 32 bit ARM Cortex-M4 microcontroller running at 48 MHz. There’s also a lot of pins available for whatever project you have in mind: the Teensy 3.0 supports 14 analog inputs, 10 PWM outputs, a USB host mode, and an I2S audio interface that will be very useful when accessing the microcontroller’s DSP functions.

There are a couple neat features on the Teensy 3.0 [Paul] somehow managed to work in. In addition to supporting a real-time clock, there are also a few extra IO pins in the middle of the board. [Paul] says the extra pins are due to Kinetis not releasing a 48 pin version of the microcontroller in time for production. It may not be what [Paul] originally had in mind, but we’ll take the upgraded board just the same.

Of course the Teensy 3.0 will be compatible with the Teensyduino Arduino IDE add-on, so if you’d like to run your Arduino sketches on a very powerful piece of hardware, this will be the board to use.

70 Watt Amp Uses An ATtiny

If you’re looking for a DIY amplifier project made with a minimum of parts, this is the build for you. [Rouslan] created a 70 watt class D amplifier using an ATtiny45 and just a few dollars worth of additional components.

A class D amplifier simply switches transistors of MOSFETs on and off very rapidly. By passing the signal produced by these MOSFETs through a low pass filter and connecting a speaker, a class D amp is able to amplify a signal very efficiently. Usually, these sort of amp builds use somewhat esoteric components, but [Rouslan] figured out how to use a simple ATtiny microcontroller to drive a set of MOSFETs.

In [Rouslan]’s circuit, the audio signal is passed into the analog input of an ATtiny45. Inside this microcontroller, these analog values are sent to the MOSFETs through a PWM output. [Rouslan] threw in a few software tricks (explained in revision 2 of his build) to improve the sound quality, but the circuit remains incredibly simple.

[Rouslan] posted a video going over the function of his ATtiny amp, and from the audio demo (available after the break), we’re thinking it sounds pretty good. Amazingly good, even, if you consider how minimalistic this 70 watt amp actually is.

Thanks [Alec] for sending this one in.

Continue reading “70 Watt Amp Uses An ATtiny”

The Python Programming Language For Physical Hacking

We see projects here all the time that blend computing with the real world. Some people are naturally stronger on the mechanical end of things, whereas some are better with electronics or coding. All three specialities can be needed depending on your project. If your weakness lies in making a computer do your bidding, I might suggest that the Python language is a good one to learn.

I’ve been going through Learn Python the Hard Way, which is offered for free online, or you can pay for it if you so choose. I’ve published my thoughts on lessons 1-10 and 11-20 so far. As a mechanical engineer with limited (but not totally nonexistent) programming skills, it’s been an excellent experience so far.

If you’re wondering if Python is a good language to learn if you’d like to participate in [HAD] style projects, why not check out the following projects featured here:

Or just do a search of [HAD], and you’ll find many other projects for inspiration. If you’ve got a Python project to share, be sure to tell us about it in the comments!

Wireless Stereo Add-on Turns On Receiver And Pipes In Some Music

[PC486] wanted to add Bluetooth to a simple shelf stereo system. But if you’re going to go wireless, why not develop an all-in-one solution. His adapter turns on the stereo and feeds it audio all from a smart phone.

This is his roommate’s hardware so cracking it open and grabbing an iron wasn’t really an option. He needed a way to control the system without any permanent alterations. Since the unit has IR remote control capabilities that’s the most obvious way to go. But the original remote is long gone so he had to hit the Internet. Luckily the remote control codes are in the LIRC repository. He grabbed a small microcontroller, an ATtiny25, and wired up an IR led to send commands to the unit.

Next he examined the Bluetooth audio receiver board he planned to used in the project. It’s got an LED that lights up when connected to another Bluetooth device. The microcontroller knows when to turn the stereo on and when to shut it off again by monitoring that LED with a pin interrupt. Check out the final results in the clip after the break.

Continue reading “Wireless Stereo Add-on Turns On Receiver And Pipes In Some Music”

Rocket Propellant Manufactured From Old Newspaper

It turns out that old newsprint can be a bit explosive; at least when it’s combined with the proper ingredients. [Markus Bindhammer] worked out a way to make solid rocket propellant from newspaper. Judging from the test footage after the break the home made engines work great!

There isn’t a long list of ingredients. In addition to newspaper you’ll need some potassium chlorate (KClO3) which serves as an oxidizer, white wood glue, and PVC pipe. The KClO3 is ground with a mortar and pestle, then run through a sieve before being combined with the wood glue. This combination is painted on the newspaper which is then rolled up with a glass rod at the center. This is allowed to harden before going into the PVC. The excess is trimmed and the whole thing is baked in a convection oven at 105 C for two hours.

If this process doesn’t suit you maybe cooking up a batch of sugar-based propellant is worth a try?

Continue reading “Rocket Propellant Manufactured From Old Newspaper”

Teensy Board Used As An AM Radio Transmitter

[Angus McInnes] has been working on AM radio transmission techniques. He tried out a method of using a VGA port for the task but found the vertical blanking was audible. His latest experiments use a Teensy microcontroller board as an AM transmitter.

This is not a standalone solution, but rather a hardware extension for his laptop. This is because the microprocessor doesn’t have enough cycles to do much more than read bytes over USB and push their bits out one of the I/O pins.

To get a steady stream of data he’s using isochronous mode to push a steady data stream via the USB connection. Bulk transfer is another option but [Angus] found that it caused some jitter in the audio. Each byte is fed to the AVR SPI hardware once every eight clock cycles. His transmission can be picked up from across the room, but that’s the limit since the AVR doesn’t put out that strong of a signal. But it should be a rather trivial exercise to build a simple amplifier.

Movie Night At The Lake Cabin

[Andrew’s] family has a rustic lake cabin. There is a lot to do during the day, but since there’s no electricity your options are limited when the sun goes down. Sure there’s the traditional campfire, but lately they’ve been spicing things up with an outdoor movie viewing.

To get this up and running they needed to build a projection screen. He’s going for a 2.35:1 aspect ration, but the technique will work for any aspect if you do your own math. They had a couple of extruded aluminum channels from an old chalk board which work perfectly as the top and bottom rails of the frame. With the width set at fourteen feet he just needed to mount the cross pieces on uprights at 5.95 feet apart. This provides a 183″ viewing surface.

White bed sheets serve as the screen material. After it’s stretched into place they line the rails with binder clips to hold it in place. The projector is powered from two 12V batteries via an 800W inverter. During the day the batteries get topped off by a solar panel system.