Dummy Batteries Let You Use An AC Adapter

We find it frustrating when battery operated consumer electronics don’t include a way to connect an external power supply. We try not to purchase disposable alkaline cells if we can avoid it, and this dummy battery AC adapter hack will aid in our mission.

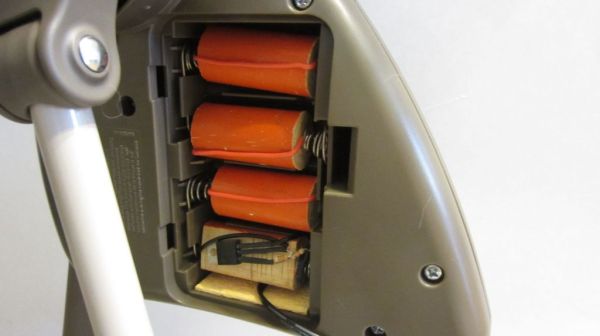
The battery compartment shown above is for a motorized baby swing. It accepts C sized batteries (who has those just lying around?) and lacks a barrel jack to connect a wall wart adapter. [Jason Smith] mentions you can get around this by connecting your positive and ground wires directly to the conductor springs. But using a dummy battery makes it a bit easier to remove the adapter if you do want to use battery power.

Each of the orange dummy is a wooden dowel with a screw at each end. The screws are connected with a piece of jumper wire, shorting the two terminals. This completes the circuit in the battery compartment and allows him to power everything from the adapter cell at the bottom. The adapter uses an LM317 adjustable voltage linear regulator. He used fixed resistor values to dial in his target voltage. The equipment should be rather forgiving as battery voltage starts higher than the printed value and drops as the cells are used up.

This technique has been around for a long time. One of our favorites was a hack that converted an Apple Magic Trackpad to USB power.

Continue reading “Dummy Batteries Let You Use An AC Adapter”

AuPod, The Solid Gold IPod Nano Watch

aupod


The 6th generation iPod nano makes a wonderful watch, but something milled out of aluminum doesn’t lend itself to more formal events. [Ted] liked the idea of an iPod nano watch, but wanted to kick things up a notch and fabricate an 18k gold iPod nano. It took 500 hours and $2500 in materials, but we’d say it’s worth it.

The new 18k gold enclosure for the watch was fabricated using the lost wax casting method. First, all the electronics and buttons were removed from the iPod, then a negative mold was made in silicone rubber. A positive wax mold was made with the silicon mold, and finally another negative mold – this time in plaster – was made by vaporizing the positive wax mold in a furnace.

[Ted] used two one-ounce coins as the source of gold for his nano enclosure, spun into the plaster mold. From there, it’s just a simple but tedious matter of cutting the sprues off, shaping, filing, buffing, and polishing. With a new leather strap, the iPod is reassembled in its new enclosure.

Wonderful work, and amazingly impressive from someone who doesn’t consider himself a jeweler.

Building A Strandbeest

flexing-jansen-mechanism

[Jeremy] may have given up on his big hexapod project, but that doesn’t mean he’s out of the world of legged robots just yet. He’s embarked on another project, much more elegant and beautiful than a simple hexapod. This time, he’s building a Strandbeest, the same machine designed by walking machine extraordinaire [Theo Jansen].

Coming up with the correct lengths and joints of a Strandbeest leg linkage isn’t something you can just pull out of your head, so after [Jeremy] found the inspiration for his new project he dug into the related literature on Strandbeest legs. He found the work of [Dominique Studer] and set to work making his own mechanical legs.

Right now, [Jeremy] has a prototype of the Strandbeest leg linkage made out of wood. It still needs a little bit of work, but soon enough there will be a PVC pipe Mountainbeest trolling the backwoods near [Jeremy]’s house.

Continue reading “Building A Strandbeest”

Ditch That Boring Mouse For A Military-grade Trackball

military-grade-trackball

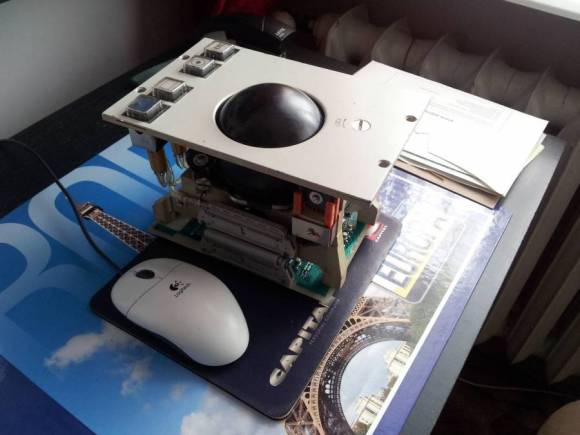
The bad thing about this type of hack is that now [Tomek Dubrownik] needs to cut a hole in his desk to house the thing. He got this military grade trackball working over USB. It’s old, and could be used as a blunt weapon. But as the video shows it still makes a great input device.

He found the hardware on Allegro — a Polish auction site similar to eBay — for just $20. The original circuitry didn’t make a lot of sense, but a bit of probing with the old oscilloscope let him establish connections to the encoders which are read by some TI 54xx parts. Apparently they use the same logic as 7400 parts but are military grade. He chose a ATmega32u4 development board for his replacement control board. That chip has native USB support so the rest is just a matter of passing data like an HID input device. His code even lets him use those pushbuttons to toggle between cursor movement and window scrolling.

[Tomek] translated his post into English after some prompting by friends at the Warsaw Hackerspace. Here’s the original in Polish if you’re interested.

Continue reading “Ditch That Boring Mouse For A Military-grade Trackball”

Using Electrical Conduit For A 3D Printer Frame

electrical-conduit-for-cnc-frame

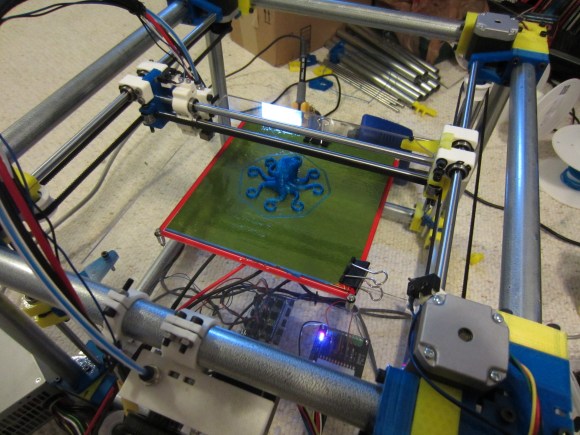
We’re always on the lookout for parts that can be source locally and that don’t cost a bundle. This hack fits both of those criteria. [Lee Miller] came up with a way to use steel electrical conduit as a 3D printer frame. He recently finished building the device seen above, and has been showing it off at Solid State Depot, a Hackerspace in Boulder, Colorado where he is a member.

Look closely at the corners of the frame in this image and you’ll see the 3D printed parts that make up the clamping mechanism. Each has three components that screw together. The two gaps in between each have a rubber ‘O’ ring. When the plastic clamps are screwed together they squeeze the rings which hold the electrical conduit firmly. This also has the side benefit of dampening vibrations.

It’s certainly easy to find this type of conduit which is sold at every home store (and most hardware stores). Just make sure that you check that a piece is straight when you pick it out. The SCAD files for the parts are available from his Github repo.

Continue reading “Using Electrical Conduit For A 3D Printer Frame”

Building A Digital Scale From Scratch

duplo

[Raivis] was given a particular task at his university – find a way to measure how many Duplo bricks are stacked together. There are a number of ways to do this, everything from computer vision to using a ruler, but [Raivis] chose a much more educational method. He built a digital scale from scratch out of a strain gauge and a Wheatstone bridge. The build log is immensely educational and provides some insight into the challenges of weighing things digitally.

A strain gauge is a simple piece of equipment, just a small force sensitive resistor. When attached to a metal bar and a force is applied, the resistance inside the strain gauge changes, but not by much. There’s only a few micro Ohms difference between the minimum and maximum of [Raivis]’ load cell, so he needed a way to measure very slight changes in resistance.

The solution was a Wheatstone bridge, or four resistors arranged in a square. When one of the resistors in the bridge is replaced with a strain gauge, very small changes in resistance  can be measured.

With a custom ‘duino amplifier shield, [Raivis] can measure the resistance of his load cell with 10-bit resolution, or a maximum weight of 1.32 kg with a resolution of two and a half grams. A single duplo block weighs about 12 grams, so we’ll call this one a success.

Loading Atari Games From An SD Card

Atari

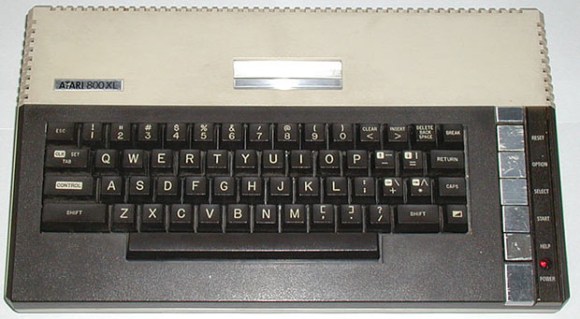
They’re not a 2600, but the Atari 400, 800 and 1200 are awesome computers in their own right. With only BASIC built in to the ROM, they’re not especially useful or fun, as [Jeroen] found out when he acquired an 800 with a broken tape drive. There are options that allow you to load emulator files from a PC, but [Jeroen] wanted something more compact. He came up with a way to load games and apps off an SD card using a simple microcontroller.

The 400, 800, and 1200 each have a port that allows the computer to talk to printers, modems, disk drives, and load games. There are already a few circuits around that connect the SIO port to a computer so games can be loaded, but [Jeroen] wanted a more compact and portable solution for his 800.

What he came up with is actually pretty simple; just an Arduino, SD card, and an LCD display that allows him to browse the directory on the SD card and load it into the 800’s memory.

A lot of folks over on the Atariage forums are really impressed with [Jeroen]’s work, and would like to get their hands on one of these boards themselves. The project isn’t done just yet – [Jeroen] still needs to make a case for his device – but hopefully he’ll be spinning a few boards up in the coming months.

You can see a pair of videos of the device in action below.

Continue reading “Loading Atari Games From An SD Card”