Disrupting Advertisement Agency Workers With Electric Shocks

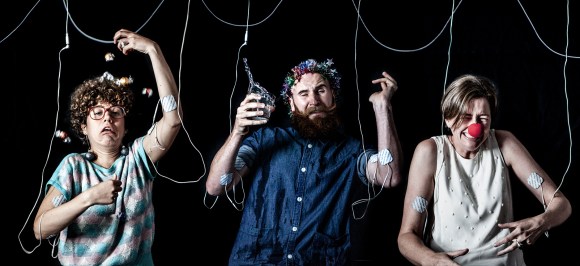
We hope this project will make you laugh as much as we did. For 4 hours, some Australian advertising executives agreed to be subjected to Electric Muscle Stimulation (EMS) controlled by people from all over the globe watching their reaction over the Internet. The public could disrupt their day with a click of a mouse. The user simply needed to go online, choose a live stream, click the ‘Disrupt’ button and watch as the EMS instantaneously zapped the volunteers. For each ‘disruption’, the company donated $1 to a local community.

The EMS hardware was designed to deliver up to 60V pulses and controlled using the MIDI protocol. The platform is powered by 8 AA batteries and receives zapping commands via UDP. Unfortunately, the resources can’t be found on the project’s webpage, but you can still have a look at the two videos embedded after the break. The total amount donated during this experiment was $5500!

Continue reading “Disrupting Advertisement Agency Workers With Electric Shocks”

Custom Rostock 3D Printer Makes Use Of IKEA Components

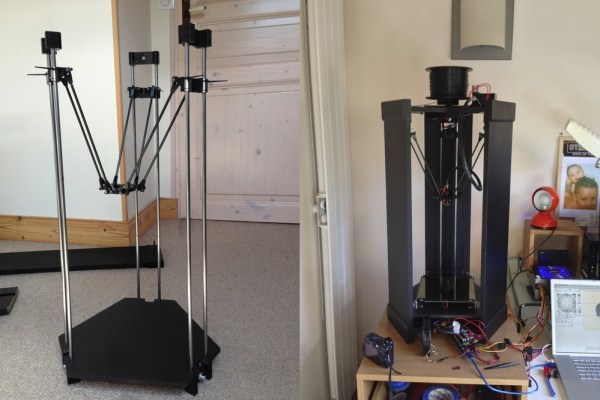
After discovering 3D printers, [Turi] had to make one. This past summer he did, and it looks fantastic.

He chose the Rostock design not only because it can print big parts quickly, but also because of its mesmerizing operation. 3D printers are generally fun to watch for the first few minutes, but Rostocks tend to have an even more robotic appeal in the motion of its end effector (robotics lingo for tool head).

The cool part of this build is [Turi’s] choice of enclosure. He had an IKEA cabinet collecting dust in his basement, so he decided to make use of its drawers for the main structure of the Rostock. A bit of wood work and some matte black spray paint later, and he has one great looking enclosure! The rest of the build was pretty standard, making use of 3D printed parts, a RAMPS 1.4 control board mounted on an Arduino Mega, and a computer power supply. He did make his own control arms using carbon fiber arrows, though!

To see it up close and in action, check out the quick video after the break.

Continue reading “Custom Rostock 3D Printer Makes Use Of IKEA Components”

Arduino Xmas Tree Shield

christmasshield

Nothing reminds us that it’s the holiday season more than an LED Christmas Tree submission. This obviously is not the first of its kind, but [Jose] does offer up a new technique using addressable RGB LEDs.

[Jose] decided to use 20 WS2812B RGB LEDs, which if you haven’t seen before, are RGB LEDs with an integrated controller. Yep, that’s right, just power/ground and 1 data line is all that is needed to control hundreds of RGB LEDs. This LED tree’s design is simple: a custom-etched PCB cut it in to the shape of a Christmas tree. The WS2812B LEDs helped keep everything clean, so the tree lacks any ‘ugly’ ornaments, except for the required bypass cap here and there. For an added bonus, the tree’s LEDs are synchronized to music generated by an Arduino via a piezo buzzer. Why is it a shield?  Well, the whole tree plugs in nicely to a standard Arduino interface. This looks like the perfect starter project to familiarize yourself with addressable LEDs, or at least to get you warmed up before building your own infinity portal.

Continue reading “Arduino Xmas Tree Shield”

Snowden Immortalized As Bond Villain In Edge-Lit Acrylic Poster

snowfall_smaller

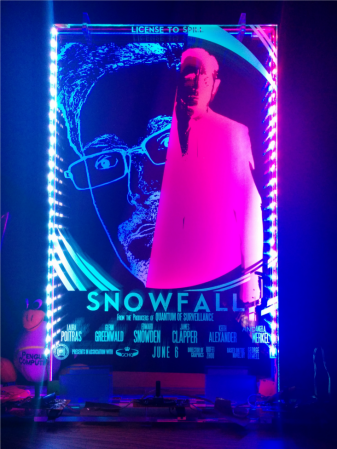
[Wilywyrm] needed to come up with a final project for art class that commented on a social issue. Healthcare, schmealthcare, he said, and busted out this movie poster about the NSA spying scandal instead.

The circuit uses three extended-duty astable 555 timers to control the brightness of the 5050 RGB common-anode LED strips that run up the sides of the 24″ x 12″ x 1/4″ acrylic panels. Each of the three panels was laser-engraved at 600 DPI on an Epilog laser engraver and features a different aspect of the poster. There’s one for Snowden, one for Daniel Craig, and one for the text.

[Wilywyrm] tied the color channels together in the first panel to output white light. He used red for the second panel and blue for the third. A complete list of parts with build notes is available on his Google Drive. [Wilywyrm]’s notes include improvement ideas, like making all the RGB strips color-adjustable with more 555s or a microcontroller and timers.

Perhaps [Wilywyrm] could get into the clear whiteboard business after college.

Cryophone: A Dry Ice-Powered Musical Installation

cryophone

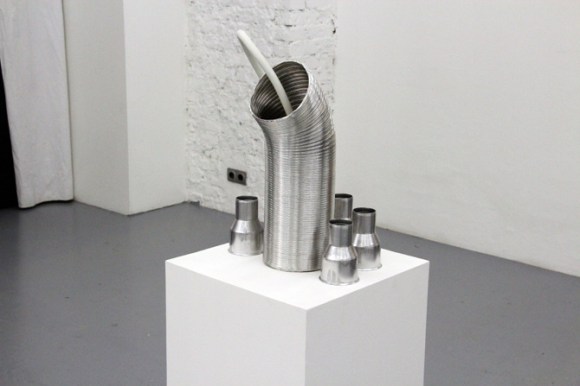
[Dmitry] is a bit of an industrial artist / hacker, and he’s recently finished this interesting and interactive audio exhibit called the Cryophone.

As you know, dry ice is terribly fun. When placed in water, it sublimates from its solid to gaseous phase rapidly, releasing carbon dioxide gas and causing a drastic (and sometimes violent) temperature change. [Dmitry’s] project attempts to amplify the sounds of these reactions and create music(?) using data from sensor inputs in the system. He uses piezo elements, temperature sensors, and an Arduino to generate an algorithmic composition from the various sensors, which a Mac Mini then synthesizes and outputs as audio in 6 channels.

The result is an eerie collection of noises that would do well in a haunted house or a horror movie. Take a listen for yourself after the break, and if you missed it, check out another unique, audio-based art installation: ‘conus.’

Continue reading “Cryophone: A Dry Ice-Powered Musical Installation”

Analog Drum Machine

Drum Machine Schematic

This analog drum machine project synthesizes a kick and snare drum that are clocked to a beat. It pulls together a few analog circuits to do the timing and synthesis.

The beat timing is a product of a hysteretic oscillator used to create a ‘shark wave,’ which is a friendly term for the output of a relaxation oscillator. This waveform can be compared to a set point using a comparator to create a slow square wave that clocks the drum beat.

The kick drum is synthesized using another hysteretic oscillator, but at a higher frequency, creating a triangle-like waveform at 265 Hz that provides a bass sound. The snare, however, uses white noise provided by a BJT’s P-N junction, which is reverse biased and then amplified. You can spot this transistor because its collector is not connected.

The resulting snare and kick drum wave forms are gated by two transistors into the output. Controlling these gates allows the user to create a drum beat. After the break, check out a video walk-through and a demo of the build.

Continue reading “Analog Drum Machine”

Retrotechtacular: Films Used To Be Recorded On Film

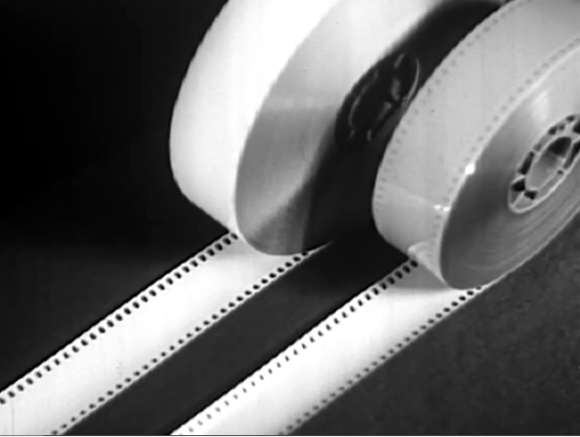
retrotechtacular-movie-film-photo-finishing

We’re sure that this title makes some readers itch because there are still a number of well-respected directors who insist on shooting with film rather than digital, but the subject of this week’s Retrotechtacular shows a portion of the movie industry that has surely been relegated to life-support in the past few decades. Photo finishing, once the stronghold of chemical processes used by all to develop their photographs, has become virtually non-existent. This is the story of how film and photo finishing drove cinema for much of its life.

The reels seen above are negative and positive film. The negative film goes in the camera and captures the images. After developing and fixing the negative film, the process is repeated. Light shines through the fixed negative in order to expose a fresh reel of film. That film is finished and fixed to create the reel which can be used in a projector. This simple process is covered near the beginning of the clip found below. The 1940 presentation moves on to discuss the in-depth chemistry techniques used in the process. But you’re really in for a treat starting about half-way through when the old manual methods are shown, which have been replaced by the “modern laboratory”. We love those huge analog dials! The video concludes by showing the true industrialization of the film developing process.

We’re running out of Retrotechtacular topics. If you know of something that might be worth a feature please send in a tip!

Continue reading “Retrotechtacular: Films Used To Be Recorded On Film”