Hackaday Space: Transmission 1

major-tom-profile-pic-cropped

Phew, what a month!

As most of you by now are probably sick of hearing, we ran a series of puzzles throughout April in the run up to the announcement of The Hackaday Prize. We had a lot of fun putting this together, and a great many of you pitched in and tried to solve the problems we presented. In all we were very impressed at the community spirit that came out of these challenges, so we thought we would do a write up of what was in the puzzles, how we built them, and the fantastic solutions that you all came up with.

We’ll be doing these as a series of posts this week since they’re quite long, for details on Transmission 1 keep reading after the break.

Continue reading “Hackaday Space: Transmission 1”

A DIY Atomic Force Microscope

AFM

For looking at really small stuff, an optical microscope will only go so far. Looking at things at the nanometer level, though, usually requires some sort of electron microscope, with all the hassle of vacuum chambers and high voltages. There is another way to investigate the domain of the very small: an atomic force microscope. Unlike their electron spewing brothers, they don’t require high voltages or hard vacuums. They can also be built for about $1000, as [whoand] over on the Instructables shows us.

Instead of shooting light or electrons at an object and picking up the reflections, an atomic force microscope drags a very, very tiny stylus across an object. This stylus is attached to a probe that will reflect laser light off of it into a photosensor, eventually rendering an image on a display. [whoand] is using a laser diode and pickup unit from a DVD-ROM drive for the optical pickup unit, a frame made from soldered together PCBs, and a few piezos to vibrate the probe.

The probes themselves are incredible pieces of engineering with a tip size of a few nanometers. They’re consumable, and expensive, ranging from $20 to $500 per probe. Still, with these probes, [whoand] can look at the pits in a CD or DVD, measure the surface of an eraser, or check out the particulate matter floating around in the atmosphere in Beijing.

Thanks [Rob] for the tip.

Solderless Pogo-Pins For Flashing Routers

Solderless Router Pins

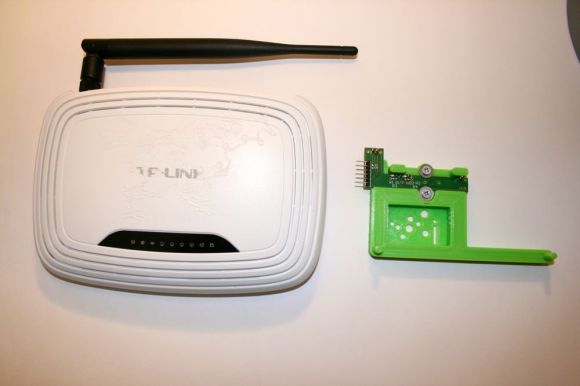
Low-cost wireless routers are a dime a dozen these days — but what happens if you need to flash the firmware? Normally you’d have to solder in a serial connection in order to access it, but [Luka Mustafa] had another idea — pogo-pins!

It’s actually quite easy to make a small PCB with pogo-pins and then use a 3D printed bracket or alignment jig in order to make connection. They currently only have designs for a few TP-Links (WR740 and WR741ND) on their GitHub, but more will be added soon. They’ve also included instructions on how to restore firmware on any of these devices with their handy-dandy pogo-pin PCB.

[Luka] is one of the guys behind IRNAS (the acronym is in Slovenian), a non-profit open-source company that makes lots of cool projects. They believe in open-source and sharing technology in order to empower the world.

And if you’ve royally bricked your router it could be possible to unbrick it with a Raspberry Pi!

Arduino Electronic Load

A Simple Programmable Electronic Load Using The Arduino

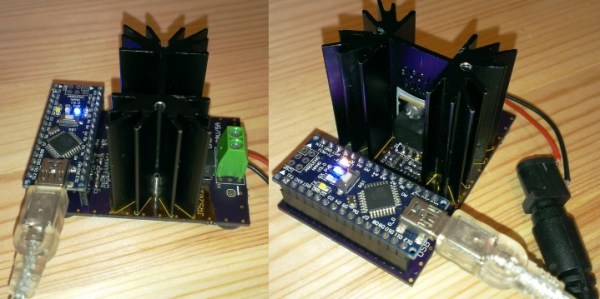
Some projects are both educational and useful. We believe that [Jasper’s] Arduino based electronic load is one of those project.

[Jasper’s] electronic load can not only act as a constant current load, but also as a constant power and constant resistive load as well. The versatile device has been designed for up to 30V, 5A, and 15W. It was based on a constant current source that is controlled by a DAC hooked up to the Arduino. By measuring both the resulting voltage and current of the load, the system can dynamically adapt to achieve constancy. While we have seen other Arduino based constant loads before, [Jasper’s] is very simple and straight forward compartively. [Jasper] also includes both the schematic and Arduino code, making it very easy to reproduce.

There are tons of uses for a voltage controlled current source, and this project is a great way to get started with building one. It is an especially great project for putting together your knowledge of MOSFET theory and opamp theory!

Replicator 1 Receives A PID Controlled Heated Chamber

Replicator 1 PID Heated Enclosure

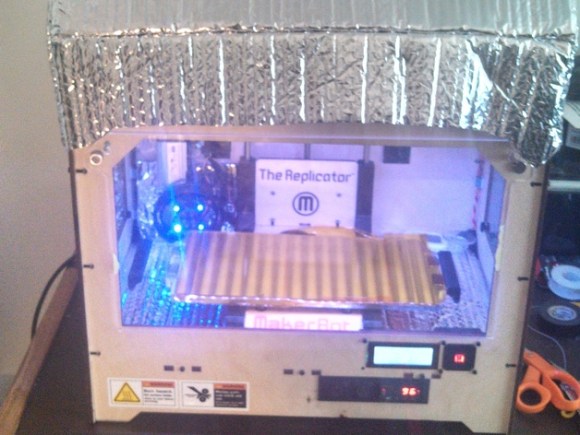
Improving 3D print quality is a bit of a black magic — there are tons of little tweaks you can do to your printer to help it, but in the end you’re just going to have to try everything. Adding a heated build enclosure however is one of those things almost guaranteed to improve the print quality of ABS parts!

And for good reason too — heated build enclosures are one of the outstanding “patented 3D printing technologies” — It’s why you don’t see any consumer printers with that feature. Anyway, [Bryan] just sent us his upgrade to his Makerbot Replicator 1, and it’s a pretty slick system. His goal was to add the heated enclosure to the printer as unobtrusively as possible — no need for people to think his printer is an even bigger fire hazard!

Continue reading “Replicator 1 Receives A PID Controlled Heated Chamber”

Profiling An Arduino

profiling

In proper, high-dollar embedded development environments – and quite a few free and open source ones, as well – you get really cool features like debugging, emulation, and profiling. The Arduino IDE doesn’t feature any of these bells a whistles, so figuring out how much time is spent in one section of code is nigh impossible. [William] came up with a clever solution to this problem, and while it doesn’t tell you exactly how much time is spent on a specific line of code, it’s still a good enough tool to be a great help in optimization.

[William]’s solution is to create a ‘bin’ for arbitrary chunks of code – one for each subroutine or deeply nested loop. When the profiler run, you end up with a histogram of how much time is spent per block of code. This is done with an interrupt that runs at about 1 kHz, with macros sprinkled around the code. Each time the interrupt ticks, the macro runs and increases a counter by one. Let the sketch run for a minute or so, and you get an idea of how much time is spent in a specific area of code.

It’s a bit of a kludge, but when you’re dealing with extremely minimal tools, any sort of help in debugging is sorely needed and greatly appreciated.


Cheap Under-Cabinet Lights Reimagined As Photography Lighting

diy photography lights

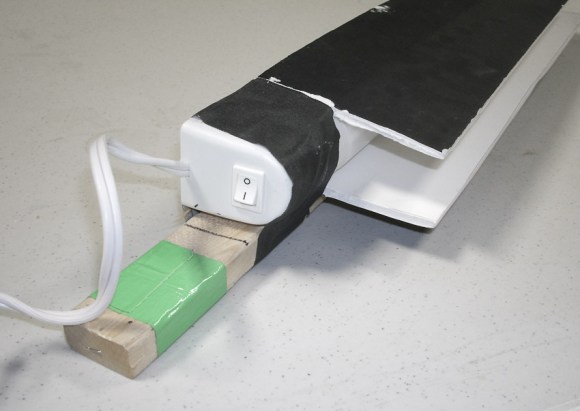
Professional photography lighting can be expensive. Sometimes the professional photographer may not want (or need) to spend the big bucks on lighting. [Alex] is one of those folks. He needed a specialized light source and instead of going out and buying some, he made exactly what he needed out of components unlikely to be found in a photography studio.

The project started off with some off the shelf $12 Home Depot under-cabinet lights. Foam core board was attached to the sides of each light to adjust the beam’s width. Opening and closing these foam flaps allow the light beam to be adjusted to ensure the perfect shot.  The entire assembly was then taped to long, thin pieces of wood. The wood’s sole purpose is to facilitate mounting of the light.

Continue reading “Cheap Under-Cabinet Lights Reimagined As Photography Lighting”