Digital Pinball With Force Feedback

pinball Hang around Hackaday long enough and you’ll hear about MAME, and all the other ways to emulate vintage arcade machines on a computer. The builds are usually fantastic, with real arcade buttons, MDF cabinets, and side graphics with just the right retro flair to make any connoisseur of ancient video games happy. MAME is only emulating old video games, though, and not physical systems like the digital pinball system [ronnied] put up on the Projects site.

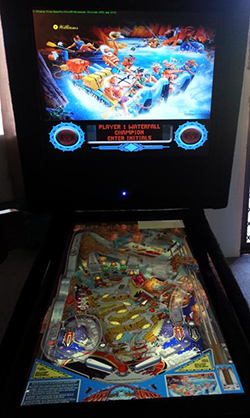
[ronnied] was inspired by a real life, full-size White Water pinball machine at his previous job, and decided it was high time for him to acquire – somehow – a pinball machine of his own. He had a spare computer sitting around, an old 16:9 monitor for the main playfield, and was donated a smaller 4:3 monitor for the backglass. With an MDF cabinet, PinMAME, and a little bit of work, [ronnied] had his own machine capable of recreating hundreds of classic machines.

The build didn’t stop at just a few arcade buttons and a screen; [ronnied] added a 3-axis accelerometer for a tilt mechanism, solenoids and a plunger torn from a real pinball machine for a more realistic interface, and a Williams knocker for a very loud bit of haptic feedback. We’ve seen solenoids, buzzers, and knockers in pinball emulators before, and the vibrations and buzzing that comes with these electromechanical add ons make all the difference; without them, it’s pretty much the same as playing a pinball emulator on a computer. With them, it’s pretty easy to convince yourself you’re playing a real machine.

Videos of the mechanisms below.

Continue reading “Digital Pinball With Force Feedback”

Give Aging Technology A Chance

Robot Arm with PDA Brain

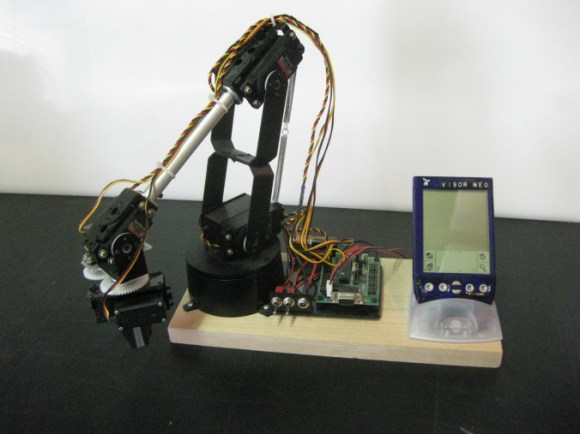
In our rush to develop new projects, a lot of the time we jump the gun and order new Arduinos and microprocessors, when with a bit of ingenuity you can recycle old tech for new purposes. [Eric Wiemers] has a Lynxmotion robot arm and needed a way to control it — sure he could use an Arduino or something… or he could try to make use of his trusty PDA that never left his side, well, 10 years ago anyway!

In 2001, Handspring released the Visor Neo — an affordable PDA competitor to the Palm Pilot. It had a super fast 33MHz processor, a whole 8MB of RAM and a 16 bit grayscale screen with a whopping 160 x 160 pixels. [Eric] was lucky enough to get his hands on one a year after it came out. Fast forward today and PDA’s are pretty much obsolete due to smart phones — but [Eric] didn’t want to just chuck it, it still worked after all!

At first he thought of just practicing coding and writing some apps for it — but let’s be honest, he’d never use it instead of his smart phone. He dug a bit deeper and discovered it was actually capable of serial output — this realization opened up a world of possibilities! Using a spare charging cradle, he tapped into the serial connections and added a Molex connector to allow him to hook it up to his Lynxmotion. He wrote his own control app with a GUI which means he can now control the robot arm without needing to drag around his laptop — success!

Think twice before throwing out your old tech. Perhaps that disused piece of junk can have a second chance in your next DIY project.

640×480 VGA On An Arduino

There are dozens, if not hundreds of examples around the Intertubes of an Arduino generating a VGA video output. The Arduino isn’t the fastest chip by far, and so far, all of these VGA generation techniques have peaked out at lower resolutions if you want to control individual pixels.[PK] has an interesting technique to generate 640×480 VGA at 60 frames per second without overclocking. It’s hacky, it’s ugly, but surprisingly, it actually works.

The VGA standard of 640×480 @ 60 fps requires pixels to be clocked out at 25.175 MHz, and the ATMega chips found in Arduinos top out at 20 MHz. [PK] wanted to generate VGA signals without overclocking, He did this by doubling the clock frequency with digital logic. The ATMega generates a clock, an inverter delays that clock so it is 90 degrees out of phase, and the two clocks are XORed, doubling clock output of the micro. It produces a very ugly square wave at 32 MHz – an error of 27% compared to the VGA spec. Somehow it still works.

With a hilariously out of spec clock, the rest of the project was pulled together from [Nick Gammon]’s VGA library, a 16×16 font set, and a project from [lft]. Video below.

Continue reading “640×480 VGA On An Arduino”

Stuff Wireless Charging Into A Nook’s Crannies

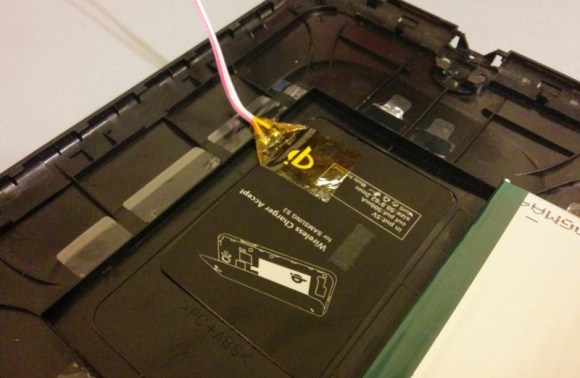
Qi receiver for NookMany technologies that come about for one type of product make us want to extend it to other things. For instance, we’d like the ability to remotely unlock our front door when it’s raining or our hands are full. Once [MS3FGX] experienced Qi wireless charging with his Nexus 5, he wanted the ability to wirelessly charge all the things. The first gadget on the list was his Nook Simple Touch eReader, which he successfully retrofit with a Qi receiver.
Space is at a premium inside of most modern technology. As it turns out, there is a burgeoning market for shoving inductive charging receivers into things. [MS3FGX] decided to try a Qi receiver meant for a Samsung S3, and it actually fits very well behind the battery. He glued it down and then cut a channel in the battery tray for the wires.

[MS3FGX] went full hack with this one and wired it to the Nook’s USB port on the inside. He would have preferred a thinner wire, but used some from a 40-pin IDE cable with little trouble. After the operation was complete, he put it on the Qi pad and it started charging right away. To his delight, the battery increased 20% after an hour. And yes, he can still charge the Nook the traditional way without any issues.

If you want to add wireless charging to any phone cheaply and easily, we’ve got you covered.

Mechanical Clock Designed For A CNC Router Gets New Life Using A 3D Printer

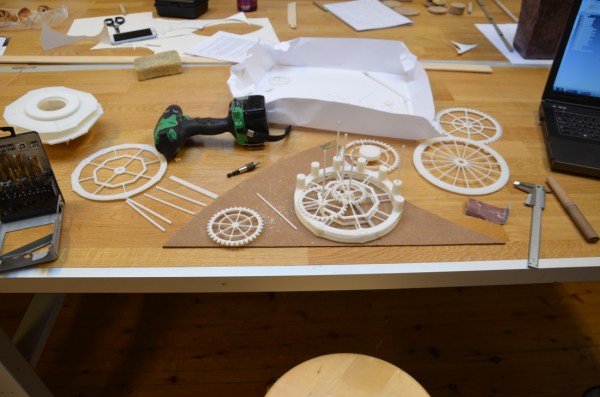
[Madis Kaasik] designed a clock a while back using Solid Edge (3D CAD) — but never got a chance to build it — until he became an exchange student at a university in Norway with access to a big industrial 3D printer!

He had originally intended for it to be cut out using a CNC router or with a laser cutter, but when discovered he could use the university’s 3D printer he decided to give it a shot — it’s actually the very first thing he’s ever printed! The designs had to be modified a little bit for 3D printing, but now that it’s done he’s also uploaded them to Thingiverse for anyone to use.

It took quite a bit of fine tuning with the pendulum, weights, and gears to get it ticking properly, but what [Madis] enjoyed most about this project was the realization of just how vast the possibilities of 3D printing are — he’s excited to begin his next big 3D printing endeavor!

Continue reading “Mechanical Clock Designed For A CNC Router Gets New Life Using A 3D Printer”

Judge Spotlight: Jack Ganssle

judge-spotlight-ganssle

This week we’re getting to know The Hackaday Prize Judge [Jack Ganssle] a little better. His depth of experience with embedded systems is formidable, and recently I was very interested to learn about his mission to improve the quality of the product in the embedded code universe. We’ll get to that in a little bit, but I wanted to start off with [Jack’s] answer to my final question.


judge-spotlight-q5Is there anything else you’d like our audience to know about you?

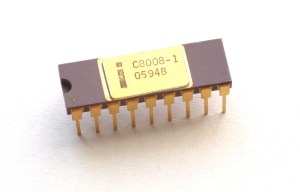
judge-spotlight-a5Intel 8008 Chip on white backgroundMy entry into this field was when the first 8 bit processor (the 8008) came out, and still find it endlessly fascinating. I write a lot about embedded topics, and give talks and seminars, on all of the continents except Antarctica (so far!). We live in heavily-wooded Finksburg, MD, which is just stunning this time of year, and, since my office is in the house, the commute is pretty tolerable. Other passions include sailing; I wrote an on-line book (www.ganssle.com/jack) about racing alone across the Atlantic. Great trip, other than losing the boat.
Continue reading “Judge Spotlight: Jack Ganssle”

DIY Embroidery Machine Sews Your Name In Your Undies

DIY Embroidery Machine

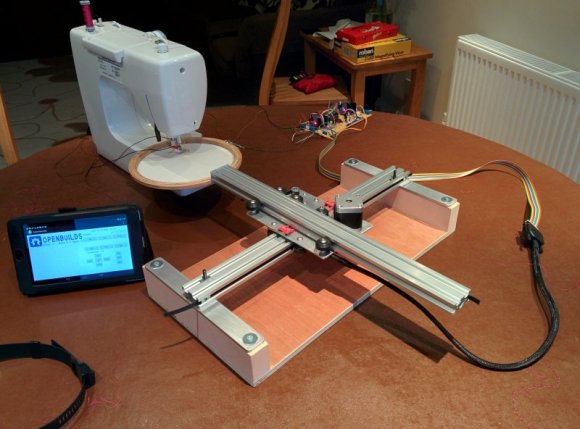
If you were in the market for a sewing machine with embroidery capabilities, you’d either be spending a bunch of money or settling for a lower-cost machine that can only do a handful of pre-programmed designs. A DIYer by the name of [SausagePaws] came up with a 3rd option, he would build one himself. He was also highly motivated, [Mrs SausagePaws] wanted one!

An off the shelf embroidery machine is similar to a standard sewing machine except the movement of the fabric is done automatically rather than by hand. Not only does the work move, but it has to move in time with the needle traveling up and down. [SausagePaws] took a no-nonsense approach and decided the simplest way to go about the task was to mount an embroidery hoop to the end of an XY drive system.

Continue reading “DIY Embroidery Machine Sews Your Name In Your Undies”