An Auto-Leveling Gyro Camera For Motorcycle Enthusiasts

FB2XXIQHF23RIUW.LARGE

[Saftari] was inspired by the technology used to capture video in the MotoGP World Championship races to create these instructables on how to build an auto-leveling Gyro camera. The setup he developed maintains the camera at a consistent level perpendicular to the earth no matter how much the motorcycle angles against the ground when turning.

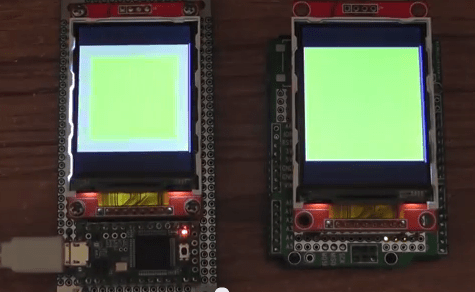
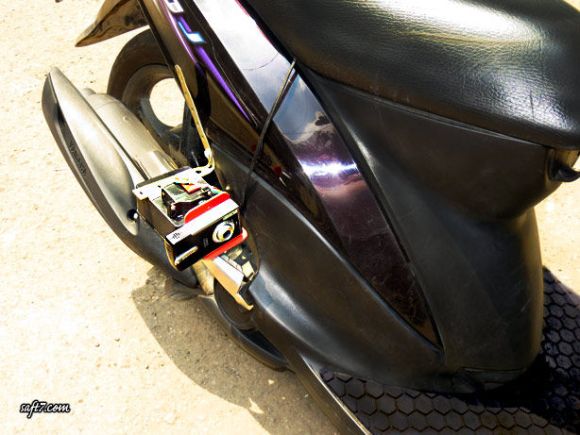
The components involved include an Arduino Uno, a Triple Axis Accelerometer, a digital servo, and a Gyro breakout board. A bracket was built to house and secure the camera to the side of the vehicle. 2mm acrylic was used for this and was bent by heating up the material. Once complete, test runs were completed showcasing the capabilities of this type of Do-It-Yourself rig.

The quality of the video after the break is a little bit blurry, but it proves the point that a Gyro camera setup can be built at home:

Continue reading “An Auto-Leveling Gyro Camera For Motorcycle Enthusiasts”

Beach Buddy Is A Boombox, Phone Charger, And Sunburn Warner

The Beach Buddy

When you venture out onto the beach for a day in the sun, you’re probably not preoccupied with remembering the specifics about your sunscreen’s SPF rating—if you even remembered to apply any. [starwisher] suffered a nasty sunburn after baking in the sunlight beyond her sunscreen’s limits. To prevent future suffering, she developed The Beach Buddy: a portable stereo and phone charger with a handy sunburn calculator to warn you the next time the sun is turning you into barbecue.

After telling the Beach Buddy your skin type and your sunscreen’s SPF rating, a UV sensor takes a reading and an Arduino does a quick calculation that determines how long until you should reapply your sunscreen. Who wants to lug around a boring warning box, though?

[starwisher] went to the trouble of crafting a truly useful all-in-one device by modifying this stereo and this charger to fit together in a sleek custom acrylic enclosure. There’s a switch to activate each function—timer, charger, stereo—a slot on the side to house your phone, and an LCD with some accompanying buttons for setting up the UV timer. You can check out a demo of all the Beach Buddy’s features in a video below.

Continue reading “Beach Buddy Is A Boombox, Phone Charger, And Sunburn Warner”

The Remaining Hours Are More Than Enough To Get In The Game

thp-time-leftWhether you’re just finding out now or are a procrastination ninja, it is not too late to give yourself a shot at winning that trip to space. The Hackaday Prize is really just getting started. At 11:50pm Wednesday night ( that’s PDT on 8/20/14, or 06:50 GMT on Aug 21) we close the entry window and the build phases will begin. That’s right, you don’t actually need to have any hardware done, you only need to document your idea and how you’re going to get there.

Close your eyes and assemble your vision of a connected device. Now open them and start typing. You need to share your overall idea and how you’re going to get there. Draw out a basic system design, and film a video of 2 minutes or less that explains it all. Think this sounds like a lot? You’re wrong… I did it in only a few minutes.

When will you have such a great opportunity to win something awesome and secure the adoration of the hacking masses? Enter now and have no regrets!

The Hema-Imager: Accessible Thermal Imaging For Smart Devices

cb889cb579f945863e6dc7e9ec67b07e_large

[Erik] began working on this project a few years back to help him improve his electronics skills. Now, after meeting an electronic’s manufacturer through LinkedIn, he is ready to get his device out into the market through a Kickstarter campaign. If successful, the technology will be shipped out and deployed in areas of construction, manufacturing, hospitals and emergency services; all of which could utilize the heat-mapping potential of this affordable device.

In addition to commercial uses, this product can assist in the reduction of household energy consumption by locating areas of heat loss. Without thermal imaging, the initial source of these types of drafts and airflows can be extremely hard to pinpoint. Abnormal equipment heating can also be found as well. For instance, electrical panels can overheat with loose or poorly attached connections.

Now, Hema-Imager is not the only product that is surfacing through crowd funding campaigns. MuOptics, for example, has raised over $280,000 through Indiegogo in 2013 without having to show an actual working product, barely even showing a 3D modeled prototype. Yet, they still achieved their goal, opening up the door for another device like the Hema-Imager to come in and raise a similar amount of money. The differences between the two can be seen on the Hema-Imager’s Kickstarter page.

[Thanks for the tip Enn!]

After the break is a video of [Erik] describing the Hema-Imager project along with a fire fighter’s point of view:

Continue reading “The Hema-Imager: Accessible Thermal Imaging For Smart Devices”

TFT LCDs Hit Warp Speed With Teensy 3.1

[Paul Stoffregen], known as father of the Teensy, has leveraged the Teensy 3.1’s hardware to obtain some serious speed gains with SPI driven TFT LCDs. Low cost serial TFT LCDs have become commonplace these days. Many of us have used Adafruit’s TFT LCD library  to drive these displays on an Arduino. The Adafruit library gives us a simple API to work with these LCDs, and saves us from having to learn the intricacies of various driver chips.

[Paul] has turbocharged the library by using hardware available on Teensy 3.1’s 32 Freescale Kinetis K20 microcontroller. The first bump is raw speed. The Arduino’s ATmega328 can drive the SPI bus at 8MHz, while the Teensy’s Kinetis can ramp things up to 24MHz.

Speed isn’t everything though. [Paul] also used the Freescale’s 4 level FIFO to buffer transfers. By using a “Write first, then block until the FIFO isn’t full” algorithm, [Paul] ensured that new data always gets to the LCD as fast as possible.

Another huge bump was SPI chip select. The Kinetis can drive up to 5 SPI chip select pins from hardware. The ATmega328 doesn’t support chip selects. so they must be implemented with GPIO pins, which takes even more time.

The final result is rather impressive. Click past the break to see the ATmega based Arduno race against the Kinetis K20 powered Teensy 3.1.

Paul’s library is open source and available on Github.

Continue reading “TFT LCDs Hit Warp Speed With Teensy 3.1”

Hot Wheels Toy Turned Radar Gun

Yl3jKbSculaOIdoE

[Ken] was strolling through a department store one day looking for a gift for his daughter when he stumbled across a Mattel’s Hot Wheels Radar Gun for $30. He purchased it, took it home, and tested it out. Surprisingly, the device had the ability to not only scan toy cars, but also regular size vehicles, spinning bicycle wheels, and joggers as well. As his mind began to churn coming up with new ideas, he purchased another toy and repackaged it creating a more professional grade DIY radar speed detector.

The process was pretty simple. First, he disassembled the device getting to the Doppler radar system inside, which was similar to the professional radar guns that police officers used. This toy was able to transmit a continuous wave at 10.525GHz, measuring the returning frequency of returning waves that bounced off of moving objects. However, the detection range of this toy was severely limited. [Ken] then upgraded the antenna housing unit with a 3″ diameter acrylic document tube, making the quality look a lot better. After that, the system was attached to a tripod allowing for the device to be easily transported and setup near a busy traffic road, quietly watching the speed of cars driving by.

Continue reading “Hot Wheels Toy Turned Radar Gun”

The Numitron Geekwatch

numitron_uhr_gehause_i

[Johannes] wanted to develop an unusual way to display time on a custom wristwatch. LED’s were too common, and mechanical indicators with small engines were too expansive, but Nixie tubes were just right. His design for the Numitron Geekwatch utilized two boards that were soldered together at a right angle, with a 3D printed enclosure made of semi-transparent PLA.

Future designs of this will improve on the button functionality as well as the housing of the wristwatch to protect the fragile tubes from external forces.

After the break is a video (in German) with [Johannes] going through the steps needed to make one of these of your very own:

Continue reading “The Numitron Geekwatch”