Planning Custom Aluminum Enclosures With OpenSCAD

We’ve seen a number of projects over the years that let you create custom enclosures using OpenSCAD, and for good reason. The parametric CAD tool is ideal for generating 3D models based on user-adjustable variables, and if you leverage its integrated Customizer, producing a bespoke box is as easy as moving some sliders around. The resulting files get sent off to the 3D printer, and you’re set. But what if you’re looking for a custom enclosure that’s not so…plastic?

In that case, AlClosure by [0xPIT] might be the answer. Rather than generating STL files intended for your 3D printer, the code is written to help you design an enclosure made from aluminum sheets. The top and bottom panels are intended to be cut from 1.5 mm – 2.5 mm sheets, while the sides are made from thicker 5 mm – 8 mm stock to accept a machined pocket that holds the front and rear inserts.

Since it’s OpenSCAD, much of the design is governed by variables which you can tweak. Obviously the outside dimensions of the enclosure can be changed in a flash, but it’s just as easy to modify the thickness of the aluminum sheet being used, or the size of the screw holes. [0xPIT] has also done a great job of documenting the code itself, so you’ll know exactly what you’re modifying.

Obviously, you’ll need the ability to cut and machine aluminum to actually utilize this project. The code itself is really just a way to conceptualize the design and get your dimensions figured out ahead of time. But as we were recently reminded by the keynote presentation [Jeremy Fielding] gave at the 2021 Remoticon, this sort of early prototyping can often save you a lot of headaches down the line.

Disguising The PS5 With A Custom Wood And Carbon Fiber Enclosure

The PlayStation 5 has a very distinctive enclosure that some love and others hate. Its design certainly does not lend itself to lying on its side, even though this is a more practical orientation for putting on a shelf in a TV console. [Matt] from [DIY Perks] decided to address this and built a custom wood and carbon fiber PS5 enclosure that looks good in any orientation.

He started by disassembling his PS5 and taking out only the main electronics unit, fan, and power supply. These were mounted on a carbon fiber baseplate using hexagonal threaded standoffs. The sides of the enclosure were constructed from dark walnut, with holes cut in the front and back for connectors and airflow. A long recess was cut in the front hole and covered with an ingenious carbon fiber cover which opens if you press it at one end and acts as the power button if you press it at the other end.

Matt paid close attention to the airflow routing of the original enclosure and copied it to the new one. Like the original, he used adhesive foam strips to direct the air through the heat sinks. The top cover is also carbon fiber, with an elegant honeycomb hole pattern with wood inserts for the air intake.

This is not [Matt]’s first custom PS5 enclosure. The other was a significantly more flashy brass incarnation of the original. Other custom enclosure he’s made include a wood PC case and a brass encased USB-C monitor. Continue reading “Disguising The PS5 With A Custom Wood And Carbon Fiber Enclosure”

An Elegant Modular Enclosure System For The Raspberry Pi 4

[NODE] has been experimenting with Raspberry Pi servers and mini computers for a long time, and knows all too well how the wiring can quickly turn into a rat’s nest. His latest creation is  the Mini Server version 3, a modular enclosure system for the Raspberry Pi 4, is designed to turn it into practical computing box.

The basic enclosure is a 92 mm x 92 mm x 26 mm 3D printed frame with a custom PCB top cover. One of the main goals was to collect all the major connectors on one side and make the micro SD slot easily accessible. To do this [NODE] created a set of custom PCB adaptors to route the USB-C and an HDMI port to the same side as the other USB ports, and move the micro SD slot to the bottom of the enclosure. A low profile adaptor was also designed to connect a mSATA SSD to one of the USB 3 ports, and there is space inside the enclosure for one or two cooling fans. Unlike previous version of the mini server, no hardware modifications are required on the Pi itself.

The only downside that we can see is that it doesn’t allow external access to the GPIO ports, but the entire project is open source specifically to allow people to make their own modifications.

[NODE] is a big fan of turning Raspberry Pis into custom computing devices, ranging from small terminal devices and pocket servers, to complete laptops.

An Open Source Toolbox For Studying The Earth

Fully understanding the planet’s complex ecosystem takes data, and lots of it. Unfortunately, the ability to collect detailed environmental data on a large scale with any sort of accuracy has traditionally been something that only the government or well-funded institutions have been capable of. Building and deploying the sensors necessary to cover large areas or remote locations simply wasn’t something the individual could realistically do.

But by leveraging modular hardware and open source software, the FieldKit from [Conservify] hopes to even the scales a bit. With an array of standardized sensors and easy to use software tools for collating and visualizing collected data, the project aims to empower independent environmental monitoring systems that can scale from a handful of nodes up to several hundred.

We’ve all seen more than enough DIY environmental monitoring projects to know there’s nothing particularly new or exciting about stuffing a few cheap sensors into a plastic container. But putting high quality, reliable hardware into large scale production is another thing entirely. Especially when your target user may have limited technical knowledge.

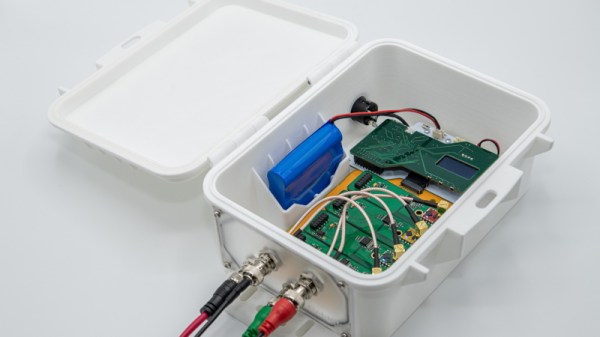
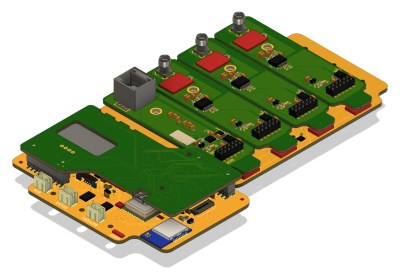
That’s why FieldKit is designed around a common backplane with modular sensors and add-on boards that can be plugged in and easily configured with a smartphone application. Whether the node is going to be mounted to a pole and powered by a solar panel, or attached to a buoy, most of the hardware stays the same.

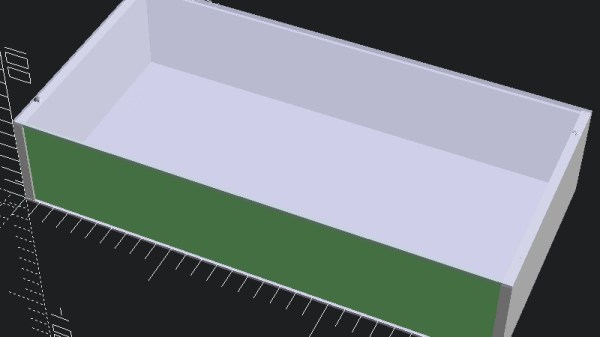
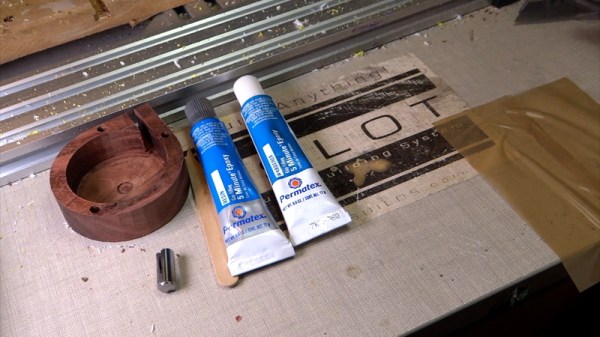
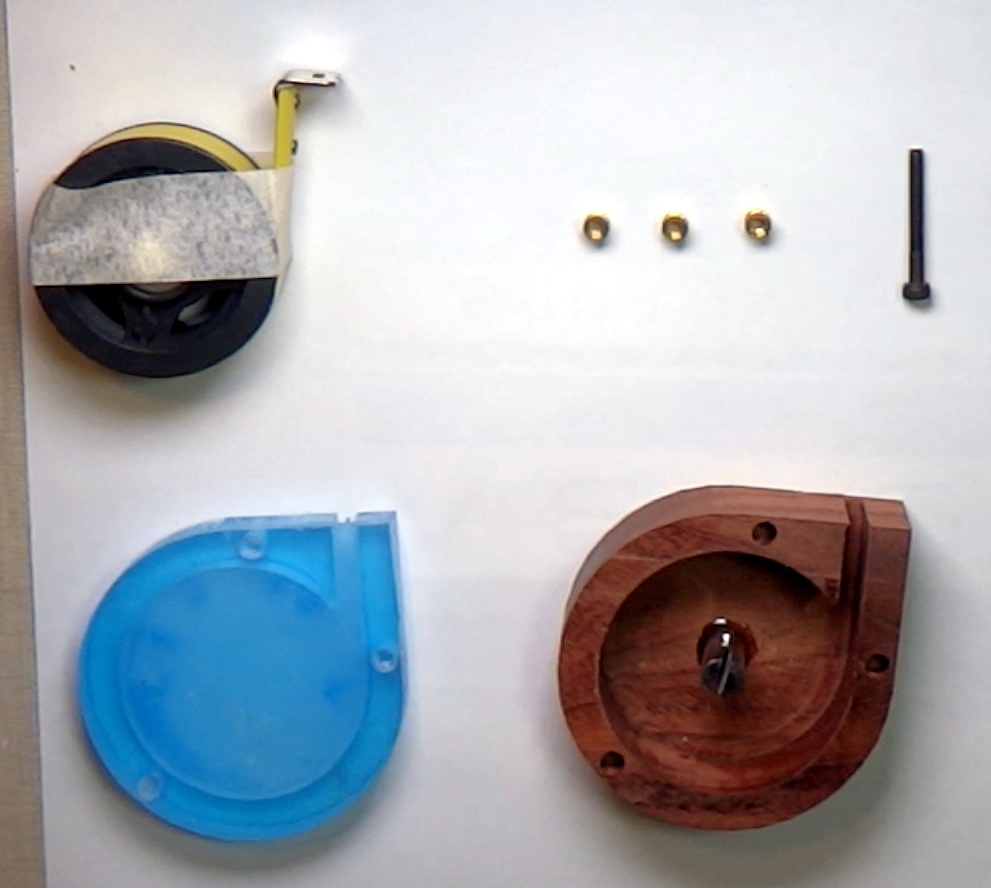
While the electronics and the software interface are naturally the stars of the show here, we can’t help but also be impressed with the enclosure for the FieldKit. It seems a minor thing, but as we’ve seen from the projects that have come our way over the years, finding a box to put your hardware in that’s affordable, adaptable, and weatherproof is often a considerable challenge in itself. Rather than using something commercially available, [Conservify] has designed their own enclosure that’s inspired by the heavy duty (but prohibitively expensive) cases from Pelican. It features a replaceable panel on one side where the user can pop whatever holes will be necessary to wire up their particular project without compromising the case itself; just get a new panel when you want to reconfigure the FieldKit for some other task. Prototypes have already been 3D printed, and the team will be moving to injection molded versions in the near future.

As a finalist in the 2019 Hackaday Prize, FieldKit exemplifies everything we’re looking for this year: a clear forward progression from prototype to final hardware, an obvious need for mass production, and the documentation necessary to show why this project is deserving of the $125,000 grand prize up for grabs.

Continue reading “An Open Source Toolbox For Studying The Earth”

Building An Artisanal Tape Measure

Some tools are so common, so basic, that we take them for granted. A perfect example is the lowly tape measure. We’ve probably all got a few of these kicking around the lab, and they aren’t exactly the kind of thing you give a lot of thought to when you’re using them. But while most of us might not give our tape measure a second thought, [Ariel Yahni] decided to create an absolutely gorgeous new enclosure for his. Because if you’re going to measure something, why not look good doing it?

A CNC router is used to carve the body of the new tape measure out of a solid block of wood and cut a top plate out of clear acrylic. [Ariel] then used an angle grinder to cut off a small section of steel rod which he secured into a carved pocket in the base using epoxy. Finally, the internals of a commercial tape measure were inserted into this new enclosure, and the acrylic top was screwed down into place.

[Ariel] has made the DXF files for this project public for anyone else who wants to carve out their own heirloom tape measure, though it seems likely the designs will need some tweaking depending on the make and model of donor tape measure. While this might not be the most technically impressive project to run on Hackaday, it’s still a fantastic example of the sort of bespoke designs that are made possible with modern manufacturing methods.

This design reminds us of a similar project to turn a basic Honda key fob into a true conversation piece with the addition of some CNC’d hardwood and aluminum.

Continue reading “Building An Artisanal Tape Measure”

Printed It: Custom Enclosure Generator

You’ve written your firmware code, etched your own PCB, and now it’s time to put that awesome new project of yours into an enclosure. Unfortunately, all you have is a generic Radio Shack project box that you picked up when they were clearing out their inventory. If you put your project in that, it’ll have all the style and grace of a kid wearing hand-me-down clothes. Your project deserves a tailor-made enclosure, but the prices and lead time on custom plastic enclosures are prohibitive for one-off projects.

In Ye Olde Olden Days, the next step might have been to start bending some sheet metal. But it’s the 21st century, and we’ve got mechanization on our side. The “Ultimate Box Maker” by [Heartman] is a fully parametric OpenSCAD design which allows you to generate professional looking enclosures by simply providing your desired dimensions and selecting from a few optional features. In a couple of hours, you’ll have a custom one-of-a-kind enclosure for your project for a few cents worth of filament.

That’s the idea, at least. For this edition of “Printed It”, I’ll be taking a look at the “Ultimate Box Maker” by generating and printing a basic enclosure. As somebody whose Radio Shack was out of enclosures by the time I got there and who doesn’t want to slice his hand open folding sheet metal, I’m very interested in seeing how well this design works.

Continue reading “Printed It: Custom Enclosure Generator”

Exquisitely Crafted Nixie Tube Weatherclock

The Weatherclock is more than just a clock sporting Nixie tubes and neon lamps. There is even more to it than the wonderful workmanship and the big, beautiful pictures in the build log. [Bradley]’s Weatherclock is not only internet-connected, it automatically looks up local weather and sets the backlights of the numbers to reflect current weather conditions. For example, green for roughly room temperature, blue for cold, red for warm, flashing blue for rain, flashing white for lightning, scrolling white for fog and ice, and so on.

neonixieclock_02The enclosure is custom-made and the sockets for the tubes are seated in a laser-cut plastic frame. While seating the sockets, [Bradley] noticed that an Adafruit Neopixel RGB LED breakout board fit perfectly between the tube leads. By seating one Neopixel behind each Nixie indicator, each number could have a programmable backlight that just happened to look fabulous.

Witpreboxh an Electric Imp board used for WiFi the capabilities of the Weatherclock were rounded out on the inside. On the outside, a custom enclosure ties it all together. [Bradley] says his family had gotten so used to having the Weatherclock show them the outside conditions that they really missed it when it was down for maintenance or work – which shouldn’t happen much anymore as the project is pretty much complete.

It’s interesting to see new features in Nixie clocks. Nixie tubes have such enduring appeal that using them alone has its own charm, and at least one dedicated craftsman actually makes new ones from scratch.