Hackaday Prize Entry: Multispectral Imaging For A UAV

At least part of the modern agricultural revolution that is now keeping a few billion people from starving to death can be attributed to remote sensing of fields and crops. Images from Landsat and other earth imaging satellites have been used by farmers and anyone interested in agriculture policy for forty years now, and these strange, false-color pictures are an invaluable resource for keeping the world’s population fed.

The temporal resolution of these satellites is poor, however; it may be a few weeks before an area can be imaged a second time. For some uses, that might be enough.

For his Hackaday Prize entry (and his university thesis), [David] is working on attaching the same kinds of multispectral imaging payloads found on Earth sensing satellites to a UAV. Putting a remote control plane up in the air is vastly cheaper than launching a satellite, and being able to download pictures from a thumb drive is much quicker than a downlink to an Earth station.

Right now, [David] is working with a Raspberry Pi and a camera module, but this is just experimental hardware. The real challenge is in the code, and for that, he’s simulating multispectral imaging using Minecraft. Yes, it’s just a simulation, but an extremely clever use of a video game to simulate flying over a terrain. You can see a video of that separated into red, green, and blue channels below.


The 2015 Hackaday Prize is sponsored by:

Continue reading “Hackaday Prize Entry: Multispectral Imaging For A UAV”

Hackaday Wants All Your Bitcoin

Bitcoin, the solution to the two generals’ problem, an economic case study in the history of currency, and the reason AMD graphics cards were so expensive a few years ago, is now accepted in The Hackaday Store.

Yes, we have a store, loaded up with swag, tools, and cool toys. We’re always stocking more  If you have coin sitting around, you can pick up a great little logic analyzer, a 3D printer, an ingenius two channel multimeter, ESP8266 boards, the ever popular Hackaday swag and a ton more. That 3D printer will cost you ฿ 3.75. A Mooshimeter is just ฿ 0.50.

It’s the perfect time to turn magical Internet money into something with real, intrinsic value, before the value of Bitcoin drops even more. Sure, we accept government-backed currency as well… but when will you have the chance to spend those hard-mined dollars hashes?

2-Stroke Engine Too Beautiful To Behold

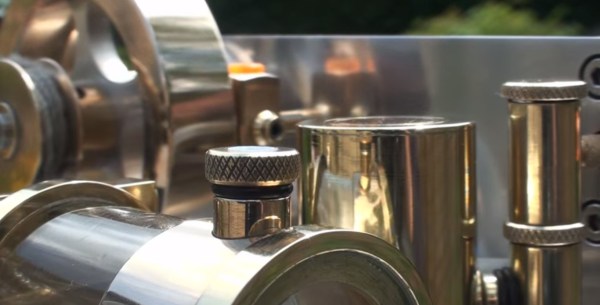
The sheer beauty of this build is blinding. We enjoy keeping a minimalistic household — not quite on the level of [Joe MacMillan] but getting there — yet this would be the thing we choose as decoration. It’s a hand-built 2-stroke Engine designed specifically to make the combustion process visible rather than locking it away inside of a block of metal.

If you have a nagging feeling you’ve seen this before it’s because the amazing craftsmanship is unforgettable. A couple years back we looked at the 4-stroke engine also built by [Huib Visser]. This new offering does away with the belt, leaving a build that is almost entirely glass and metal polished to a high sheen. The glass cylinder contains the combustion, pushing the graphite piston to drive the fly-wheel. A passing magnet triggers the spark plug to ignite the white-gas fuel, all of which is well-illustrated in the video after the break.

This is not for sale, which doesn’t surprise us. How hard would it be to part with something of such beauty especially knowing you created that beauty? But don’t worry, you can definitely build your own. Just make sure to set the bar lower for your first half dozen tries. We’ve even seen engine builds using hardware store parts.

Continue reading “2-Stroke Engine Too Beautiful To Behold”

Live Steam… Chugga Chugga

At Maker Faire this weekend. tucked in between a building full of homegrown foodstuffs and a rock polishing booth is the Bay Area Garden Railway Society (BAGRS). They’re running a few live steam locomotives, and they’re beautiful works of engineering and modeling. None of these trains are electric; they all move by boiling water with either coal or butane. It’s a true, proper locomotive running on 45mm gauge track.

[David Cole] of BAGRS gave me the walkthrough of their booth. It’s a simple oval track that took a solid day to level out. There are technically three sets of tracks, two G-scale, and another O scale sharing a rail with a G-scale track. Each and every one of these locomotives is powered by steam produced when water is heated by either coal or butane. Butane is the fuel of choice because of its ease of acquisition, but BAGRS had a few coal-fired locomotives with tiny shovels shoveling anthracite into tiny fireboxes. After loading up with water and getting the firebox nice and hot, these locomotives will cruise around the oval track for about half an hour, with the speed of the locomotive controlled by a servos and RC gear.

Maker Faire isn’t the headline event for BAGRS; in July 2016 they’ll be hosting the National Garden Railway Convention in San Francisco. If you’re local to the Faire, it will be a cool event to check out.

Setup Day At The Faire Is A Glorious Time!

The Bay Area Maker Faire starts today, but the Hackaday crew rolled in early for something new this year. Friday has traditionally been just for exhibitor setup but this year a few extra groups were on site to see everything come together. Most notably, school field trips. How awesome is it to skip the normal class schedule and hang out at the fair? Also able to get in are media and industry.

I had a great time. Watching everything get setup is often more interesting that seeing the finished display. It’s also much quieter, many fewer bodies (Saturday afternoon is usually a mad press of people) and people haven’t yet lost their voices or the fallen into the monotony of voicing the same explanation over and over again.

Above you can see a few of the friends I ran into. [Windell Oskay] is one of the 2015 Hackaday Prize Judges. He had a freshly minted copy of his new book which I first heard about when visiting Evil Mad Scientist Labs last fall. I also ran into [Kevin] who is the creator of the Arduboy. I first met him at BAMF last year and this year he makes a triumphant return with the new version of Arduboy which overshot it’s Kickstarter by an order of magnitude in just a few days. And who else should I bump into but [Brian Benchoff]. He lives in Pennsylvania and I in Wisconsin so we look forward to hanging out when Hackaday hits the road. I also said a quick hello to [Caleb Kraft] who was slinging veggie paella all evening.

[Brian], [Sophi], [Matt], [Jasmine], [Rich], and I will all be at tonight’s Hackaday Meetup. Anyone in the area won’t want to miss this one. There are a ton of awesome hackers already planning to clink glasses starting at 7pm. All you need to do to join in is RSVP.

Back to the action; I made a quick Friday first pass which still took about three hours. The setup changes just a bit each year… generally things are in the same places but of course returning exhibitors have made a year of upgrades and there’s always a lot of fresh and new on hand. I don’t remember seeing the probability machine last year. It has reservoir of marbles at the top which are being steadily dropped into the “Plinko” style peg-board showing a distribution which has a higher probability toward the center.

Here are just a few more favorites. The Kijani Grows booth has a couple of full aquaponics setups that are worth checking out. I spent some time with the Firepick Delta guys. Sand plotters are always fun and there’s a giant one in one of the booths. I may try my hand at lock picking in The OPen Organization of Lockpickers tent today. And [Louis] of SmartMatrix is launching his Kickstarter to bring fully-assembled versions to people who don’t want to solder the one available in our store.

That’s all for now, I’m off to see as much as is humanly possible. If you’re at the Faire today or tomorrow track us down for some stickers and other swag, and don’t forget tonight’s meetup that I mentioned above!

Not Just A Floor Wax But An Embossing Powder!

The embossing process used in the creation of some of your fancier wedding invitations and business cards is an interesting one. It’s often called thermography or thermographic printing. Slow-drying, wet ink is applied to a substrate. The ink is dusted with a thermoplastic polymer called embossing powder, and a heat source raises the ink while drying it.

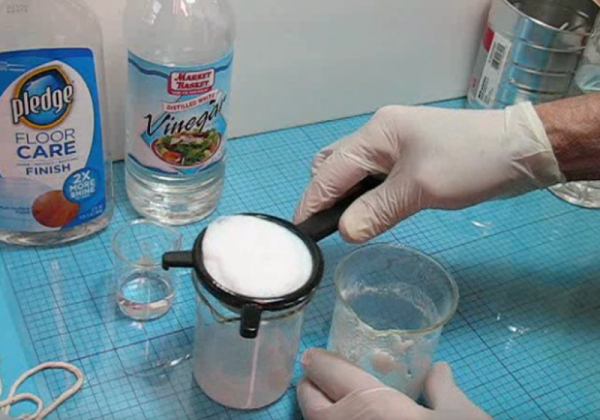
Commercial embossing powder costs about $10 an ounce. As [Ken] discovered, its manufacture is quite closed-source to boot. He set about creating his own embossing powder, and succeeded with a combination of commonly available floor finish and distilled white vinegar. A standard-sized bottle of floor finish yielded about four ounces of homemade embossing powder.

How does this work? The floor finish is an acrylic-based stable emulsion. Adding vinegar destabilizes the emulsion, decreasing its pH and setting the polymer free.  It’s a fairly fast process, which you can see in the second video that accompanies [Ken]’s write up. From there, it’s mostly a matter of straining the material, letting it dry, and pulverizing the coarse matter into powder. In the first video, [Ken] performs a comparison test of Ranger, a commercial powder, and his own concoction.

For a completely different take on home embossing, check out this soda-can-turned-keepsake-box.

Hamvention Just Getting Started

For one weekend in May, the landscape of Dayton, Ohio is dominated by ham radio operators. The Dayton Hamvention (“ham-convention”), sponsored by the Dayton Amateur Radio Association, is the preeminent gathering of hams from around the world. This is where industry rolls out new products, friends gather to catch-up, and old equipment is “re-distributed” amongst willing parties in the sprawling swap meet which subsumes the entire Hara Arena parking lot where you can find almost anything and meet some of the most interesting people.

Continue reading “Hamvention Just Getting Started”