Portable SNES Chiptune Player

Chiptunes are the fantastic, bleeping musical renditions of the soundchips of retro consoles past. Performers of the art overwhelmingly favour the various flavours of Game Boy, though there are those who work with such varied machines as the Commodore 64, Sega Genesis, and the Nintendo Entertainment System. A little more off the beaten track in the chiptune scene is the Super Nintendo, but [kevtris] has struck out and built a chiptune player for SNES-based music.

The heavy lifting is handled by an FPGA, which emulates the SNES’s S-SMP sound processor, and handles loading the music from the SPC-format files. Being chiptunes, these files store both the instrument data as well as the note data for the music. Audio output is clean and crisp, as heard in the test video.

The laser cut case lends the device a great aesthetic.

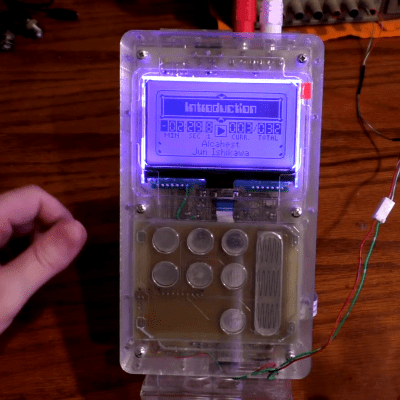
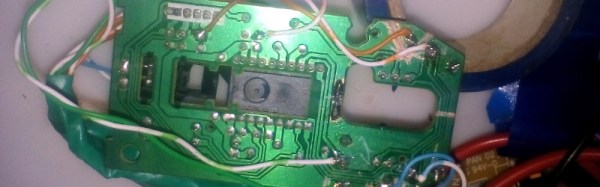
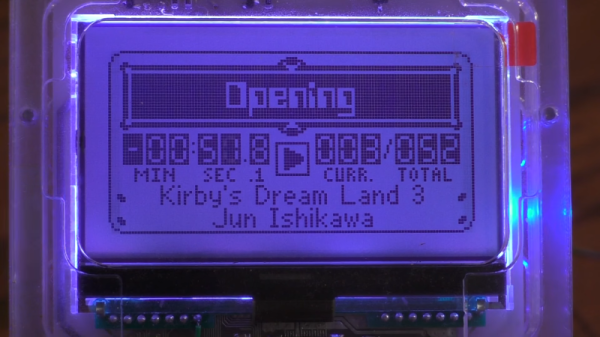
Case design is where this project really shines. Laser cut clear acrylic is combined with a bright LCD character display and some LEDs which create an effect not unlike a glowing magical block from your 90s platformer of choice. It’s combined with some slick capacitive buttons that avoid the need to drill holes for bulky traditional buttons. [kevtris] goes through the case design, showing how it all fits together with a combination of screws and standoffs. Being built out of a series of essentially 2D slices, the case is stacked up one layer at a time.

What really stands out about this project is the fit and finish. There’s plenty of microcontroller and FPGA projects out there that can hum out a tune, but the attention to detail paid to the case design and the neatly laid out PCB really add polish to a project like this. For a different take, why not check out this chiptune player built around a Raspberry Pi?

[Thanks Morris!]

How To Do PCB Art In Eagle

Last month I had the pleasure of creating a new piece of hardware for Tindie. [Jasmine], the queen bee of Tindie, and I designed, developed, and kitted three hundred Tindie badges in ten days leading up to DEF CON. The badges were a complete success, they introduced soldering to a lot of people, and were loved by all.

This badge was such a rousing success, it’s now official Tindie swag. We’ll be handing out a few of these blinky badges at upcoming events. But as of right now we’ve already handed out our entire stock, that means we need to build more. The second run meant ordering a thousand PCBs.

We could just do another run, and order a few more PCBs from the Gerbers I’ve already designed. I’m not really happy with the first version of this badge, though, and this is an opportunity to improve my design. This also gives me an opportunity to demonstrate my workflow for creating artistic boards in Eagle.

Effectively, what I’ll be demonstrating here is the creation of the Benchoff Nickel. A few months ago, [Andrew Sowa] took a portrait of yours truly, changed the colors to what is available on a normal OSHPark PCB, and turned that into different layers in KiCad. There are a few differences here. Firstly, I’ll be using a blue solder mask, although the same technique can be applied to green, red, yellow, white, or black soldermask. Secondly, this is Eagle, and I’m going to do the majority of the work with a BMP import. This is the fast and easy way to do things; if you want a KiCad tutorial, check out [Andrew]’s work, or my overly-involved multiple silkscreen process for KiCad. I don’t recommend this overly-involved process if you can help it. It took 20 hours to do the art for my previous project in KiCad, and I estimate it would have taken two in Eagle.

With that said, here’s the easy, cheap, and fast way of doing artistic boards in Eagle.

Continue reading “How To Do PCB Art In Eagle”

Living In A Storage Locker Undetected For 2 Months

A Vancouver man [007craft], also known as [Michael], posted a video on YouTube about his living in a storage locker to save money for an apartment. The small space meant he had to incorporate quite a few little hacks to make living there comfortable.

While probably illegal and almost certainly against the storage locker’s terms of service, it seems you can live quite well in a storage locker if times get tough. [Michael] lived in a U-haul storage locker which cost him around $160 per month complete with bed, bar, living area and kitchen including running water. He goes on to explain how his first problem was electricity, which he had to obtain from an outlet quite a distance from his unit, To do this he just plugged in a large extension cord and cable tied it to the wall so it didn’t look too out-of-place, while for his water supply he used two water tanks, one each for waste and fresh water. Surprisingly he says he only needed to change them over around once a week from a water fountain. He did manage to live there undiscovered for 2 months by keeping out of sight as much as possible.

The video includes quite a few small hacks which try to make the most of the tiny space available and is well worth a watch even if you aren’t planning on living in a storage unit, so check it out below the break.

Continue reading “Living In A Storage Locker Undetected For 2 Months”

Mouse Mis-Clicking? We Got You.

A mouse with malfunctioning buttons can be a frustrating to deal with — and usually a short leap to percussive maintenance. Standard fixes may not always last due to inferior build quality of the components, or when the microswitch won’t close at all. But, for mice that double/triple-click, will release when dragging, or mis-click on release, this Arduino-based hack may be the good medicine you’re after.

Instructables user [themoreyouknow]’s method cancels click malfunctions by latching the mouse’s controller switch trace to ‘on’ when pressed, keeping it there until the button normally closed contact closes again completely. Due to the confined spaces, you’ll want to use the smallest Arduino you can find, some insulating tape to prevent any shorts, and care to prevent damaging the wires this process adds to the mouse when you cram it all back together.

Before you take [themoreyouknow]’s guide as dogma, the are a few caveats to this hack; they are quick to point out that this won’t work on mice that share two pins between three buttons — without doing it the extra hard way, and that this might be trickier on gaming or other high-end mice, so attempt at your own peril.

Speaking of gaming mice, we recently featured a way to add some extra functionality to your mouse — cheating optional — as well as how to stash a PC inside an old Logitech model.