Surprise Your Loved One With A Heart Keychain

Sometimes the simplest projects can be the most impressive. Most of the time our simple projects are not as neat and elegant as our more time consuming ones. Sometimes they don’t even leave the breadboard! When [Sasa Karanovic] first envisioned his key-chain idea, he knew it would be simple. But he made up for the lack of sophistication with style.

The heart-shaped key-chain has one goal – to flash a pair of red LEDs when a capacitive button is touched. He was able to accomplish this with a PIC12LF1822 and a handful of supporting components. We’re quite impressed with the soldering skills and layout of the PCB. The resistors, LEDs and single capacitor are 0603 surface mount devices, which push the limits of hand soldering. [Sasa] gives a great explanation of how capacitive touch buttons work and how they can be easily incorporated directly into a PCB.

What’s the smallest SMD you’ve soldered? Let us know in the comments, along with what you think about this nifty key-chain.


IoT Garage Door Opener From Scrap

[Hans Nielsen] has a couple roommates, and his garage has become a catch-all for various items. And like any good hacker’s garage, it boasts an IoT controlled garage door opener. It had a problem though, it used a Particle Photon – a popular IoT board that required internet access and a web server to operate. So [Hans] raided his roommate’s spare parts bin and set-forth to rebuild it!

One of his main goals was to make something that did not require internet access to operate. Anyone connected to the local WiFi should be able to open and close the door via a web interface, and he would give our good friend [Linus Torvalds] a call to make it happen. The key component in the build is the C.H.I.P SBC that made the news a while back for being ridiculously cheap.

Be sure to check out [Han’s] blog if you’re at all interested in working with the C.H.I.P. He does a fantastic job of documenting the ins and outs of getting a project like this working.

NodeConf EU Hackable Badge

During conferences, a name-tag is one of the first things people look at when bumping in to others – mentally trying to keep track of faces and names. But gone are the days when your name tag was a post-it stuck on your arm. Over the years, conference badges have become increasingly interesting and complex. Hackable electronic badges are becoming the norm, and not just at hardware cons. For the recently concluded NodeConfEU conference in Ireland, [Gordon Williams], of Espruino fame, designed a JavaScript centric hackable badge.

NodeConf EU is the key Node.js event in Europe, providing a forum for the Node.js community. So when they brain-stormed ideas for a conference badge, they obviously gravitated towards a design that could run JS. [Gordon]’s Puck.js fit the requirements perfectly, and he was tasked with creating a new design based on the Puck.js. The feature list included BlueTooth Low Energy, low power consumption so it could run off a CR2032 battery, a high contrast LCD, some buttons, NFC, and a prototyping area – all packaged in a beautiful hexagonal shaped PCB (obviously) to resemble the Node.js logo. The badges were programmed with attendee names, but the fun, juicy part could be accessed by pressing buttons in the Konami code sequence.

Easy to follow, detailed documentation helped hackers quickly get started with code examples. They were also presented several challenges to work through allowing them to get familiar with the badge. Hacked badges were entered for a Grand Challenge with a chance to win a free ticket to next years conference. The badge hardware and firmware are open source and source files are hosted in a Github repository. Check out a short overview of the badge in the video after the break.

Thanks to [Conor] from nearForm for letting us know about this awesome badge.

Continue reading “NodeConf EU Hackable Badge”

Bluetooth Photo Booth Gets Vetting At Wedding

With just two weeks to go before his friends’ wedding, [gistnoesis] built a well-featured robotic photo booth. Using a Bluetooth PS3 controller, guests could move the camera around, take a picture, style it in one of several ways (or not), and print it out with a single button press.

The camera is mounted on a DIY 2-axis gimbal made from extruded aluminium and 3D-printed parts. It can be moved left/right with one joystick, and up/down with the other. [gistnoesis] set up a four-panel split-screen display that shows the live feed from the camera and a diagram for the controls. The third panel shows the styled picture. Guests could explore the camera roll on the fourth panel.

LINN uses two PCs running Lubuntu, one of which is dedicated to running an open-source neural style transfer program. After someone takes a picture, they can change the style to make it look like a Van Gogh or Picasso before printing it out. A handful of wedding attendees knew about some of the extra features, like manual exposure control and the five-second timer option, and the information spread gradually. Not only was LINN a great conversation piece, it inspired multi-generational collaboration.

Despite the assembled size, LINN packs up nicely into a couple of reusable shopping bags for transport (minus the TV, of course).  This vintage photo booth we saw a few years ago is more of a one-piece solution, although it isn’t as feature-rich.

Continue reading “Bluetooth Photo Booth Gets Vetting At Wedding”

LEDs Give HP 3457A DDM’s LCD Display The Boot

Have you ever been so frustrated with a digital display that you wanted to rip the whole thing out and create a better one? That is exactly what [xi] did. Replacing their constantly used HP 3457A multimeter’s LCD display with a brighter LED one was a necessary project — and a stress reducing one at that.

While this digital multimeter is well-known for its reliability, its standard display is rather lacking. In fact, there are several mods already out there that simply add a backlight. However, as [xi] notes, LCD screens always have a certain angle where they still don’t quite show properly. So this hack reverses the LCD’s protocol and details the process of creating new LED display.

The issue of dim displays that comes with traditional digital multimeters is not a new one. One solution to this that we have seen before is a hack where someone decided to add a backlight onto their cheap multimeter. [Ken Kaarvik] got around the dimness altogether by giving his multimeter a wireless remote display of his choosing. It is interesting to see the different solutions that are made to the same nuisance. The first item on the agenda of [xi]’s hack was to successfully analyze the HP LCD protocol. With the aid of an ATmega32, the digits were decoded throughout the transmission frames.

Continue reading “LEDs Give HP 3457A DDM’s LCD Display The Boot”

The Perils Of Developing The Hackaday Superconference Badge

In case you haven’t heard, the best hardware conference in the world was last weekend. The Hackaday Superconference was three days of hardware hacking, soldering irons, and an epic hardware badge. Throw in two stages for talk, two workshop areas, the amazing hallwaycon and the best, most chill attendees you can imagine, and you have the ultimate hardware conference.

Already we’ve gone over the gory details of what this badge does, and now it’s time to talk about the perils of building large numbers of an electronic conference badge. This is the hardware demoscene, artisanal manufacturing, badgelife, and an exploration of exactly how far you can push a development schedule to get these badges out the door and into the hands of eager badge hackers and con attendees.

The good news is that we succeeded, and did so in time to put a completed badge in the hand of everyone who attended the conference (and we do have a few available if you didn’t make it to the con). Join me after the break to learn what it took to make it all happen and see the time lapse of the final kitting process.

Continue reading “The Perils Of Developing The Hackaday Superconference Badge”

Friday Hack Chat: High Speed Data Acquisition

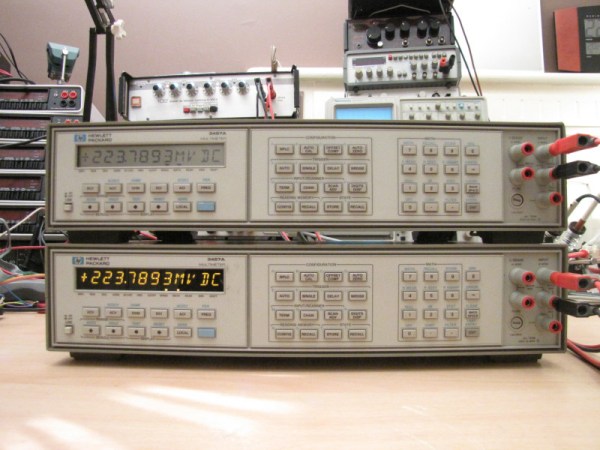
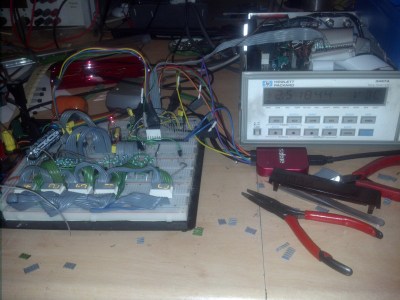
For this week’s Hack Chat, we’re going to be talking all about High-Speed Data Acquisition. If you’ve ever needed to shove voltages, currents, logic signals, temperature, pressure, or sound into a computer, you’ve used a DAQ. If you’ve ever needed to acquire a signal at a very high speed, you’ve probably paid a lot of money for that piece of equipment.

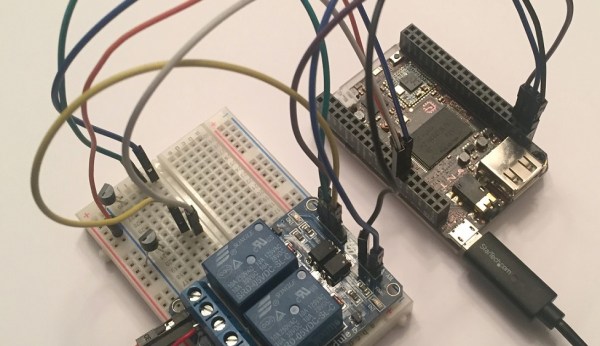
Our guest for this week’s Hack Chat will be [Kumar Abhishek], engineering student, Hackaday Prize finalist, and creator of the very, very cool Beaglelogic, a logic analyzer for the BeagleBone. The interesting bit about the Beaglelogic is its utilization of the Programmable Real-Time Units (PRUs) found in every BeagleBone.

These PRUs are basically DMA machines, shuttling bits back and forth between memory and GPIOs. This year, [Kumar] turned the Beaglelogic cape into the Beaglelogic Standalone, a device based on the Octavo Systems OSD3358 (the ‘BeagleBone On A Chip‘) that gives those Saleae logic analyzers a run for their money.

In this Hack Chat, we’ll be discussing the PRUs found in various iterations of the BeagleBoard, how the Beaglelogic performs its data acquisition, and how programming the PRUs is actually accomplished. If you have a question for [Kumar], leave a comment on the Hack Chat page

join-hack-chatOur Hack Chats are live community events on the Hackaday.io Hack Chat group messaging. Usually, our Hack Chats go down at noon, PDT, Friday. This one is different. Because [Kumar] is in India, we’ll be running this Hack Chat at 9:30a PST, Friday, November 17th. What time is that in India, and what time is that where you live? Who cares! Here’s a time zone converter!

Click that speech bubble to the left, and you’ll be taken directly to the Hack Chat group on Hackaday.io.

You don’t have to wait until Friday; join whenever you want and you can see what the community is talking about.

We’re also looking for new Hack Chat guests! If you’ve built something cool, you’re working on an interesting project, or you’re about to introduce a really cool product, hit us up! Email our wonderful community managers, and we’ll see if we can slot you in.