This ESP32 Pico Wristwatch Has Plenty Of Potential

First hand-built prototype. Nurse! isopropyl alcohol, stat!

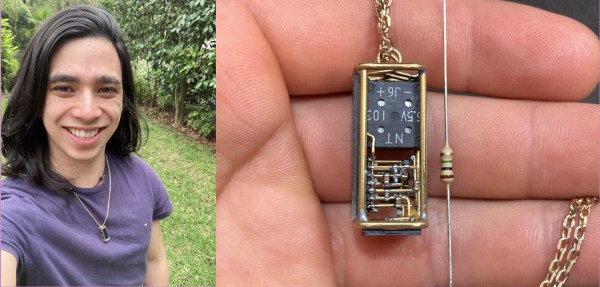
Prolific hacker [Sulfuroid] is a medical doctor by day, and an electronics hobbyist by night, and quite how he finds the time, we have no idea.

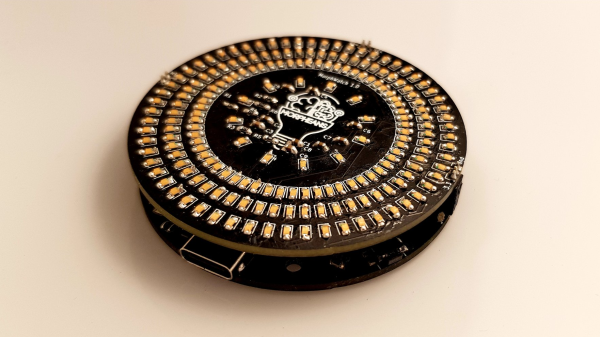
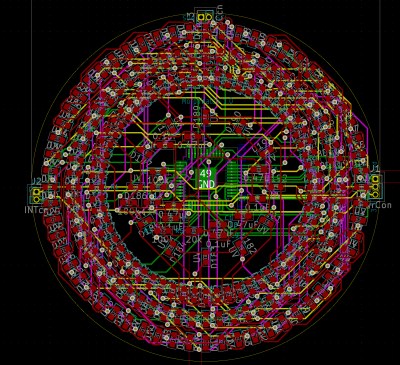
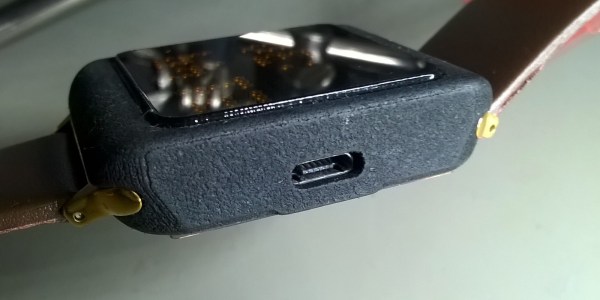
The project we want to highlight is an ESP32 based LED smart watch, which we’ll sure you’ll agree, looks pretty nicely developed so far, and [Sulfuroid] has bigger plans, as you may find, when you dig into the GitHub repo. This analog-style design uses four groups of 0603-sized LEDs, arranged circularly to indicate the passage of time, or anything else you fancy. Since there are four control buttons, a pancake vibration motor, as well as Wi-Fi and Bluetooth, the possibilities are endless.

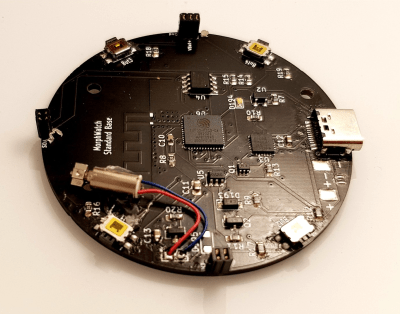
In order to stand a hope of driving those 192 LEDs from a single ESP32-Pico-D4, it was necessary to use a multiplexed LED driver, courtesy of the Lumissil IS31FL3733 device, which can handle arrays up to 12 x 16 devices. This chip is one to remember, since it has some really nice features, such as global current control to reduce CPU overhead, automatic breathing loops for those fancy fade effects, and even includes a handy open/short detection function, so it can report back assembly problems, assisting in reworking your dodgy soldering!

Routing circular arrays is such a pain.

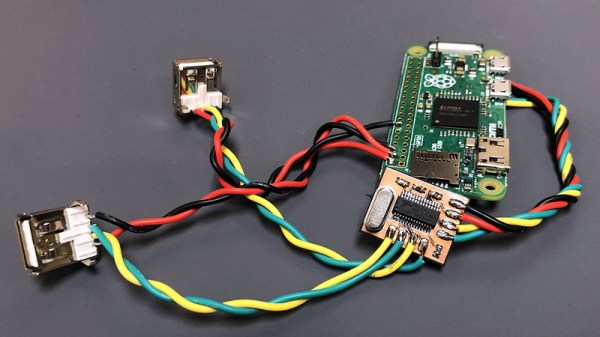
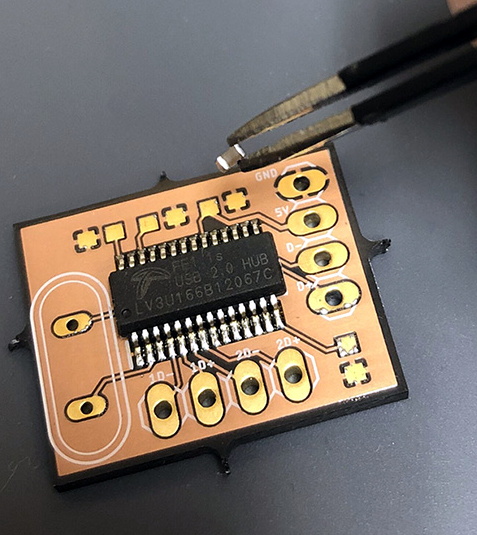
Power and interfacing are taken care of via USB-C, with a TP4054 single Li-Ion cell charger chip handling the battery. This is a Taiwanese clone of the popular LTC4054, but that chip may be a bit hard to get at the moment. There is the common-as-muck CP2104 USB chip dealing with the emulated serial port side of things, since for some reason, the ESP32 still does not support USB. The Pico-D4 does have RTC support, but [Sulfuroid] decided to use a DS3231M RTC chip instead. We noticed the touch functionality wasn’t broken out – that could be added easily in the next revision!

We’ve covered watches a lot, because who doesn’t want custom geek-wear! Here’s a slick one, a fun one with the brains on display, and finally one using charlieplexing to get the component count down.


Solar-powered pendant chirps like a bird.

BEAM Bird Pendant Really Chirps

[NanoRobotGeek] had a single glorious weekend between the end of the term and the start of exams. Did they buy a keg and party it up? No, in fact, quite the opposite — they probably gained a few brain cells by free-form soldering this beautiful chirping bird pendant at 0603 instead.

Three versions of basically the same circuit.The circuit is a standard BEAM project built around a 74HC14, but [NanoRobotGeek] made a few changes to achieve the ideal chirp sound. As you can see in the video after the break, it chirps for around 30 seconds and then shuts off for 1-2 minutes before starting up again.

What is better than a BEAM project? A portable one, we say. Although the chirping would probably get old pretty quickly, there’s just no substitute for working so small that you can carry it around your neck and show it off.

This one is kind of a long time coming, because [NanoRobotGeek] started by breadboarding the circuit and then made a PCB version way back in 2019, which they were attempting to miniaturize with this project. We think they did a fantastic job of it, and the documentation is stellar if you are crazy enough to attempt this one. You will need a lot of blu tack and patience, and pre-tinning is your friend. Be sure to check out the demo after the break.

The name checks out, and this isn’t [NanoRobotGeek]’s first foray into tiny circuit sculpture — just take a look at all we’ve covered.

Continue reading “BEAM Bird Pendant Really Chirps”

A Tiny USB Hub For All Your Hardware Modding Needs

Going all the way hack to the heady days of Eee PC modding, hardware hackers have been on the hunt for small USB hubs that can easily be liberated from their enclosures and integrated into whatever project they happen to be working on. From time to time you see recommendations out there for makes and models which lend themselves to this sort of repurposing, but it’s seemed more difficult than necessary to source such a basic component.

Which is why [RETROCUTION] has developed a USB hub that’s not only extremely small, but relatively easy to assemble with only six components. Plus best of all, they are dirt cheap.

When you add up the cost of getting the PCBs made and buying all the SMD components, the per-unit price of these hubs is only going to be a few dollars. If you’ve got what it takes to make the PCBs in-house, even better. Considering how much easier these things could make other projects, it seems more than worth the upfront cost.

The star of the show is the FE1.1s, a four port USB 2.0 controller in a SSOP-28 package. As of this writing, it goes for about 25 cents from the usual overseas sources (even less, for larger orders). Add to the mix a few 10 μF ceramic capacitors, a 2.7 kΩ resistor, and a 12 MHz crystal.

There’s no provision for actual USB ports in the design, but they would just take up space anyway; this hub is intended to be directly soldered to the other devices. Incidentally, to reduce the number of traces and pads on the PCB, there aren’t power lines for the downstream devices either. So you’ll need to power them separately.

The passives are 0603, but the crystal is a good old fashioned through-hole component. [RETROCUTION] assembles the boards with a solder paste stencil and a hot air station, but if you’ve got a little practice, it’s certainly something you could do with an iron. With such a straightforward design, you could build a lifetime supply of these itty-bitty hubs in an afternoon. That’s certainly our plan, anyway.

Continue reading “A Tiny USB Hub For All Your Hardware Modding Needs”

LED Matrix Watch Is The Smart Watch We Didn’t Know We Wanted

[Mile] put together this stunning LED matrix watch, on which the stars of this show are the 256 monochrome 0603 LEDs arranged in a grid on its face. The matrix is only 1.4in in the diagonal and is driven by a combination of an LED driver and some shift registers. The brain is an ATmega328p. We appreciate the extra effort taken to add a USB to UART adapter so the mega can be programmed over USB. It also contains all the necessary circuitry to charge and maintain the lithium battery inside safely.

Input into the device is done with a hall effect sensor which keeps the build from having any moving parts. The body is a combination of 3D printed parts and really fetching brass details connecting to the band.

If it weren’t over the top enough the build even has an ambient light sensor so the display can dim or brighten depending. We bet [Mile] is pretty proud to wear this on their wrist.

Surprise Your Loved One With A Heart Keychain

Sometimes the simplest projects can be the most impressive. Most of the time our simple projects are not as neat and elegant as our more time consuming ones. Sometimes they don’t even leave the breadboard! When [Sasa Karanovic] first envisioned his key-chain idea, he knew it would be simple. But he made up for the lack of sophistication with style.

The heart-shaped key-chain has one goal – to flash a pair of red LEDs when a capacitive button is touched. He was able to accomplish this with a PIC12LF1822 and a handful of supporting components. We’re quite impressed with the soldering skills and layout of the PCB. The resistors, LEDs and single capacitor are 0603 surface mount devices, which push the limits of hand soldering. [Sasa] gives a great explanation of how capacitive touch buttons work and how they can be easily incorporated directly into a PCB.

What’s the smallest SMD you’ve soldered? Let us know in the comments, along with what you think about this nifty key-chain.


Soldering Challenge To Challenge You

[Rick] knew that the blinking, beeping microcontroller kits that are commonly used for educational soldering workshops just would not cut it for a serious combat among SMD reworking professionals. The “Soldering Challenge” he created to fill this gap is a little PCB with eight difficulty levels from large through hole components to the smallest hand solderable SMDs. After assembly, the circuit assesses the skill level of the soldering aspirant based on a built-in scoring system.

soldering_challenge_ongoingThe challenge is meant to be played on a time limit. There are no two same-sized components of different value, so contestants may focus on soldering fast. Little rubber pads on the backside of the board provide for good ground contact in the curves. After the starting signal, you will be confronted with a few through hole resistors, a capacitor, different LEDs and a DIP-8 IC. Here it’s all about the speed and efficiency as you tackle a track full of bends and cut-off resistor legs. Over the course of the challenge, the components get smaller and smaller, until you finally reach the 0603 level, with a tiny SC-85 MOS-FET and a TSSOP 555 timer at the finishing line.
Continue reading “Soldering Challenge To Challenge You”

Which Resistor Values Should You Order For All Circumstances?

A hard drive crash, and some other happenings that aren’t entirely clear to us, led [Devbisme] to put in a parts order. As he wanted to make the most of his shipping costs, he decided to fill out the order with parts that he’ll use eventually. He’s been working with surface mount designs and wanted to move from using resistors with 0805 packages to the 0603. Having nothing on hand, he devised a way to account for almost all standard values with the fewest number of different resistors.

That’s a mouthful, but what he actually did was figure out what combinations of resistors can best be wired in parallel to achieve a different standard resistance value. This way, if he doesn’t have a specific value he can solder one 0603 surface mount resistor on top of another one to get there. He ended up writing a Python program to best calculate this set of values. It came up with a set that lets him synthesize 159 of the 168 standard resistor values within +/- 4% using just 19 actual resistor values. His method requires anywhere from one to three resistors to get to each value. Soldering three 0603 packages on top of each other might not be the most fun, but it makes for easy parts inventory management.