fastener counter

Fastener Fusion: Automating The Art Of Counting

Counting objects is an ideal task for automation, and when focusing on a single type of object, there are many effective solutions. But what if you need to count hundreds of different objects? That’s the challenge [Christopher] tackled with his latest addition to his impressive automation projects. (Video, embedded below.)

[Christopher] has released a series of videos showcasing a containerized counting system for various fasteners, available on his YouTube channel. Previously, he built remarkable devices to count and sort fastener hardware for automated packaging, but those systems were designed for a single fastener type. He effectively highlights the vast complexity of the fastener ecosystem, where each diameter has dozens of lengths, multiple finishes, various head shapes, and more.

To address this, he developed a machine that accepts standardized containers of fastener hardware. These uniform boxes can hold anything from a small M2 countersunk screw to a large M8 cap head bolt and everything in between. To identify the loaded box and determine the appropriate operations, the machine features an RFID reader that scans each box’s unique tag.

Once a box is loaded, the machine tilts it to begin counting fasteners using a clever combination of moving platforms, an optical sensor, and gravity. A shelf first pushes a random number of fasteners onto an adjustable ledge. A second moving platform then sweeps excess fasteners off, leaving only those properly aligned. It’s no surprise this system has nine degrees of freedom. The ledge then moves into view of a sensor from a flatbed scanner, which detects object locations with an impressive 0.04 mm resolution across its length—remarkable for such an affordable sensor. At this point, the system knows how many fasteners are on the ledge. If the count exceeds the desired number, a sloped opening allows the ledge to lift just high enough to release the correct amount, ensuring precision.

The ingenuity continues after the initial count. A secondary counting method uses weight, with a load cell connected to the bin where fasteners drop. A clever over-center mechanism decouples the tilting system from the load cell to ensure accurate readings. We love automation projects, and this one incorporates so many ingenious design elements that it’s sure to inspire others for their future endeavors.

Continue reading “Fastener Fusion: Automating The Art Of Counting”

Origami assembly line.

Building An Assembly Line For Origami Pigeons

When it comes to hacks, the best ones go to extremes. Either beautiful in their simplicity, or magnificent in their excess. And, well, today’s hack is the latter: excessive. [HTX Studio] built an assembly line for origami pigeons!

One can imagine the planning process went something like this:

  1. Make origami pigeon assembly line
  2. ?
  3. Profit

But whatever the motivation, this is an impressive and obviously very well engineered machine. Even the lighting is well considered. It’s almost as if it were made for show…

Now, any self-respecting nerd should know the difference between throughput and latency. From what we could glean from the video, the latency through this assembly line is in the order of 50 seconds. Conservatively it could probably have say 5 birds in progress at a time. So let’s say every 10 seconds we have one origami pigeon off the assembly line. This is a machine and not a person so it can operate twenty four hours a day, save downtime for repairs and maintenance, call it 20 hours per day. We could probably expect more than 7,000 paper pigeons out of this machine every day. Let’s hope they’ve got a buyer lined up for all these birds.

If you’re interested in assembly lines maybe we could interest you in a 6DOF robotic arm, or if the origami is what caught your eye, check out the illuminating, tubular, or self-folding kind!

Continue reading “Building An Assembly Line For Origami Pigeons”

3D Printing A Bottle Labeling Assembly Line

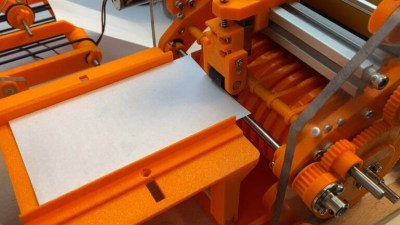
We’re not completely sure why [Fraens] needs to label so many glass bottles at home. Perhaps he’s brewing his own beer, or making jams. Whatever the reason is, it was justification enough to build an absolutely incredible labeling machine that you could mistake for a piece of industrial gear…if it wasn’t for the fact that majority of the device is constructed out of orange 3D printed plastic.

As we’ve come to expect, [Fraens] has documented the build with a detailed write-up on his site — but in this case, you’ve really got to watch the video below to truly appreciate how intricate the operation of this machine is. Watching it reminded us of an episode of How It’s Made, with the added bonus that you not only get to see how the machine functions, but how it was built in the first place.

Nearly every part of the machine, outside the fasteners, smooth rods, a couple of acrylic panels, and a few sections of aluminum extrusion, were 3D printed. You might think this would result in a wobbly machine with sloppy tolerances, but [Fraens] is truly a master of knowing when and where you can get away with using printed parts. So for example, while the glue rollers could be done in printed plastic, they still needed metal rods run through the middle for strength and proper bearings to rotate on.

Looking at the totality of this build, it’s hard to imagine how it could have been accomplished via traditional methods. Sure you could have sourced the rollers and gears from a supplier to save some plastic (at an added expense, no doubt), but there’s so many unique components that simply needed to be fabricated. For example, all the guides that keep the label heading in the right direction through the mechanism, or the interchangeable collars which let you select the pattern of glue which is to be applied. Maybe if you had a whole machine shop at your disposal, but that’s a lot more expensive and complex a proposition than the pair of desktop 3D printers [Fraens] used to crank out this masterpiece.

If the name (and penchant for orange plastic) seems familiar, it’s because we’ve featured several builds from [Fraens] in the past. This one may be the most technically impressive so far, but that doesn’t diminish the brilliance of his vibratory rock tumbler or cigarette stuffing machine.

Continue reading “3D Printing A Bottle Labeling Assembly Line”

Retrotechtacular: Philips Factory Tour, Circa 1930s

If you’ve got a half-hour or so to spare, you could do worse than this video trip through a Philips factory in the 1930s.

The film is presented without narration, but from the Dutch title cards and the fact that it’s Philips, we gather that this factory of gigantic proportions was somewhere in the Netherlands. In any case, it looks like something right out of [Fritz Lang]’s Metropolis and turned the rawest of materials into finished consumer products.

Much of the film focuses on the making of vacuum tubes; the sheer physicality of the job is what really stands out here. The upper body strength that the glassblowers had to have boggles the mind. Check out the chops — and the soon-to-be very unfashionable mustache — on the glassblower at the 12:00 mark. And it wasn’t just the gents who had mad skills — the fine motor control needed for the delicate assembly of the innards of the tubes, which seems to be mostly staffed by women, is just as impressive. We were also surprised by the amount these manual crafts were assisted by automated systems.

Especially interesting is the section where they build the luidspreker. Without narration or captions, it’s a little hard to tell what’s going on, but it appears that they used an enormous press to form chips of Bakelite into sleek covers for the speakers, which themselves are super-chunky affairs made from scratch in the factory. We’re also treated to assembly of the radios, packaging of finished products, and a group of dockworkers who clearly didn’t read the “Fragile” labels pasted on the boxes.

One can’t help but wonder if these people had the slightest inkling of what was about to sweep over them and the rest of the world. And if they did, would they even begin to comprehend how much the very products that they were making would contribute to both the slaughter of the coming war as well as to the sparing of so many lives? Likely not, but the film is still an interesting glimpse into the creation of an industry, one that relied very much on craftsmanship to get it started.

Continue reading “Retrotechtacular: Philips Factory Tour, Circa 1930s”

Robots With A Delicate Touch Assemble PlayStation 4

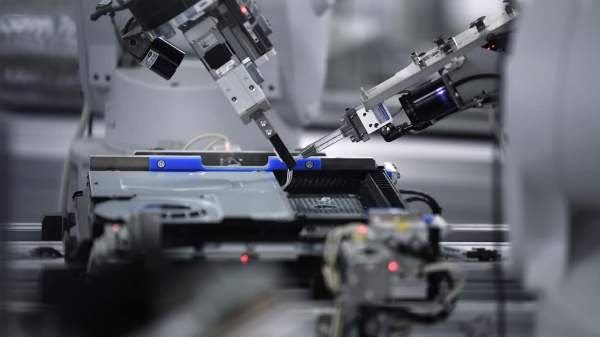
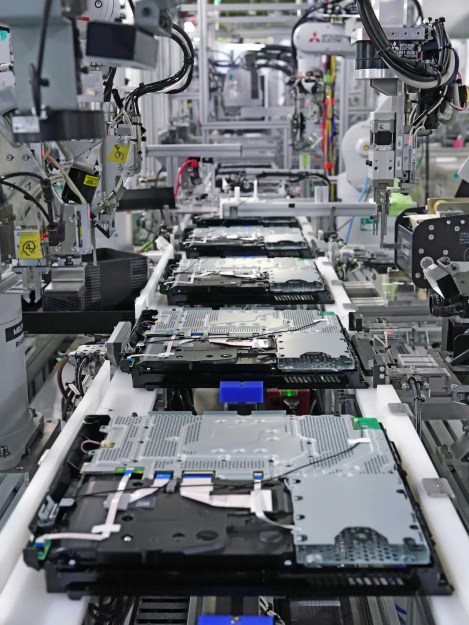
Sony’s video game division is gearing up for their upcoming PlayStation 5, pushing its predecessor PlayStation 4 off the spotlit pedestal. One effect of this change is Sony ever so slightly relaxing secrecy surrounding the PS4, allowing [Nikkei Asian Review] inside a PlayStation 4 final assembly line.

This article was written to support Sony and PlayStation branding for a general audience, thus technical details are few and far in between. This shouldn’t be a huge surprise given how details of mass production can be a competitive advantage and usually kept as trade secrets by people who knew to keep their mouths shut. Even so, we get a few interesting details accompanied by many quality pictures. Giving us a glimpse into an area that was formerly off-limits to many Sony employees never mind external cameras.

The quoted engineers are proud of their success coaxing robots to assemble soft and flexible objects, and rightly so. Generally speaking robots have a hard time handling non-rigid objects, but this team has found ways to let their robots handle the trickier parts of PS4 assembly. Pick up wiring bundles and flat ribbon cables, then plug them into circuit board connectors with appropriate force. Today’s automated process is the result of a lot of engineers continually evolving and refining the system. The assembly machines are covered with signs of those minds at work. From sharpie markers designating positive and negative travel directions for an axis, to reminders written on Post-It notes, to assembly jig parts showing the distinct layer lines of 3D printing.

We love seeing the result of all that hard work, but lament the many interesting stories still untold. We would have loved a video showing the robots in action. For that, the record holder is still Valve who provided an awesome look at the assembly of the Steam Controller that included a timelapse of the assembly line itself being assembled. If you missed that the first time, around, go watch it right now!

At least we know how to start with the foundations: everything we see on this PS4 assembly line is bolted to an aluminum extrusion big or small. These building blocks are useful whether we are building a personal project or a video console final assembly line, so we’ve looked into how they are made and how to combine them with 3D printing for ultimate versatility.

[via Adafruit]

Parallel Pis For Production Programming; Cutting Minutes And Dollars Off Of Assembly

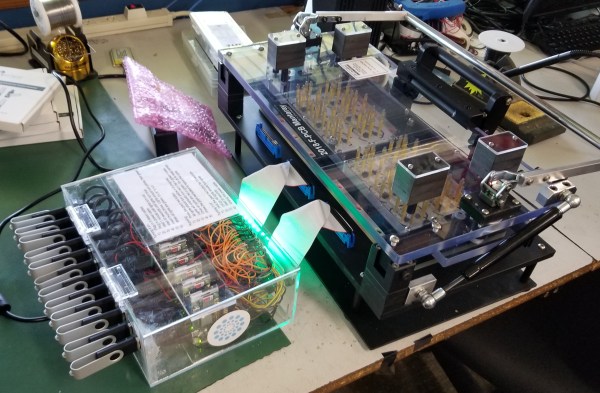
Assembly lines for electronics products are complicated beasts, often composed of many custom tools and fixtures. Typically a microcontroller must be programmed with firmware, and the circuit board tested before assembly into the enclosure, followed by functional testing afterwards before putting it in a box. These test platforms can be very expensive, easily into the tens of thousands of dollars. Instead, this project uses a set of 12 Raspberry Pi Zero Ws in parallel to program, test, and configure up to 12 units at once before moving on to the next stage in assembly.

Continue reading “Parallel Pis For Production Programming; Cutting Minutes And Dollars Off Of Assembly”

Behind The Scenes Of The 2019 Superconference Badge

If you count yourself among the several hundred of our closest friends that have joined us at Supplyframe HQ for the 2019 Hackaday Superconference, then by now you’ll have your hands on one of this year’s incredible FPGA badges. It should come as no surprise that an incredible amount of time and effort went into developing and manufacturing this exceptionally unique piece of hardware; the slick gadget in your hands today took nearly an entire year to develop, and work continued on it until very literally the last possible moment.

Badge designer Jeroen Domburg (aka Sprite_TM), Hackaday staff, and a team of dedicated volunteers were still putting the final touches on these ambitious devices less than 24 hours before they were distributed to the first wave of Superconference attendees. Naturally, that’s not exactly how things were supposed to go. But when you’ve got a group of people that want to push the envelope and build something truly incredible, convincing them to actually stop working can be a challenge in itself.

In fact, development of the badge is still ongoing. Fixes and improvements are being made to the software even as you read this, and if you haven’t already, you should upgrade your badge to make sure you’ve got the latest and greatest from our international team of wizards. We all know that conference badges have an unfortunate habit of languishing on the shelf and collecting dust, but the 2019 Superconference badge was built to challenge you for longer than just one weekend. Consider yourself warned: for every Supercon badge that gets tossed in a drawer come Monday, Sprite_TM will shed a single tear.

After the break, come along as we turn back the clock and take a look at the last minute dash to get 500+ badges programmed and ready to go before the doors opened for the 2019 Hackaday Superconference.

Continue reading “Behind The Scenes Of The 2019 Superconference Badge”