$13 Scope And Logic Analyzer Hits 18 Msps

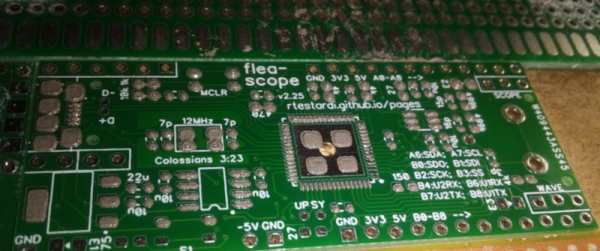
We aren’t sure what’s coolest about [Richard Testardi’s] Flea-Scope. It costs about $13 plus the cost of making the PCB. It operates at 18 million samples per second. It also doesn’t need any software — you connect to it with your browser! It works as an oscilloscope, a logic analyzer, and a waveform generator. Not bad. The board is basically a little life support around a PIC32MK and the software required to run it.

Of course, for $13, you need to temper your expectations. One analog input reads from -6 to 6V (hint: use a 10X probe). The goal was for the instrument to be accurate within 2%.  There are also nine digital inputs sampled simultaneously with the analog sampling. The signal generator portion can output a 4 MHz square wave or a 40 kHz arbitrary waveform.

Continue reading “$13 Scope And Logic Analyzer Hits 18 Msps”

Hacking A PIC To Redefine A Microphone’s Transmit Frequency

Software defined radio and widespread software-controlled PLL synthesis for RF has been a game changer. Things like the RTL-SDR can be any kind of radio you like on almost any frequency you like. But not every SDR or PLL system opens the configuration doors to you, the end user. That was the problem [vgnotepad] faced when trying to connect a Sennheiser wireless microphone to some receivers. They didn’t use the same frequencies, even though the transmitter was programmable. The solution to that is obvious — hack the transmitter!

The post is only part one of several parts and if you read to the end, you’ll learn a lot about what’s inside the device and how to crack it. Luckily, the device uses a PIC processor, so getting to the software wasn’t a big issue.

Continue reading “Hacking A PIC To Redefine A Microphone’s Transmit Frequency”

Supercon Badge Hardware Hacking: Here’s What To Bring

Hackaday Superconference is just a week away (precious few tickets remain), a celebration of all things Hackaday, which naturally includes creative projects making the most of their hardware. Every attendee gets a platform for hacking in the form of the conference badge.

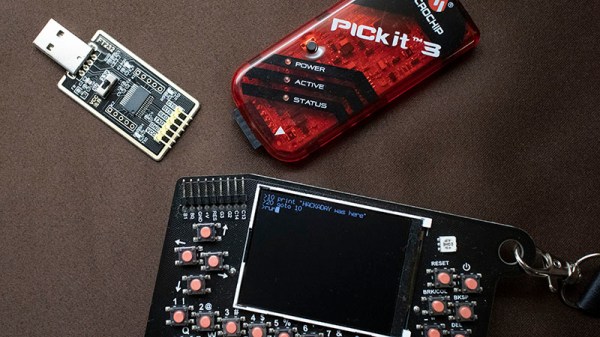
To make the most of your badge hacking fun, plan ahead so you will have the extra components and the tools you need. At the most basic, bring along a serial to USB cable and a PIC programmer. These are common and if you don’t own them, ask around and you will likely be able to borrow them. Now is also the time to put in a parts order for any components you want to use but don’t have on hand!

The badge is hackable without any extras, but it’s designed for adding hardware and hacking the firmware. We’re excited to see what you can do with it. We gave an overview of this retro themed pocket computer a few days ago, today we’re inviting you to exploit its potential for your hardware hacks.

Continue reading “Supercon Badge Hardware Hacking: Here’s What To Bring”

Surprise Your Loved One With A Heart Keychain

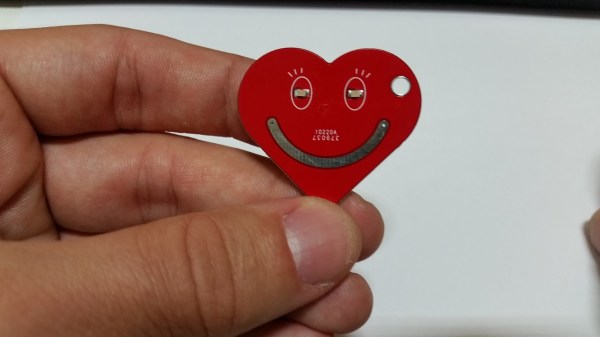
Sometimes the simplest projects can be the most impressive. Most of the time our simple projects are not as neat and elegant as our more time consuming ones. Sometimes they don’t even leave the breadboard! When [Sasa Karanovic] first envisioned his key-chain idea, he knew it would be simple. But he made up for the lack of sophistication with style.

The heart-shaped key-chain has one goal – to flash a pair of red LEDs when a capacitive button is touched. He was able to accomplish this with a PIC12LF1822 and a handful of supporting components. We’re quite impressed with the soldering skills and layout of the PCB. The resistors, LEDs and single capacitor are 0603 surface mount devices, which push the limits of hand soldering. [Sasa] gives a great explanation of how capacitive touch buttons work and how they can be easily incorporated directly into a PCB.

What’s the smallest SMD you’ve soldered? Let us know in the comments, along with what you think about this nifty key-chain.


Arduino With A… PIC?

Before the Arduino took over the hobby market (well, at least the 8-bit segment of it), most hackers used PIC processors. They were cheap, easy to program, had a good toolchain, and were at the heart of the Basic Stamp, which was the gateway drug for many microcontroller developers.

[AXR AMR] has been working with the Pinguino, an Arduino processor based on a PIC (granted, an 18F PIC, although you can also use a 32-bit device, too). He shows you how to build a compatible circuit on a breadboard with about a dozen parts. The PIC has built-in USB. Once you flash the right bootloader, you don’t need anything other than a USB cable to program. You can see a video of this below.

You will need a programmer to get the initial bootloader, but there’s plenty of cheap options for that. The IDE is available for Windows, Linux, and the Mac. Of course, you might wonder why you would use a PIC device instead of the more traditional Arduino devices. The answer is: it depends. Every chip has its own set of plusses and minuses from power consumption to I/O devices, to availability and price. These chips might suit you, and they might not. That’s your call.  Of course, the difference between Microchip and Atmel has gotten less lately, too.

We’ve covered Pinguino before with a dedicated board. If you never played with a Basic Stamp, you might enjoy learning more about it. If you’re looking for more power than a PIC 18F can handle, you might consider the Fubarino, a PIC32 board you can use with the Arduino IDE.

Continue reading “Arduino With A… PIC?”

Christmas Star Uses Two AA Batteries

When [hkdcsf] was a teenager, he made a Christmas star with an up counter driving decoder logic and using transistors to light LEDs in festive patterns. He’s revisited this project using modern techniques including a microcontroller, a DC/DC converter, and constant current LED drivers.

The project uses two AA batteries, and that’s what makes the DC/DC converter necessary. Blue LEDs have a forward voltage of just over 3V, and the LED driver chip requires about 0.6V of overhead. Two fresh AAs will run a tad above 3V, but as they discharge, or if he’s using rechargeables, there just won’t be enough potential. To make sure the star works even with whatever LEDs are chosen, the converter takes the nominal 3V from the batteries and converts it to 3.71V.

Continue reading “Christmas Star Uses Two AA Batteries”

Wii MotionPlus Gyro To Microchip PIC

Sometimes the most mundane products have surprisingly sophisticated internals. What’s in a game controller? If it is a Wii remote, you’ll find a lot inside–an IR sensor, Bluetooth, an accelerometer, and EEPROM. It also has a six pin expansion port that allows I2C peripherals connect to the controller.

[DotMusclera] wanted to experiment with a gyroscope and decided to hook up to the Wii MotionPlus to a Microchip PIC. Using information from the WiiBrew wiki, [DotMusclera] connected a PIC18F4550, an LCD, and a handful of components (mostly to do 3.3V level conversion), he set up the hardware on a breadboard. The only odd part you might have to work around is a Wii breakout board that converts from the breadboard to the Wii interface.

The software is easy to follow since it is written in Hi-TECH C and well-commented. The hardware lacks a schematic, but from the parts list and the video, you can probably figure it out. The setup works well and shows roll, pitch, and yaw on the LCD screen.

The project log is very detailed, with a lot of information about gyroscopes and the communication format the gyro uses. The video demo is worth watching as well.

Continue reading “Wii MotionPlus Gyro To Microchip PIC”