Hackaday editors Elliot Williams and Mike Szczys chew the fat over the coolest of hacks. It’s hard to beat two fascinating old-tech demonstraters; one is a mechanical IBM computer for accurate cheese apportionment, the other an Analog-to-Digital Converter (ADC) built from logic chips. We gawk two very different uses of propeller-based vehicles; one a flying-walker, the other a ground-effect coaster. Big news shared at the top of the show is that Keith Thorne of LIGO is going to present a keynote at Hackaday Remoticon. And we wrap the episode talking about brighter skies from a glut of satellites and what the world would look like if one charging cable truly ruled all smartphones.
Take a look at the links below if you want to follow along, and as always, tell us what you think about this episode in the comments!
Want to make a t-shirt with a custom design printed on it? It’s possible to use a 3D printer, and Prusa Research have a well-documented blog post and video detailing two different ways to use 3D printing to create colorful t-shirt designs. One method uses a thin 3D print as an iron-on, the other prints directly onto the fabric. It turns out that a very thin PLA print makes a dandy iron-on that can survive a few washes before peeling, but printing flexible filament directly onto the fabric — while more complicated — yields a much more permanent result. Not sure how to turn a graphic into a 3D printable model in the first place? No problem, they cover that as well.
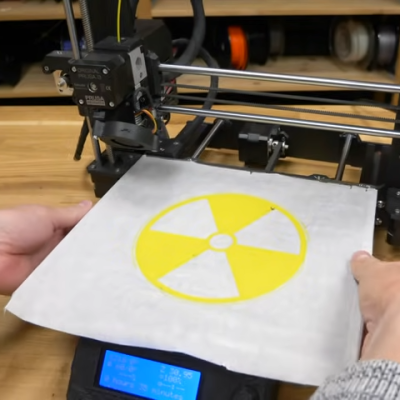
Making an iron-on is fairly straightforward, and the method can be adapted to just about any printer type. One simply secures a sheet of baking paper (better known as parchment paper in North America) to the print bed with some binder clips, then applies glue stick so that the print can adhere. A one- or two-layer thick 3D print will stick to the sheet, which can then be laid print-side down onto a t-shirt and transferred to the fabric by ironing it at maximum temperature. PLA seems to work best for iron-ons, as it preserves details better. The results look good, and the method is fairly simple.
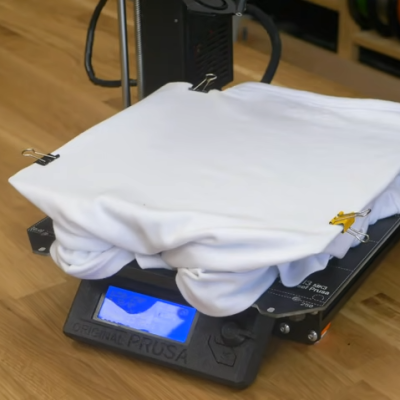
Direct printing to the fabric with flexible filament can yield much better (and more permanent) results, but the process is more involved and requires 3D printing a raised bed adapter for a Prusa printer, and fiddling quite a few print settings. But the results speak for themselves: printed designs look sharp and won’t come loose even after multiple washings. So be certain to have a few old shirts around for practice, because mistakes can’t be undone.
A very thin 3D print makes a decent iron-on that survives a few washes.
A 3D-printed bed adapter enables direct printing onto fabric for better results.
That 3D printers can be used to embed designs directly onto fabric is something many have known for years, but it’s always nice to see a process not just demonstrated as a concept, but documented as a step-by-step workflow. A video demonstration of everything, from turning a graphic into a 3D model to printing on a t-shirt with both methods is all in the short video embedded below, so give it a watch.
Apache 2.4.50 included a fix for CVE-2021-41773. It has since been discovered that this fix was incomplete, and this version is vulnerable to a permutation of the same vulnerability. 2.4.51 is now available, and should properly fix the vulnerability.
The original exploit used .%2e/ as the magic payload, which is using URL encoding to sneak the extra dot symbol through as part of the path. The new workaround uses .%%32%65/. This looks a bit weird, but makes sense when you decode it. URL encoding uses UTF-8, and so %32 decodes to 2, and %65 to e. Familiar? Yep, it’s just the original vulnerability with a second layer of URL encoding. This has the same requirements as the first iteration, cgi-bin has to be enabled for code execution, and require all denied has to be disabled in the configuration files. Continue reading “This Week In Security: The Apache Fix Miss, Github (Malicious) Actions, And Shooting The Messenger”→
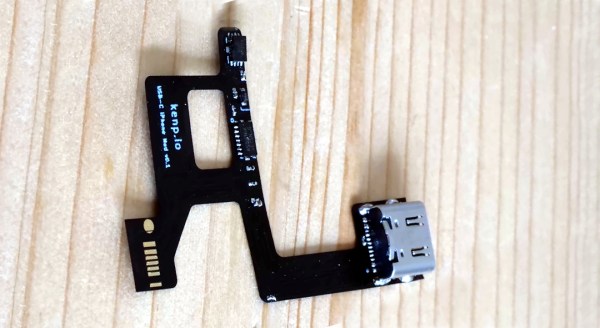
Apple iPhones ship with the company’s Lightning cable, a capable and robust connector, but one that’s not cheap and is only useful for the company’s products. When the competition had only micro-USB it might have made sense, but now that basically all new non-fruity phones ship with USB-C, that’s probably the right way to go.
We’re a bit hazy on the individual iPhone model involves, but the essence of the work involves taking the internals of a Lightning-to-USB-C cable and hooking it up to the phone’s internal Lightning port. The proof-of-concept does it by putting the Apple flexible PCB outside the phone and plugging the cable part in directly, but it seems his final work involves a custom flexible board on which the reverse-engineered USB-C converter parts are mounted along with the USB-C socket itself. We see a glimpse of machining the slot in the phone’s case to USB-C dimensions, and we can’t wait for the full second installment.
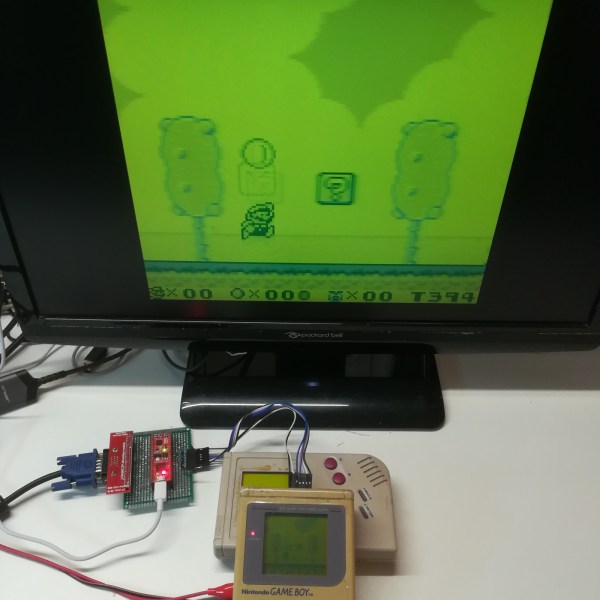
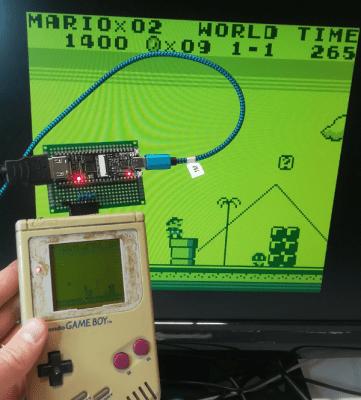
The classic Game Boy remains a firm favorite in the realm of retrocomputing. Revolutionary as it was at the time, by today’s standards its display is rather primitive, with no backlight and a usable area measuring only 47 mm x 44 mm. [Martoni] figured out a way to solve this, by developing GbVGA and GbHdmi, two projects that enable the Game Boy to connect to an external monitor. This way, you can play Super Mario Land without straining your eyes, and we can also image potential uses for those who stream their gameplay online.
Getting the image data out of the Game Boy is surprisingly straightforward, and has been done a few times before. Basically, the connection between the CPU and the LCD screen is a serial interface with a 4 MHz clock, two data lines and two sync lines. [Martoni] uses pin headers sticking out of the Game Boy’s plastic case to connect these to a small FPGA board. The board in question is a Fireant for the VGA version and a Tang Nano 4K for the HMDI model. In either case the FPGA reads out each frame from the Game Boy’s LCD interface and draws the extracted image onto the monitor, using the same four shades of green as used on the original screen.
[Martoni] states that the ultimate goal of these projects is to make a Switch-like docking station for the original Game Boy, which is definitely something we’re looking forward to. Although adding external monitors to the Game Boy is not entirely new, we like the simplicity of this implementation and the fact that anyone can improve upon it thanks to the full source code being available. Similar hacks have been performed on the newer Game Boy Pocket and Game Boy Advance as well.


 Getting the image data out of the Game Boy is surprisingly straightforward, and


