Prusa’s Official Enclosure Pulls Out All The Stops

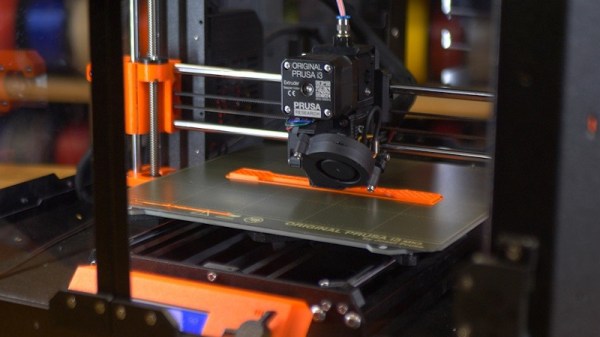
It’s well known in the desktop 3D printing world that you get what you pay for. If you want to spend under $300 USD, you get a Creality Ender 3 and deal with its slightly half-baked nature. Or if you’ve got the money to burn, you buy a Prusa i3 MK3 and know that you’ll remain on the cutting edge thanks to a constantly evolving slicer and regular hardware revisions.

Now it stands to reason that an expensive product will have expensive accessories, but even still, the recently unveiled “Original Prusa Enclosure” is sure to induce a bit of sticker shock in even the most ardent of [Josef Průša]’s fans — the most bare-bones configuration of the 10 kg (22 lbs) box rings up at $349 USD. You read that right, just the enclosure for Prusa’s flagship machine costs more than the average Chinese 3D printer. In fact it costs as much as the kit version of the Prusa Mini, which incidentally, is set to get its own version of the enclosure sometime in the future. If you select all the bells and whistles, a fully-decked out Prusa Enclosure will cost you $700 USD, plus shipping.

Continue reading “Prusa’s Official Enclosure Pulls Out All The Stops”

Reviving A 1974 Sinclair Scientific Calculator

When a treasure of retrotechnology fails to work, the natural next step is to have a go at repairing it. [Adam Wilson] found himself in this position when he acquired a 1974 Sinclair Cambridge Scientific calculator, and his progress with the device makes for an interesting read.

First up is something of value to all old Sinclair enthusiasts, he’s found a solution to the original battery connectors being prone to failure. A couple of parts stocked by RS can be used as replacements, which should save quite a lot of Sinclairs with crusty connectors.

Saving the connectors should have fixed the calculator, but only served to reveal that it had an electronic fault. Some detective work traced this to the power supply, which is a small switching circuit. The 1974 chip and associated coil had both failed, which rather drew the project to a halt. A second repair-or-spares Cambridge Scientific was sourced, and by good luck it happened to have a working PCB. So [Adam] got a working calculator, and we hope he’ll succumb to the temptation to shoehorn in a PSU from 2022 to get the other one working.

Anyone curious about this slightly unusual calculator should take a look at our teardown of one.

3D printed fish leaping through waves

A Crazy Wave Automaton

[Henk Rijckhaert] recently participated in a “secret Santa” gift exchange. In a secret Santa, everyone’s name goes in a hat, and each person must pick a name without looking. Each gives a gift to the person whose name they drew.

Henk needed a gift for Amy, a friend who loves the water and water sports as well as maker-y things.  So he built her a wave automaton — a sea wave and fishies, and documented the build in this video.

The build is mostly plywood and 3D printed parts. We have to  think reprising it in a nice wood and brass would make a lovely project for a hobby wood and metalworker.

The bulk of the project is 30 plywood boards stacked up with spacers. Each board is mounted with a 3D printed stepped bushing on one end that rides in a horizontal slot. On the other end is a 3D printed eccentric riding in an oversized (about 5cm) hole. So the board moves in a circle at one end and back and forth at the other for a very nice simulation of an ocean wave. Continue reading “A Crazy Wave Automaton”

Creating An Image Format For Embedded Hardware

Whether its one of those ubiquitous little OLED displays or a proper LCD panel, once you’ve got something a bit more capable than the classic 16×2 character LCD wired up to your microcontroller, there’s an excellent chance you’ll want to start displaying some proper images. Generally speaking that means you’ll be working with bitmap files, but as you might expect when pushing a decades-old file format into an application it was never intended for, things can get a little messy. Which is why [gfcwfzkm] has created the Portable Image File (PIF) format.

This low-overhead image format is designed specifically for microcontrollers, and can be decoded on devices with at least 60 bytes of free RAM. Images stored with PIF not only require fewer computational resources to process, but equally important, take up less space on flash. The format supports both color and monochrome images, and the GitHub repo even includes a graphical Python 3.10 tool that lets you convert your images to either .pif files or a .h header file for embedding directly into your C code.

[gfcwfzkm] has provided some source code to show you how to get the PIF library up and running, but as of the time of this writing, there isn’t any example code for using PIF within the Arduino environment. That’s no big deal for the old hands in the audience, but we’re interested in seeing how the community can make use of this file format once it’s available in a bit more beginner-friendly package. It’s one of the final unchecked items on the todo list though, so it shouldn’t be long now.

Of course nothing is wrong with using bitmaps to display images in your microcontroller projects, and there’s a certain advantage to fiddling around with the well-known image format. But if a new file type is all it takes to speed up access times and cram a few more images onto the chip, we’re definitely ready to upgrade.

Free Your Pi With This Bare Metal Programming Environment

[Rene Strange] has graced these fair pages a short while ago with a sweet Raspberry Pi software based poly synth, with a tantalising reference to it being a bare metal application. So now, we’ll look into circle, the bare metal programming environment that it is based upon. The platform consists of a large set of C++ classes to access the hardware as well as perform tasks such as task creation and scheduling in the cooperative multitasking, multicore environment. Supporting all Raspberry Pi boards from version 2 onwards (not including the Pico!) in both 32-bit and 64-bit flavours, the environment is pretty complete. Classes are provided for USB, networking, FatFS, as well as more mundane tasks such as dealing with interrupts. On top of these classes there are a pile of application-specific libraries, covering functions such as display interfacing, GUIs using a variety of frameworks, and some more esoteric applications such as interfacing to a Pico, and even sending the system log to a remote web browser!

Classes and libraries however, don’t always help by themselves, which is where the 42 (yes, we know) code examples come in very handy. They’ve provided example applications for some fun stuff like drawing Mandelbrot fractals to the display, as well as some more mundane tasks that we have to deal with such as getting that pesky DMA controller to play nice with the SPI hardware. All-in-all, this looks like a great set of tools for taking full advantage of some fairly beefy hardware for your next embedded project that needs plenty of resources, but not all that unnecessary operating system stuff.

Perhaps not quite as complete as circle, but we’ve seen a fair few Raspberry Pi Bare metal projects over the years, like the Nerdsynth, based on the PiZero, and this neat little bare metal assembly language clone of starfox.

Thanks [Ruhan] for the tip!

Header: Aryan Patidar, CC BY 4.0/Evan-Amos, Public domain.

Web Emulator For The Kenbak-1 Computer (If You’ve Heard Of It)

Ever heard of the KENBAK-1? Recognized as the first personal computer, created by John Blankenbaker and sold in 1971 in comparatively small numbers, it’s now a piece of history. But don’t let that stop you if you are curious, because of course there is an emulator on the web.

If the machine looks a bit strange, that’s because early computers of this type did not have the kind of controls (or displays) most people would recognize today. Inputs were buttons and switches, and outputs were lights showing binary values of register contents. The machine could store and run programs, and those programs were entered in pure machine code (no compiler, in other words) by setting individual bit values via the switches. In fact, the KENBAK-1’s invention preceded that of the microprocessor.

The KENBAK was the first electronic, commercially available computer that was not a kit and available to the general population, but the story of how it came to be is interesting. Back in 2016 we covered how that story was shared by John Blankenbaker himself at Vintage Computer Festival East.

Reflecting On A Queueing Prism Leads To Unexpected Results

Computers are difficult enough to reason about when there’s just a single thread doing one task. There are dozens of cores in today’s modern processor world, and your program might try to take advantage of using more than just one. Things happening concurrently makes the number of states and interactions explode in to a mess we as humans are likely going to have trouble understanding. So, like [Hillel], you might turn to the computer to try and model those interactions.

The model in question is a task queue. Things are added to the pile, and “workers” grab one from the pile and process it. There are two metrics used to measure the effectiveness of a task queue: throughput and latency. Throughput is the number of things you can do per second (like this maximum throughput 3d printer), while latency is the amount of time it takes to finish one thing. Continue reading “Reflecting On A Queueing Prism Leads To Unexpected Results”