In three words, Hackers love clocks. Not only do we think that digital watches are still a pretty neat idea, we love all manner of timepieces. This episode of The Hacklet focuses on the clock projects we’ve found over on Hackaday.io.
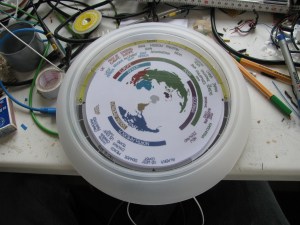 We start with [rawe] and [tabascoeye], who both put the famous XKCD “now” clock into hardware. [tabascoeye] used a stepper motor in his xkcd world clock. [rawe] didn’t have any steppers handy, so he grabbed a cheap wall clock from Ikea for his xkcd.com/now clock in hardware. The now clock needs a 24 hour movement. Ikea only sells 12 hour movements, so [rawe] hacked in a 555 and some logic to divide the clock’s crystal by two. He’s currently using an EEVblog uCurrent to verify his modified clockwork consumes about half a milliwatt.
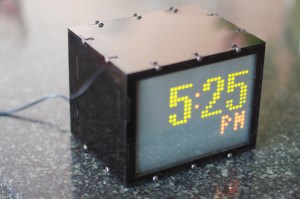 Next up is [Craig Bonsignore] and his Touchscreen Alarm Clock. [Craig] got sick of store-bought alarm clocks, so he built his own. Then he modified it, added a few features, and kept building! The current incarnation of the clock has a pretty novel interface: a touchscreen over a bicolor LED matrix. The rest of the clock consists of an Arduino, an Adafruit Wave shield, and a Macetech Chronodot. [Craig] is currently mashing up these open source designs and building a single Arduino shield for his clock.
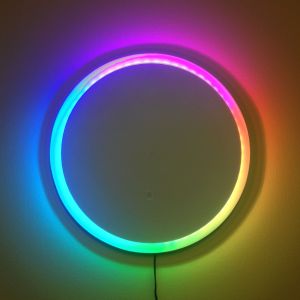 [Warren Janssens] took the minimalist route with The Iris Clock. Iris is a ring of WS2812 RGB LEDs. The LEDs are mounted behind a wall colored piece of wood in such a way that you can only see their glow on the clock frame and the wall beyond it. This helps a with the eye searing effect WS2812s can have when viewed directly – even when dimmed with PWM. The code is mainly C with some AVR assembly thrown in to control the LEDs. [Warren] has given Iris 8 different time modes, from hour/minute/second to percentage of day with sunrise and sunset markers. With so many modes, the only hard part is knowing how to read the time Iris is displaying!
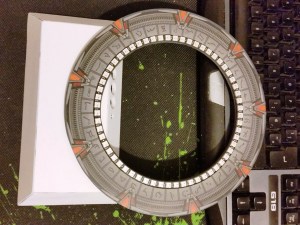 [David Hopkins] also built a ring clock. His Stargate LED Clock not only tells time, but is a great replica of the Stargate from the TV series. [David] used four Adafruit WS2812 Neopixel segments to build a full 60 RGB LED ring. The Stargate runs on an Arduino nano with a real-time clock chip to keep accurate time. A photoresistor allows the Stargate to automatically dim at night. With some slick programming [David] added everything from a visual hourly “chime” to a smooth fade from LED to LED.
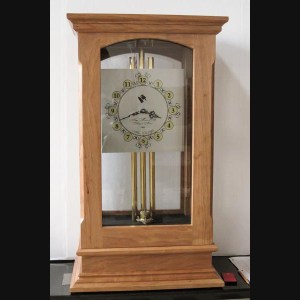 [dehne1] gives us something completely different with The Bendulum Clock. A bendulum is [dehne1’s] own creation consisting of an inverted pendulum built without a pivot. The inverted pendulum swings by bending along its length. In [dehne1’s] design, the bendulum is made out of a spring steel strip rescued from a car windshield wiper. The Bendulum doesn’t have a mechanical escapement, but an electromagnet sensed and driven by an Arduino. The amazing part of this project is that [dehne1] isn’t using a real-time clock chip. The standard 8MHz Arduino resonator is calibrated over various temperatures, then used to calibrate the bendulum itself. The result is a clock that can be accurate within 1 minute each day. [dehne1] mounted his clock inside a custom wood case. We think it looks great, and want one for Hackaday HQ!
We’ve used enough clock ticks for this episode of The Hacklet. As always, see you next week. Same hack time, same hack channel, bringing you the best of Hackaday.io!
Still want more? Check out our Timepiece List!


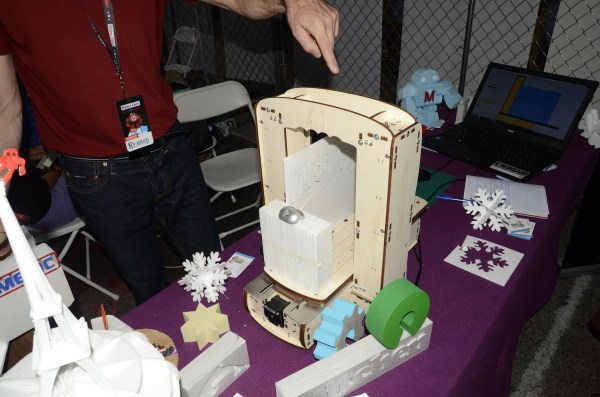
 epper motors much like a 3D printer. Rather than print though, it pulls a heated nichrome wire through styrofoam. Foam cutting is great for crafts, but it really takes off when used for R/C aircraft. [Renaud] was cutting some models out of