In the world of proprietary protocol darkness, it’s comforting to see that the RV realm (Recreational Vehicle, also known as a motorhome) has mostly settled on RV-C, an open protocol that lets various devices and systems inside an RV talk to each other over CAN. The undeniable openness of RV-C is surprising, but we haven’t seen many hobbyists tinker with it — yet.
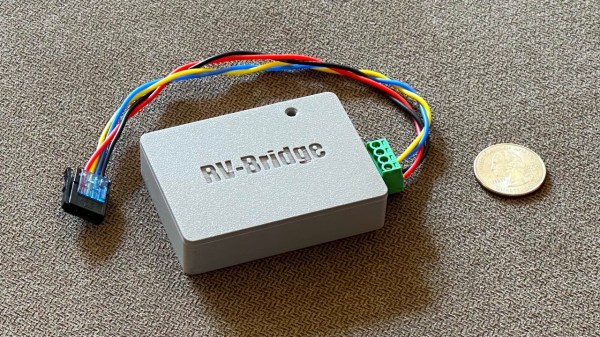
Now, [Randy Ubillos] sets an example — his gift to us is an ESP32 firmware called RV-Bridge and it lets you control your RV’s RV-C network from HomeKit. After all, your motorhome could benefit from home automation, too!
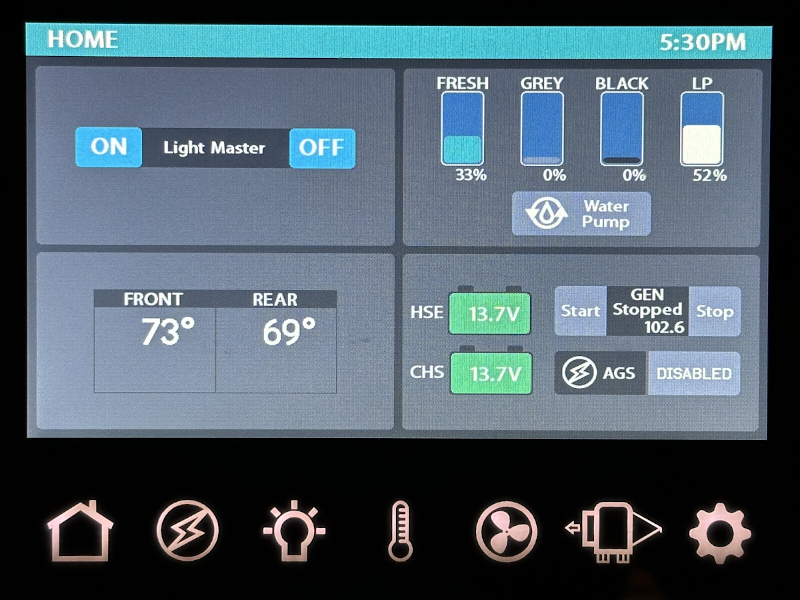 The RV-C network in [Randy]’s family RV already had a factory-provided front-end and an iOS app, but naturally, it had a limited set of features. Having looked around online he found that both RV-C and HomeKit had open libraries for them, and set out to join these worlds together.
Now he’s released the first revision of RV-Bridge, fully-featured enough for comfortable day-to-day use, and with a setup guide for those who want to try it out! When it comes to hardware, you’ll want an ESP32 board with CAN support — [Randy] has found a perfect board for sale, and made it even more fitting by designing a 3D printed case for RV use; as usual, files are on GitHub!
Making your stock RV more comfy through hacker methods is exactly what we expect to grace our tips line! The kinds of RV projects we’ve seen so far, are also outstandingly cool, yet of different kind – things like building your own RVs out of something not meant to be an RV, whether it’s an abandoned airliner, a school bus, or a jet engine! Oh, and if your hackerspace owns a RV, you can always convert it to something else, be it a mobile hackerspace or a spaceship simulator.