Lockheed Wants To Build The Next Lunar Lander

The United States is going back to the moon, and it’s happening sooner than you would think. NASA is going back to the moon in 2024, and they might just have the support of Congress to do so.

Getting to the moon is one thing, and since SpaceX launched a car to the asteroid belt, this future of boots on the moon after Apollo seems closer than ever before. But what about landing on the moon? There’s only ever been one Lunar Lander that has taken people down to the moon and brought them back again, and it’s doubtful that design will be used again. Now, Lockheed has their own plan for landing people on the moon, and they might be able to do it by 2024.

Continue reading “Lockheed Wants To Build The Next Lunar Lander”

Hackaday Links Column Banner

Hackaday Links: April 28, 2019

Lego is releasing a series of Braille bricks. As near as we can tell, these Braille bricks are standard 2 x 4 bricks, with studs corresponding to Braille letters on the top. There are also screen/pad printed legends on top. I don’t mean to be a downer, but why, exactly, is this being created now? Did it really take fifty years for someone to say, ‘hey, if you don’t put some studs on top of a brick, it becomes Braille?’ How is this not already a thing? This isn’t me being facetious — how did it take so long for this to be invented?

KiCon is this weekend, so here’s a tip for everyone in Chicago right now: get a hot dog. Don’t put ketchup on it, or else someone will shoot you.

KiCon and Moogfest in one weekend? Yes, and that means new toys. The Matriarch is Moog’s latest synthy boi and the apparent successor to last year’s Moog Grandmother. The Matriarch is a four-note paraphonic synth that is semi-modular; no, you don’t need patch cables to make noises, but there are ninety-odd patch points for modular fun. It’s two grand, which is getting up there in the synth game. If only Radio Shack were still around and sold Moog synths…

We’re all aware that Russia launches rockets out of Baikonur cosmodrome, and the first stages eventually make their way onto the steppes of Kazakhstan. The locals, few there are, end up recycling these rockets, scrapping them, and sometimes taking space tourists and photojournalist out to the crash site of these boosters. Russia has other spaceports, and now we’re getting pictures of booster crashes from the frozen north. These rockets came from the Plesetsk cosmodrome and fell in the boreal forests near Arkhangelsk where hunters discovered them. Yes, these boosters are carcinogenic, but that’s what you do when a few tons of aluminum and titanium fall in your backyard.

No spoilers, but oh man the after-credits scene in Endgame was hilarious.

This 3D Scanner Is Your Ticket To Photogrammetry

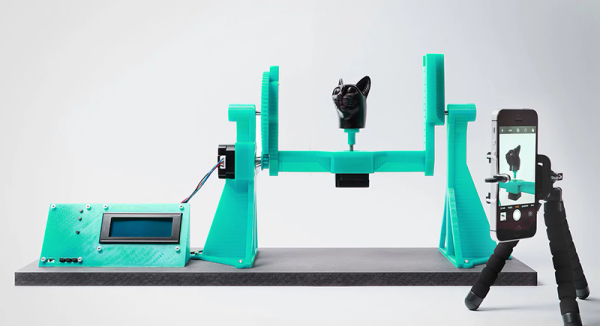
It seems 3D printers have been around for ages and still we don’t have a good solution for turning physical 3D objects into digital ones. Yes, 3D scanners exist, but the OpenScan is the best 3D scanner we’ve seen. It’s a 3D printed device meant to take pictures of an object that can then be used by photogrammetry software to construct a point cloud. From there, it’s just a matter of messing with meshes to create a 3D printed copy of anything you want.

The latest version of the scanner is an improvement over the previous version that kind of, sort of looked like the Machine from Contact. This was a gigantic hubless ring, with a smartphone attached to the rim. Put an object in the center, and the phone would rotate around the object in every axis, snapping pictures the entire time. Needless to say, a simpler design prevailed. That doesn’t mean the old version didn’t look awesome. The electronics are simply an Arduino clone, two stepper drivers, a character display for control and some headers for connections and power supplies. This is pretty normal stuff for the RepRap crew.

Running this machine is as simple as putting an object in the device and taking a few pictures. There is some support for remotely controlling some cameras, but everything is universal if you have a remote shutter release. This can be plugged into the electronics, and once everything is done you have a few dozen pictures of an object with optimal lighting conditions that can be thrown into your photogrammetry software of choice. (Ed note: at least one that doesn’t rely on the object remaining stationary with respect to the background to estimate camera position.)

The No-CPU Computer Gets A C Compiler

C is the most perfect language and it will run on anything. It will even run on a computer without a CPU.

The computer in question here is the Gigatron, a fully-functional ‘home computer’ the likes of which you would find in the late 70s and early 80s, complete with a VGA output. What makes the Gigatron exceptional is the fact that there is no microprocessor; everything is just a RAM, a ROM, and a bunch of logic chips. There is no ALU chip. Or rather, there is; it’s just that an entire RISC CPU is implemented in basic logic chips and a whole lot of microcode on the ROM. It’s weird, yes, but it is cool. We’ve taken a look at the Gigatron before, and with this computer you get a glimpse of how clever engineers could have been if there were massive memories available in the late 70s.

While the Gigatron can be programmed in BASIC, the limiting factor of this computer is the fact that it remains exceptionally difficult to program. This is what the 8-Bit Guy says, and even though you can write some simple programs, it’s nothing compared to the likes of an Apple II or C64. If only there were a proper IDE, indeed if only there were a C compiler. That’s where [pgavlin] comes in. He has the LCC compiler working on the Gigatron. This is technically a C compiler for a computer without a CPU, or a computer that is entirely CPU. Either way you look at it, this is impressive.

As far as examples and demos go, [pgavlin] has a demo of Conway’s Game of Life working, and a program that will put dots on the screen. It’s not much, and it’s very slow, but check out the video below.

This isn’t a complete implementation of C, as multiplication, division, mod, and arbitrary shifts left or right haven’t been written yet. Floating point support will probably never be completed, and there’s no shame in that. The hardware is limited due to the fact of the fragmented memory map, but this can be improved by upgrading the Gigatron to a 64k memory model.


Continue reading “The No-CPU Computer Gets A C Compiler”

Making A Three Cent Microcontroller Useful

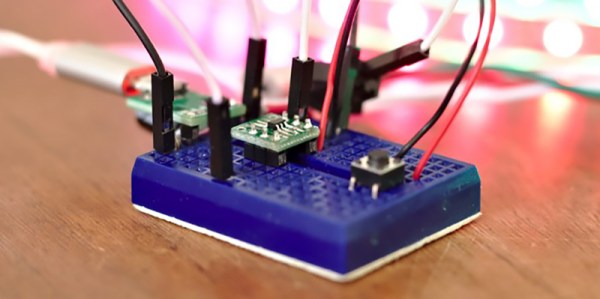
The Padauk PMS150C is a terrible microcontroller. There are only six pins, there’s only one kiloword of Flash, 64 bytes of RAM, and it doesn’t do multiplication. You can only write code to this chip once, and the IDE uses 8-bit ints. [Anders] got his hands on some of these chips and decided to do something useful with them. It turns out that you can do a lot with minimal hardware, such as driving 300 RGB LEDs with a three cent microcontroller.

There’s some work trying to make an Open Source toolchain for these chips, but [Anders] decided to just go with the manufacturer IDE and programmer. What to do with a three cent microcontroller, though? Obviously something blinky. [Anders] connected this microcontroller to a strip of Neopixels, or WS2812Bs, but instead of driving them by giving each pixel a few bytes of RAM, the entire strip is being bitbanged one bit at a time. It’s some clever code, and even if [Anders] won’t be able to send images to a gigantic graphic display made of Neopixels, it’s still a neat trick.

At three cents and nearly zero associated hardware, this is the cheapest microcontroller we’ve ever seen. Even the minimalist PIC and AVR parts are on the orders of dozens of cents per part, and they still only have the functionality of this three-cent part. The manufacturer’s page has more details on the microcontroller itself including the data sheet, and you can check out the sizzle reel of this project below.

Continue reading “Making A Three Cent Microcontroller Useful”

3D Printer Becomes Soldering Robot

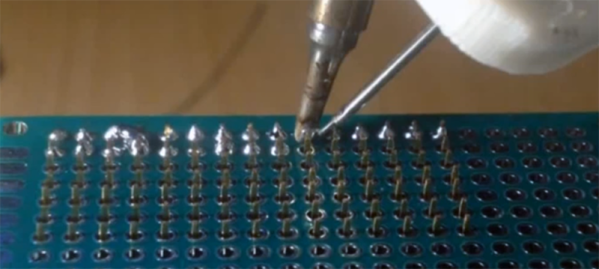
What do you do if you have to solder thousands of through-hole parts? The expensive, professional way of doing this is running the boards through a wave soldering machine, or a machine with a fancy CNC solder fountain. The amateur way of soldering thousands of through-hole joints is putting some boards on the workbench and sitting down with a soldering iron. There is nothing in between; you’re either going to go with full automation for a large soldering job, or you’re doing it completely manually. That’s the problem this soldering robot solves. It’s a small, cheap, but still relatively capable soldering robot built out of a 3D printer.

This project is a solution to the development hell of the OpenScan project. This project is built around a small, simple printed circuit board that uses several 0.1″ female headers to connect an Arduino and motor drivers. Soldering them by hand is simply boring, and 3D printers are cheap, so the great mind behind this project decided to use a printer to pump out solder.

The modifications to the printer include a mount for a TS100 soldering iron and a modified filament extruder that pushes a spool of solder through a PTFE tube. The GCode for this soldering job was created manually, but you could also use a slicer instead. After 20 hours of development, the ‘success rate’ – however that is defined – is between 60-80%. That needs to get up to four or five nines before this DIY soldering robot is practical but this is a decidedly not-bad result for a few hours of tinkering.

This printer mod works great for the use case of stuffing a few 0.1″ headers into a board and letting a robot automatically solder the joints, but this printer will run into a problem with the general case of soldering a lot of randomly-shaped through hole parts. You need to actually hold the parts up against the board while soldering. There’s an easy solution to this problem: just flip the 3D printer upside down. This hack of a cheap 3D printer is so, so close to being a great solution to soldering thousands of through-hole parts quickly and easily, and we’re looking forward to seeing where the community takes this idea. You can check out the video demo below.

Continue reading “3D Printer Becomes Soldering Robot”

Raspberry Pi Becomes The Encrypted Password Keeper You Need

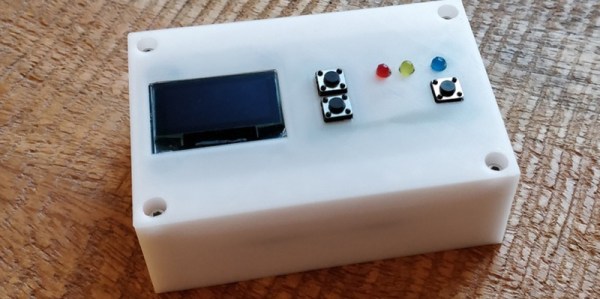
Unless you’re one of the cool people who uses the same password everywhere, you might be in need of a hardware device that keeps your usernames and passwords handy. The Passkeeper is a hardware password storage system built on a Raspberry Pi. It encrypts your passwords, and only through the magic of a special key fob will you ever get your passwords out of this device.

The hardware for this device is built around the Raspberry Pi Zero. You might be questioning the use of a Pi Zero, but given that it’s an entire Linux system for just a few bucks, it only makes sense. The rest of the hardware is a tiny OLED SPI display, an RFID card reader, a few LEDs, some wire, and some solder. A 3D printed case keeps everything together.

Of course, this build is all about the software, and for that, the Passkeeper device is built in Go, with a system that builds a web interface, builds the firmware, and writes everything to an SD card. Usage is simply plugging the Passkeeper into the USB port of your computer where it presents itself as a network interface. Everything is available by pinging an IP address, and after that the web UI will log your usernames and passwords. All this data is encrypted, and can only be unlocked if an RFID key fob is present. It’s an interesting idea and certinaly inexpensive. It’s not quite as polished as something like the Mooltipass, but if you have a Pi around and don’t have a password keeper, this is something to build this weekend.