Balena Introduces DIN-Capable Pi Compute Module Carrier Board

Although you don’t hear about it very much over the clamor of emulating old video game systems, one of the biggest uses of the Raspberry Pi outside its educational roots is in industry. The Pi makes for a great industrial control system, and if you mount it to a DIN rail, you’re golden. This is the biggest reason the Pi foundation is still making the Pi 1, and it’s one of the big motivations behind the Pi Compute Module.

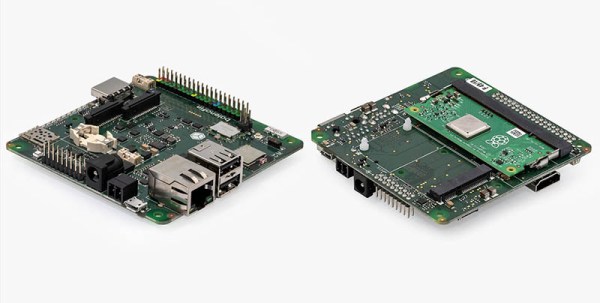
Now that the Pi Compute Module 3 and 3+ have been out for a while, it’s only fitting that these modules get a great carrier board. The balenaFin 1.1 is out now, and it’s the perfect carrier board for the Pi compute module.

Balena (formerly resin.io) is a software stack designed for managing fleets of Linux devices, and there’s no better example of that than a factory filled with Pis fiddling relays and such. Balena has found its way from tracking sea turtles to monitoring oil rigs, and with that comes a need for a developer kit. The Pi compute module is supposed to have a very long support life, so the obvious solution is to make a great carrier board for this fantastic module.

Features of note include two camera connectors, PoE (with a Hat), USB headers, an RGB indicator LED, an industrial temperature range, and a case designed for a DIN rail. So far, so goo, but there’s also a microcontroller with a Bluetooth radio that can operate without the compute module being turned on, and an RTC for time-based operation. There’s a mini PCI express slot designed for cellular modems, and a SIM card slot just for fun.

While most Pi builds we see could make use of these features, they are assuredly one-off builds. You’re not going to be deploying hundreds of Pis if you need to 3D print an enclosure for each one. That’s when actual engineers need to get involved, and if you’re doing that, you might as well go with the Raspberry Pi compute module. If you’re looking for a fleet of Pis, you could do worse than to look at this very nice compute module carrier board.

Zach Archer: Live Coding 500 Watts For ToorCamp

ToorCamp is a five-day open air tech camping event held every two years somewhere around the northwest corner of Washington state. Think of it as something like Burning Man, except you can survive for three hours without water, there aren’t a whole bunch of scenesters and Instagram celebs flying in on private planes, and everyone there can actually build something. Oh, and ToorCamp has delivery drones that will send you creme brulee. These mini creme brulees were probably made with the hot air gun hanging off a soldering station. Don’t worry, you’re getting fresh air that’ll balance out the heavy metal poisoning.

For last year’s ToorCamp, the biggest welcome sign was a 40-foot-long illuminated ToorCamp sign. This was designed, built and coded by Zach Archer, and he was at the 2018 Hackaday Superconference to give us the details on how he made it and how it was coded.

Continue reading “Zach Archer: Live Coding 500 Watts For ToorCamp”

New Part Day: The STM32 That Runs Linux

There are a lot of ARM microcontrollers out there, and the parts from ST are featured prominently is the high-power builds we’re seeing. The STM32F4 and ~F7 are powerhouses with great support, and the STM32F0 and the other younger children of the family make for very good, low-power microcontrollers. Now, the STM32 family is getting a big brother. It runs Linux. It’s two ARM Cortex-A7 cores and one M4 core on the same chip. The STM32MP1 is the chip you want if you still can’t figure out how to waste computing cycles by blinking LEDs.

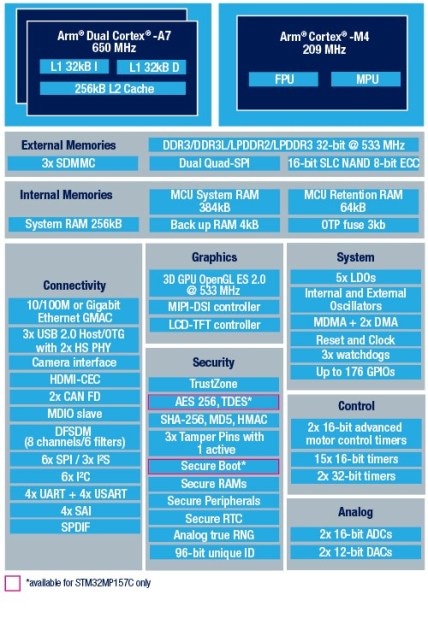
Block diagram of the STM32MP157 Image: ST

First, that Linux support. The STM32MP157C was mainlined into Linux last summer, and there is support for Android. So yes, this chip can run Linux. There is an optional 3D GPU in this family, a MIPI-DSI controller, support for HDMI-CEC, USB 2.0, and 10/100M or Gigabit Ethernet. This brings us the inevitable question of whether you can build a Raspberry Pi clone with these parts. Maybe, champ, but if you’re asking that question it’s probably not you that’s going to build one. It looks as if this chip is designed for phones, set-top boxes, and smart TVs. That doesn’t preclude a single board computer, but the biggest problem there is maintaining software support anyway.

The chip family in question all come with dual ARM Cortex-A7 processors running at a nominal 650MHz. There’s also a Cortex-M4 running at 209MHz, and the ST literature suggests that engineers are already running Linux on the A7 and an RTOS on the M4. This chip will need external memory, but DDR3 / DDR3L / LPDDR2 / LPDDR3 are supported.

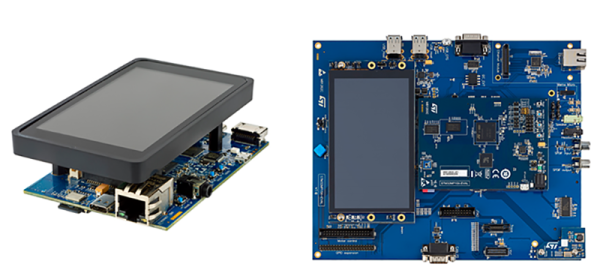
This chip is only announced right now, you can’t get it on Mouser or Digikey yet, and there’s no information on pricing. However, there are two development boards available, the Evaluation board, which features 1 GB of DDR3L, 128 MB of Flash, and an 8 GB eMMC. There’s a 5.5″ display, and enough connectors to make your heart flutter. The Discovery board is a bit more cut down, and comes with a 4″ 480×800 LCD, WiFi, Bluetooth LE, and of course it comes with GPIO expansion connectors for an Arduino and Raspberry Pi. The Discovery Board is not available at this time, but it will sell for $99 USD.

Ask Hackaday: Can We Get Someone To Buy And Destroy RAM?

We like blinky things. We’re moths drawn to the flame of serially-addressable RGB LEDs. If the LEDs are smaller, we want to know. If you can drive more of them, we want to know. That said, the most interesting news out of CES last January was both right up our alley, and immensely disappointing. Corsair, makers of RGB computer fans, RGB CPU coolers, and RGB keyboards and mice, have a new product out: RGB RAM, because professional gamers and streamers have a higher win percentage when their RAM is illuminated.

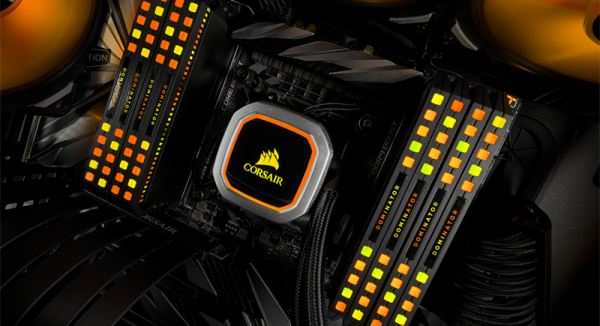
The key innovation of the new Corsair Dominator Platinum RGB DDR4 DRAM is called, ‘Capellix LEDs’. The press surrounding these LEDs gives a clear advantage: right now, the RGB LEDs in your gaming system are mounted in a large SMD package, like a WS2812 or APA101. These large packages reduce LED density, and making LEDs smaller means moar RGB — more colors, or brighter colors, or better efficiency. The key advancement in Capellix LEDs is taking the guts of a serially addressable RGB LED and putting it in a smaller package. Instead of a package that’s 2.8mm³ in volume, the Capellix LED is ‘just 0.2mm³ in size’. The few pictures available of these LEDs give the impression they’re about the size of an 0805 package. It’s small, and we’d like to get our hands on some.

Where these LEDs come from is anyone’s guess, but Corsair did partner with Primax, a Taiwanese manufacturer of computer peripherals, to pull this off. There is no mention of Capellix LEDs in Primax’s press releases, and we don’t actually know if these are the smallest serially addressable RGB LEDs available; we don’t even know if they’re serially addressable. There could easily be a small microcontroller in the Corsair Dominator Platinum RGB DDR4 DRAM, as each stick is only driving twelve individually controllable RGB LEDs.

The bottom line is, someone needs to spend $160 for 16GB of RAM, then tear the whole thing apart, preferably with close-up pics of the fancy new RGB LEDs.

A cynical reader would say that Capellix LEDs are simply existing LEDs, the name ‘Capellix’ was trademarked by Corsair, and these LEDs were shoved into a stick of RAM with a significant markup. This, surprisingly, is demonstrably wrong because there is no entry for ‘Capellix’ in the United States Patent and Trademark Office Trademark Electronic Search System. That doesn’t mean the spirit of the cynic is wrong, though; ROHM semiconductors just released a new side-view RGB LED that might be smaller than Corsair’s Capellix LEDs. There are, of course, RGB LEDs available in similar sizes, but none of these are serially-addressable like a WS2812 or APA101. We don’t know what’s in these fancy sticks of RAM, but we’re waiting for someone to do a tear down so we can find out.

The No-Parts Temperature Sensor In Your Arduino

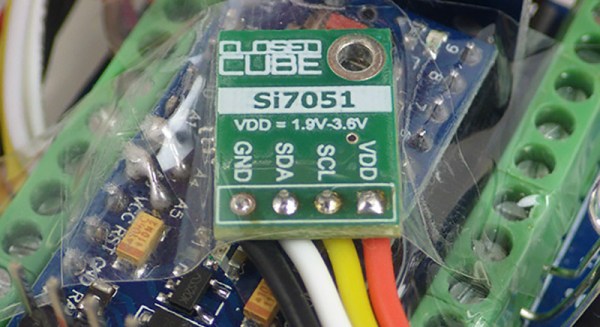
[Edward], creator of the Cave Pearl project, an underwater data logger, needed a way to measure temperature with a microcontroller. Normally, this problem is most easily solved by throwing a temperature sensor on the I2C bus — these sensors are cheap and readily available. This isn’t about connecting a temperature sensor in your Arduino. This build is about using the temperature sensor in your clock.

The ATMega328p, the chip at the heart of all your Arduino Uno clones, has within it a watchdog timer that clicks over at a rate of 110 kHz. This watchdog timer is somewhat sensitive to temperature, and by measuring this temperature sensor you can get some idea of the temperature of the epoxy blob that is a modern microcontroller. The trick is calibrating the watchdog timer, which was done with a homemade ‘calibration box’ in a freezer consisting of two very heavy ceramic pots with a bag of rice between them to add thermal mass (you can’t do this with water because you’re putting it in a freezer and antique crocks are somewhat valuable).

By repeatedly taking the microcontroller through a couple of freeze-thaw cycles, [Edward] was able to calibrate this watchdog timer to a resolution of about 0.0025°C, which is more than enough for just about any sensor application. Discussions of accuracy and precision notwithstanding, it’s pretty good.

This technique measures the temperature of the microcontroller with an accuracy of 0.005°C or better, and it’s using it with just the interrupt timer. That’s not to say this is the only way to measure the temperature of an ATMega; some of these chips have temperature sensors built right into them, and we’ve seen projects that use this before. However, this documented feature that’s clearly in the datasheet seems not to be used by many people.

Thanks [jan] for sending this in.

Casting The Bed Of A CNC Machine In Granite

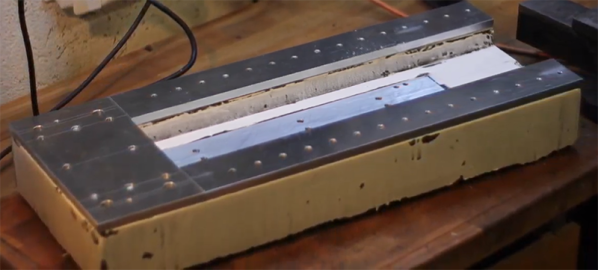
If you’re looking at CNC machines, or machine tools in general, heavier is better. That old drill press or mill made of a few hundred pounds of cast iron isn’t just better because it’s stood the test of time for a hundred years — greater mass equals less vibration. Thanks to modern epoxy resins, we now have a replacement for tons and tons of iron. Epoxy granite, or chips of granite bound together with epoxy resin, is a viable and very good base for CNC machines, mills, and other tools that are served well with a ton of mass. [Joerg Beigang] is building his own CNC router, and he’s building the base out of epoxy granite. Here’s how he’s doing it.

Before you pour epoxy into a mold, you’ll need to figure out how you’re going to attach your ways, linear rails, and ball screws. [Joreg] is bolting these parts to pieces of aluminum he cut on his home made panel saw before carefully drilling and tapping them to accept the linear rails. These aluminum plates were then mounted to the bottom panel of the mold, in this case melamine-coated plywood.

As you would expect, the most intricate part of this build isn’t globbing up a mold with epoxy resin. No, the real trick here is making sure the rails of the CNC are aligned perfectly before the epoxy goes in. This was done by bolting the linear rails to the mold box and checking everything with a dial indicator. Once that was done it was time to pour.

The bed itself is made of 18kg of epoxy granite, with the entire pour done in four batches. The best way to settle a big pour of epoxy granite is through vibration, just like concrete, but it looks as though [Joreg] is getting some good results by tamping it down with a few sticks. You can check out the first part of this build series below.

If we’ve captured your interest, it’s worth reminding you that this isn’t the first epoxy granite CNC machine we’ve featured.

Continue reading “Casting The Bed Of A CNC Machine In Granite”

NASA Is Building A Space Station In A Weird Orbit. Here’s Why

Representatives from SpaceX, Blue Origin, and United Launch Alliance participated in a forum last week held by NASA to determine the future of humans on the moon. This isn’t just how they will live, how long they will stay, or what they will do; no, this is far more interesting: this was how humans will travel from lunar orbit from the surface of the moon. The future of the next generation of lunar lander is being determined right now.

The plan right now is entirely unlike Apollo, which sent a pair of spaceships in orbit around the moon, sent one to the surface, then returned to the mother ship for the trip back to Earth. Instead of something somewhat simple, the next era of lunar exploration will happen from a gateway orbiting in cis-lunar space. What makes this so amazing is how weird the orbit is, and the reasons behind it.

Continue reading “NASA Is Building A Space Station In A Weird Orbit. Here’s Why”