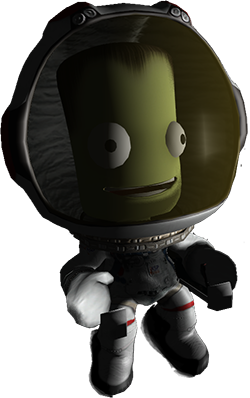
 Kerbal Space Program is already a runaway indie video game hit, and if you ask some people, they’ll tell you it is the way to learn all about orbital dynamics, how spaceships actually fly, the challenges of getting to the mün. The controls in KSP are primarily keyboard and mouse, something that really breaks the immersion for a space flight simulator. We’ve seen a few before, but now custom controllers well suited for a Kerbal command pod can be made at home, with all the blinkey LEDs, gauges, and buttons you could want.
[Freshmeat] over on the KSP forums began his space adventures with a keyboard but found the fine control lacking. An old Logitech Dual Shock controller offered better control, but this gamepad doesn’t come with a throttle, and USB throttles for flight sims are expensive. He found a neat plugin for KSP made for interfacing an Arduino, and with a few modifications, turned his controller into a control panel, complete with sliders, pots, gauges, and all the other goodies a proper command pod should have.
[Freshmeat]’s work is not the only custom Kerbal controller. There’s a whole thread of them, with implementations that would look great in everything from a modern spaceplane to kerbalkind’s first steps into the milky abyss of space. There’s even one over on the Hackaday projects site, ready to fly Bill, Bob, and Jeb to the mün or a fiery explosion. Either one works.
Thanks [drago] for the tip.
 In the late 1800s, no one knew what light was. Everyone knew it behaved like a wave some of the time, but all waves need to travel through some propagation medium. This propagation medium was called the luminiferous aether and an attempt to detect and quantify this aether led to one of the coolest experimental setups of all time: the Michelson-Morely experiment. It was a huge interferometer mounted on a gigantic slab of marble floating in a pool of mercury. By rotating the interferometer, Michelson and Morely expected to see a small phase shift in the interferometer, both confirming the existence of a luminiferous aether and giving them how fast the Earth moved through this medium.
 I suppose I can take credit for introducing the super awesome [Fran Blanche] to Hackaday’s very own crotchety old man and Commodore refugee [Bil Herd]. I therefore take complete responsibility for
 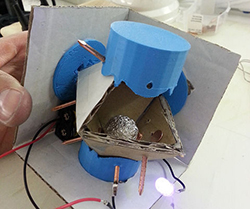 If you’re trying to detect the orientation of an object, sometimes you really don’t need a 6DOF gyro and accelerometer. Hell, if you only need to detect if an object is tilted, you can get a simple “ball in a tube” tilt sensor for pennies. [tamberg] liked this idea, but he required a tilt sensor that works in the X, Y, and Z axes. Expanding on the ‘ball in a tube’ construction of simple tilt sensors,
  If you’re looking to do something awesome with a graphing calculator, [Chris] is the guy to go to. He’s literally written the book on the subject.
  [Steel 9] was looking around for a LED strobe light for reasons unknown. He couldn’t find any that he liked, and when that happened, he did what any normal person would do –