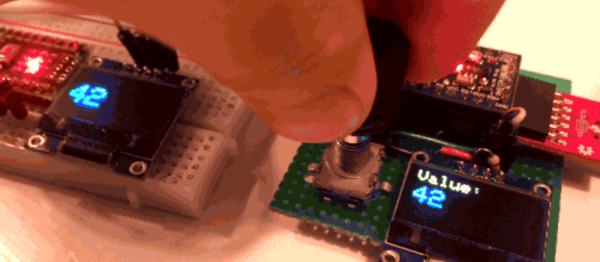
[Captain Credible] is a chiptune music artist. He wanted to release an EP, but a regular old em-pee-three was too lame for him, so he made a tiny board with a coin cell, an ATtiny85, and a 3.5mm socket on it.
Rather than just writing some code to generate the tones for a pre-composed song, his “Dead Cats” EP generates the music itself. Using the arduino-tiny library, which adds the tone() function to the ATtiny, he has the chip pick its own time signature, key, subdivisions, and tempo. The melody and drum beat is randomly generated into an array. In addition to that, there are some code “one-liners” which insert unique sounds. After that the code just loops through the music.
If you don’t like the song, simply unplug the audio cable and plug it back in. The 3.5mm jack he chose has a built-in micro-switch, so the board is only powered up if someone is listening. If you’d like to see the circuit diagram, purchase the EP, or take a look at the code, all of that is available on his site.
There was a discussion in the comments when the Alpha Go results were released. Some commentors were postulating that AI researchers are discounting more fluid games such as the RTS StarCraft.
The comments then devolved into a discussion of what would make the AI fair to consider against a human player. Many times, AI in RTS games win because they have direct access to the variables in the game. Rather than physically looking at the small area of the screen where a unit is located and then moving their eye to take in strategic information like exact location, health, unit level, etc, the AI just knows that it’s at 120x,2000y,76%,lvl5, etc instantly. The AI also has no click lag as it gets direct access to the game’s API, it simply changes the variables and action queue of a unit directly.
So we were interested to see [Matt]’s Star Craft AI that required the computer to actually look at the game board and click. [Matt]’s AI doesn’t see using OpenCV, which in its own way is forcing the computer to look in a way that’s unnatural to it. He instead wrote some code to intercept the behind the scenes calls to the DirectX library.
The computer is then able to make determinations about what it is looking at using the texture information and other pieces sent to the library. Unlike AI’s that get a direct look at the variables, it has to then translate this and keep its own mental picture of the map and the situation. If a building is destroyed, for example, it has to go over and look at that part of the map, test what it’s seeing against a control, and then remove the building from its list.
The AI’s one big advantage are its robot fingers. Even though this AI has to click on the interface, it doesn’t do it with a weak articulated fleshy nub like the rest of us. This allows the AI to get crazy Actions Per Minute (APM) in the range of 500 to 2000.
The AI has only been tested against StarCraft’s built in cheater bots. So far it can win most games against the hard level bots. If you want to see a video of what the AI is looking at, check after the break.
PJON, pronounced like the iridescent sky rats found in every city, is a cool one wire protocol designed by [gioblu].
[gioblu] wasn’t impressed with the complications of I2C. He thought one-wire was too proprietary, too complicated, and its Arduino implementations did not impress. What he really wanted was a protocol that could deal with a ton of noise and a weak signal in his home automation project with the smallest amount of wiring possible.
That’s where is his, “Padded Jittering Operative Network,” comes in. It can support up to 255 Arduinos on one bus and its error handling is apparently good enough that you can hold an Arudino in one hand and see the signals transmitted through your body on the other. The fact that a ground and a signal wire is all you need to run a bus supporting 255 devices and they’ll play nice is pretty cool, even if the bandwidth isn’t the most extreme.
Aside from the cool of DIY protocols. We really enjoyed reading the wiki describing it. Some of the proposed uses was running your home automation through your ducting or water pipes (which should be possible if you’re really good at isolating your grounds). Either way, the protocol is neat and looks fun to use. Or check out PJON_ASK if you want to do away with that pesky single wire.
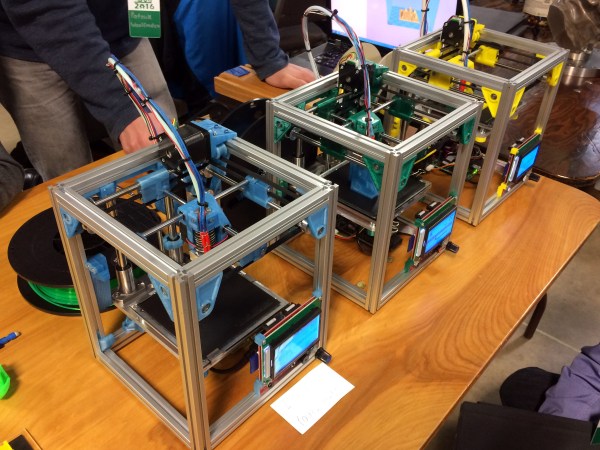
Patrick and Matt hold a running Kitten Printer. The frame is stiff enough that the printer can be held or turned upside down and it can keep printing without visible defects in the print.
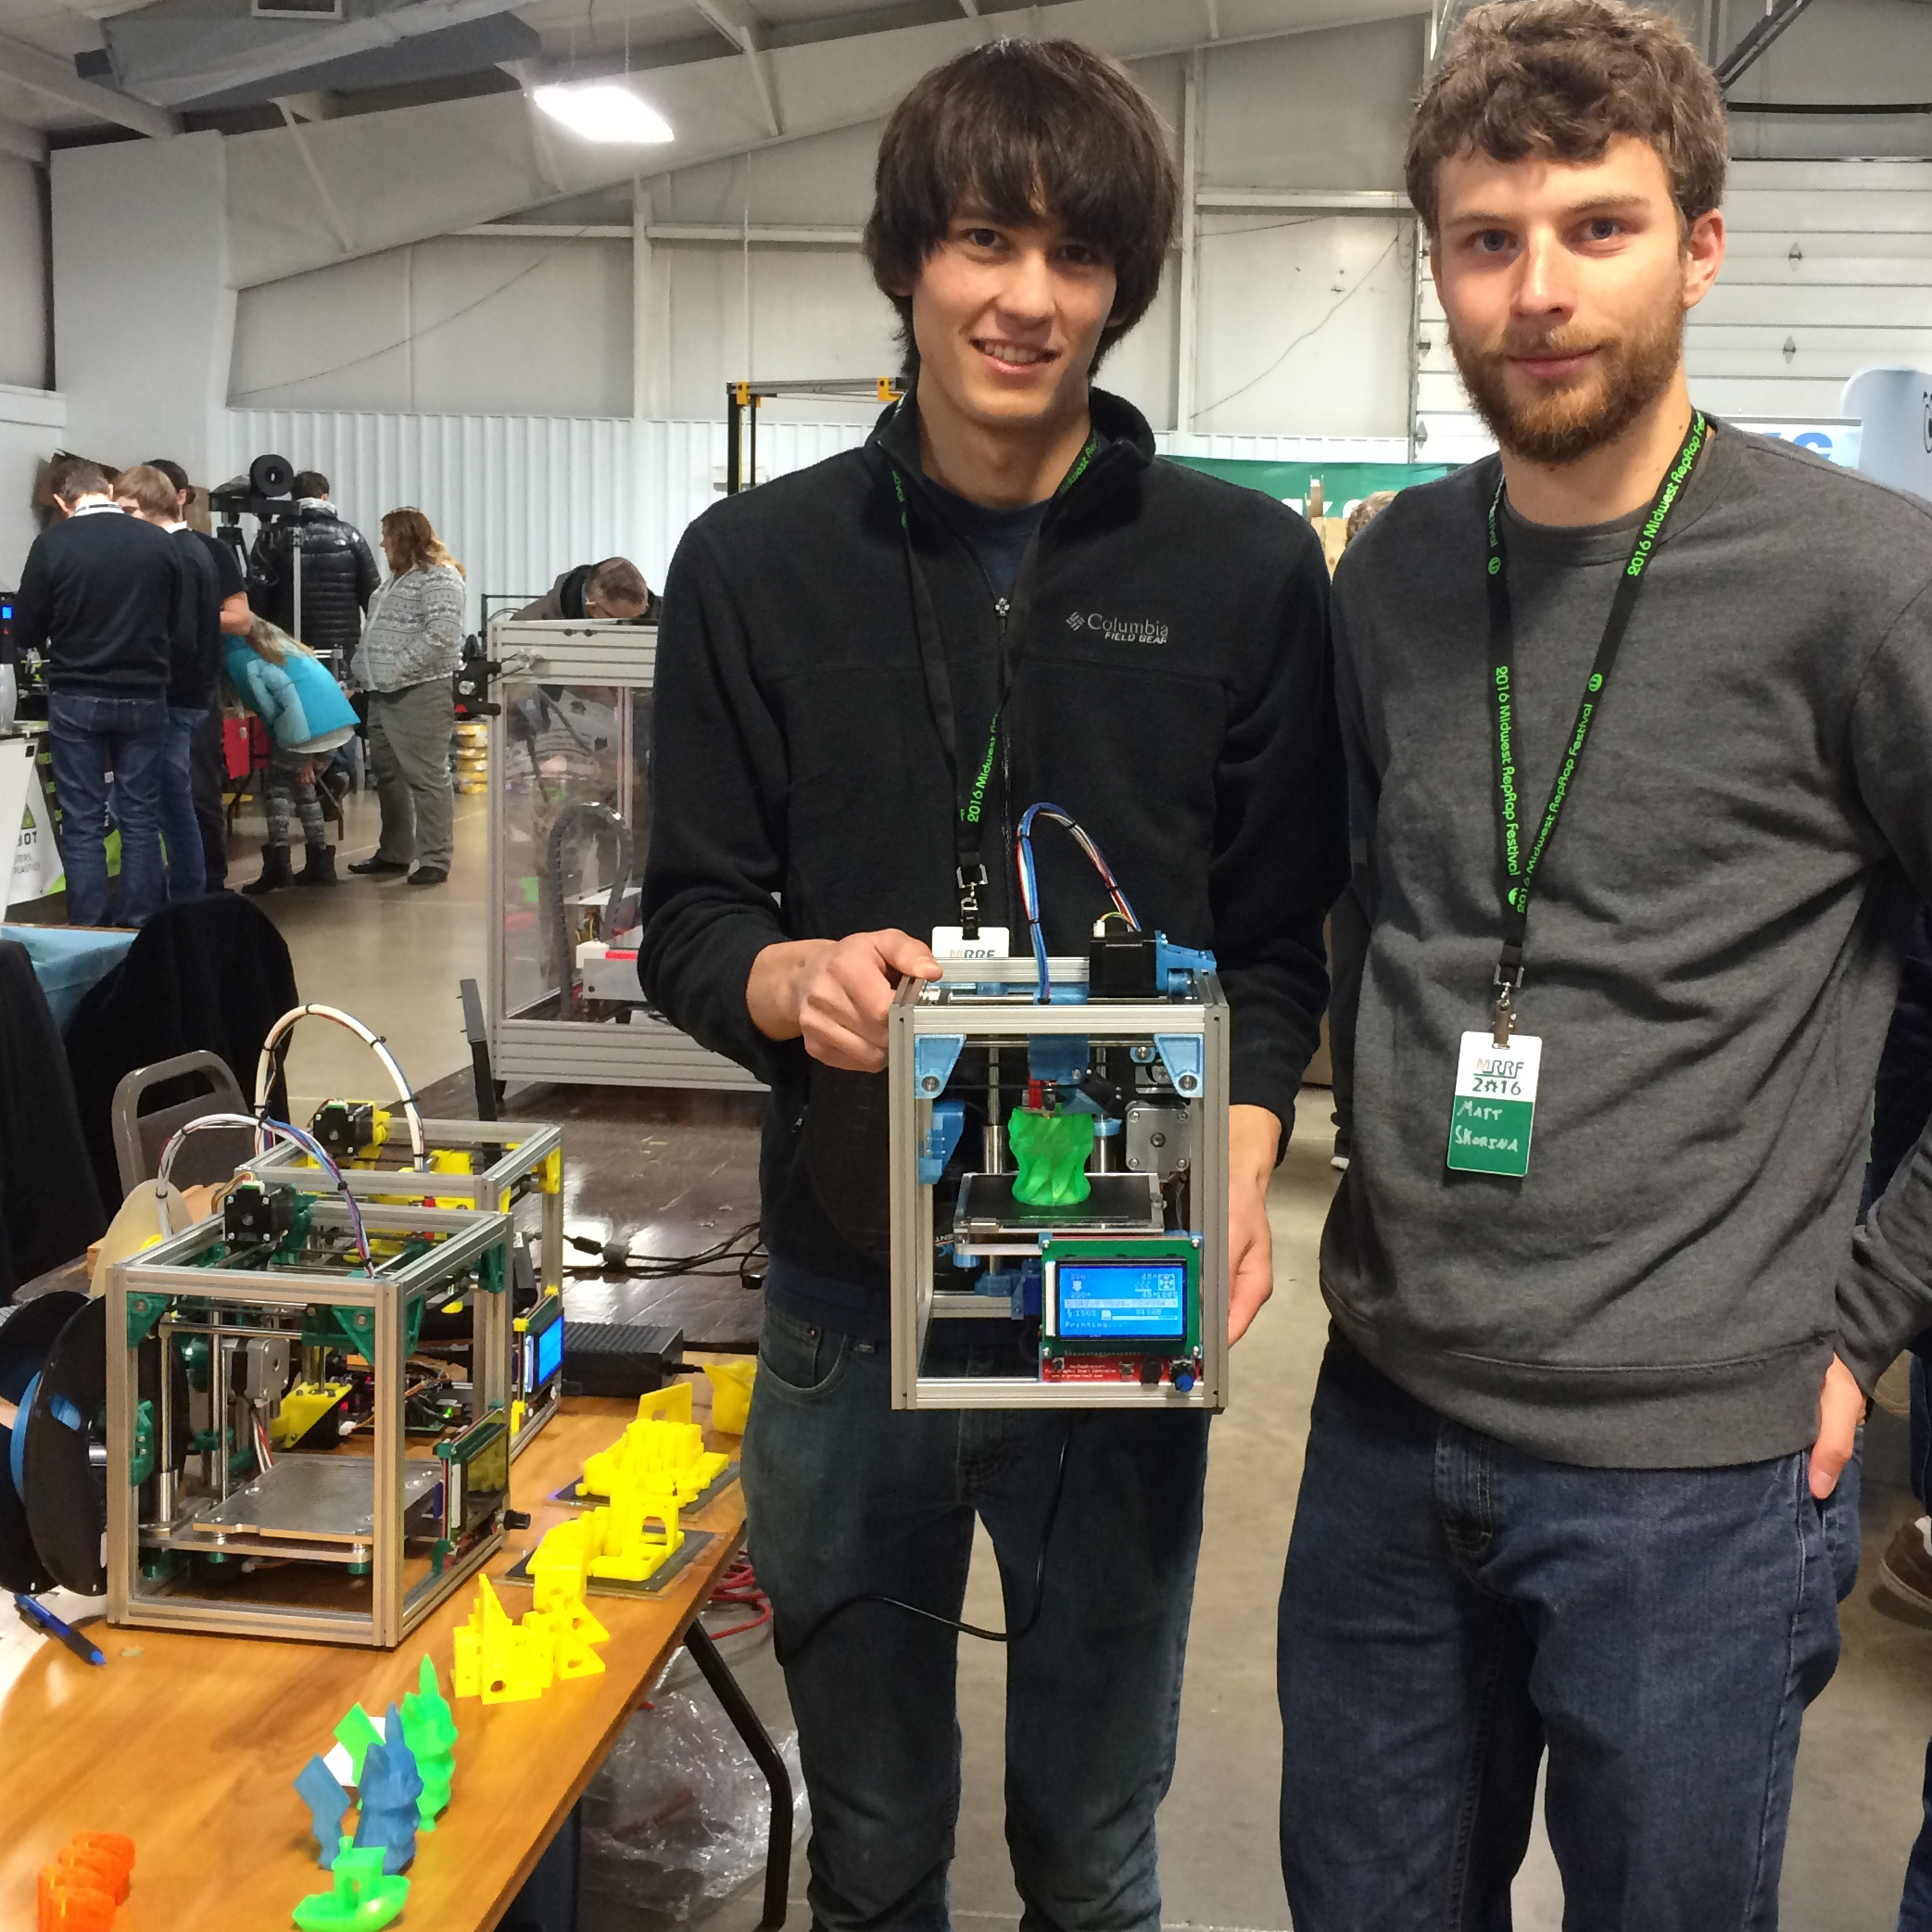
[Patrick] and [Matt] have been coming to the Midwest RepRap Festival from Minneapolis for the past few years and bringing their trusty Tantillus printers with them. However, sometime between this year and the last [Patrick] decided that it would be really fun to make his own 3D printer, and liking the size and accuracy of the Tantillus, started there.
The adorably sized printer is adorably named too: Kitten 3D printer. The printer is certainly an enthusiast’s choice. It’s expensive at 1200 and small, but very well made. Its one big advantage? It prints really accurate parts.
The Tantillus also printed well, but the extruder left a lot to be desired, and the low stretch fishing line movement was very difficult to get tensioned just right. The secret behind the Tantillus and Kitten’s great print quality, aside from good design, is the small xy movement and low weight of the extruder set-ups. By having a movement over a very small range, cumulative errors in construction never get to add up. Also vibrations are less likely to show and smaller moments on the joints mean less flex at the extremes of the movements.
Really stunning print quality almost entirely free of ringing and z-wobble. 100mm x 100mm tray. These are very small parts.
[Patrick] is a mechanical engineer for his day job, and since this was a just for fun printer, he cut no corners. The frame is made with Misumi extrusions and linear movements. The build plate sits on a machined aluminum plate. It’s not flexing or going anywhere.
Part of what really stood out to me about the printer are a lot of neat little features which show careful thought. For example, the extruder movement sits neatly under one of the motors. All the parts except for one can be printed inside its build envelope without support. It uses around 200g of plastic. Every axis is constrained just enough, rather than the common tendency to over constrain that plagues 3D printer design. The spec sheet reads like my printer part wishlist: Bondtech extruder, Rambo board, E3d nozzle, heated bed, flat borosilicate build plate, name brand linear movements, and a well designed Z.
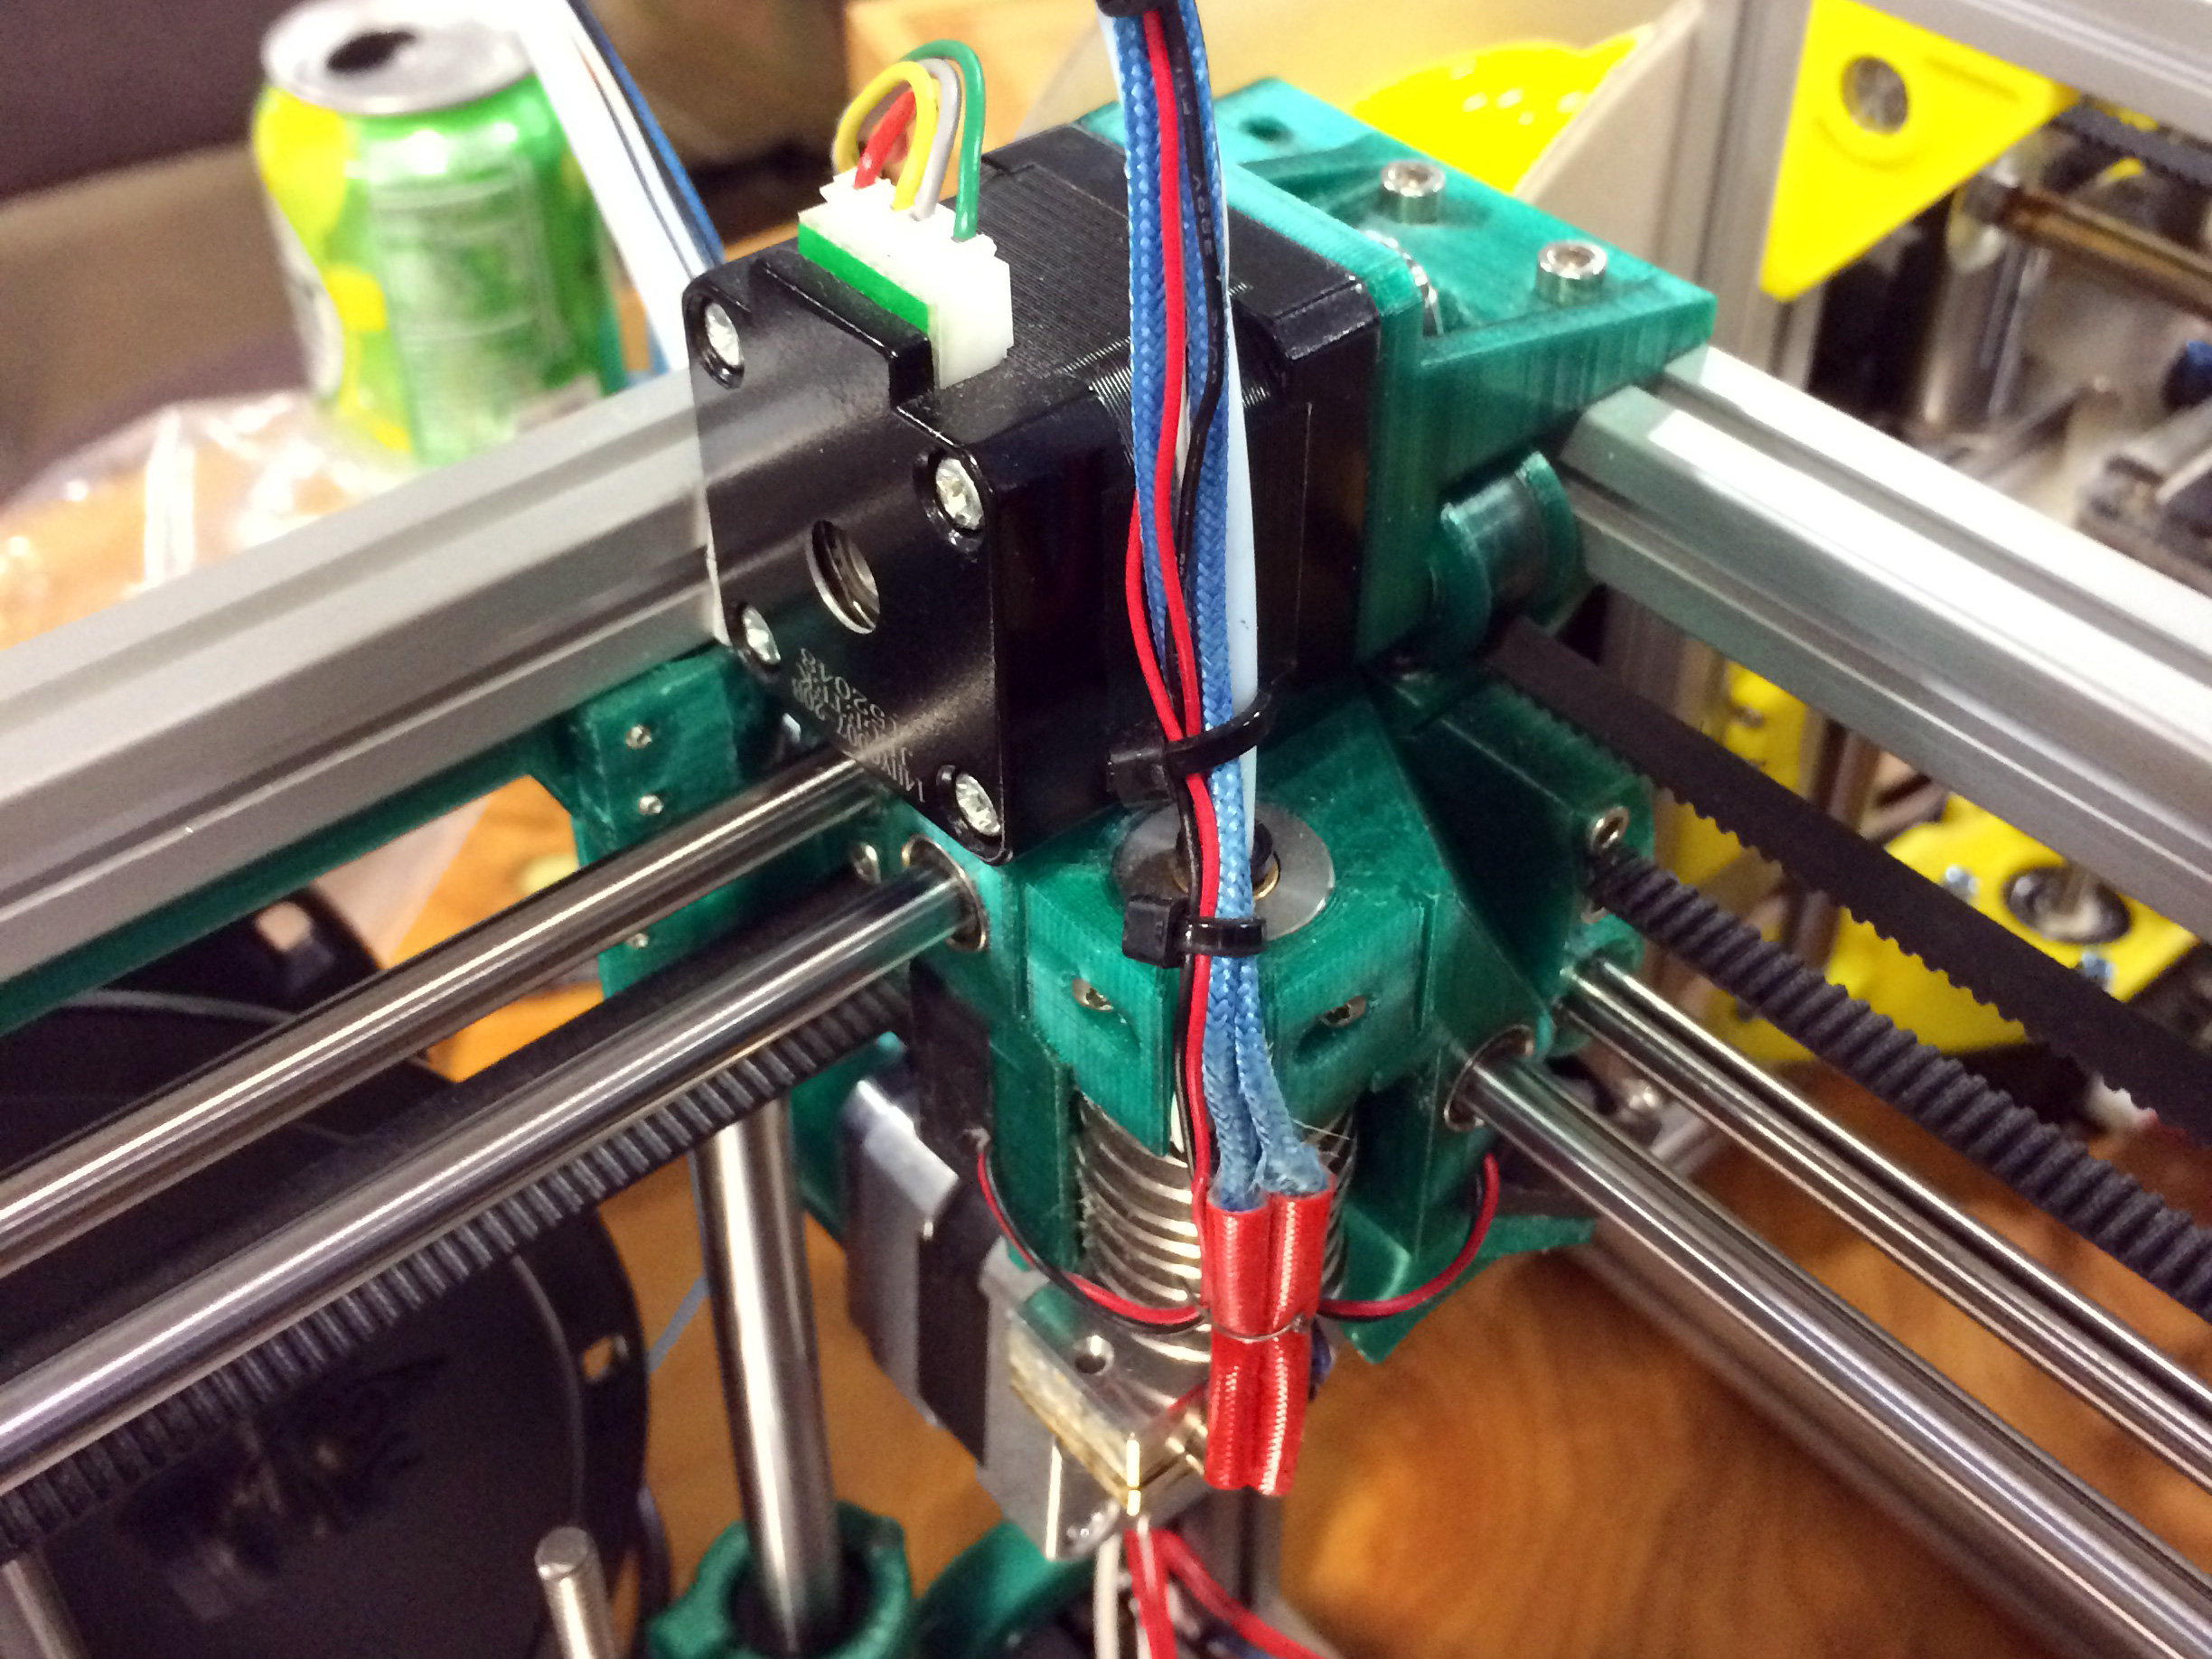
The entire extruder assembly tucks under one of the XY motors at the corner of its movement. Compare its size to the size of a NEMA14 stepper motor.
Another interesting aspect of the design is the extremely light extruder assembly. The lighter an extruder can get, the less ringing will show in your parts at speed. This is one of the most compact designs I’ve witnessed. It consists of two fans, an E3d v6 lite nozzle, and two small linear bearings. The cold end is handled by a bowden set-up and a Bondtech extruder at the back of the printer. The only way to get it lighter would be a different nozzle, such as the upcoming insanely light 13g Pico from B3 unveiled at the festival. I was also interested to see that the bearings on the supporting rails were printed bushings to keep the weight even lower. [nop head] has tested these extensively, they should be fine as long as the rods have a good finish.
I’ve mentioned the size before, but it’s hard to grasp just how adorable this printer is without seeing it. The build envelope is 100mm x 100mm x 100mm, the printer itself is 200mm x 200mm x 240mm. That’s only 50mm wider than the build footprint. It’s a really fun design just to look at and see how they fit it all in there. There are lots of neat little tricks with belt routing and part design to get it all right.
For the enthusiast this would make a good small parts printer and travel printer. However, for me, it was neat to see people still setting out to try designing their own printer. In some ways the 3d printer movement has become crowded with Chinese knock-offs, and I was excited to see something new at the festival. It wasn’t the only new printer design there, but it stood out to me the most. I like the uncompromising nature of it, many people try to design for the lowest BOM and not the nicer print. There are still lots of low-hanging fruit in the 3d printer world and many of them are just getting the mechanics right.
PLA Bushing
Seriously serious Z.
[Patrick] and [Matt] came to the festival with their printer to see if people would like it. They didn’t have grand dreams of selling tons of printers and making millions. They were quite aware that their price point and the small size made it not for everyone. However, their table always had a small crowd. They just really like 3D printers, and that honesty resonated. They didn’t even have a website up at the start of the convention, but by the end they had gotten so many requests they had to oblige. They expect to have 3 kit options available by the end of April. If you’re interested there’s a mailing list sign up on their website. Let’s hope we see them at MRRF again next year with another cool design to look over.
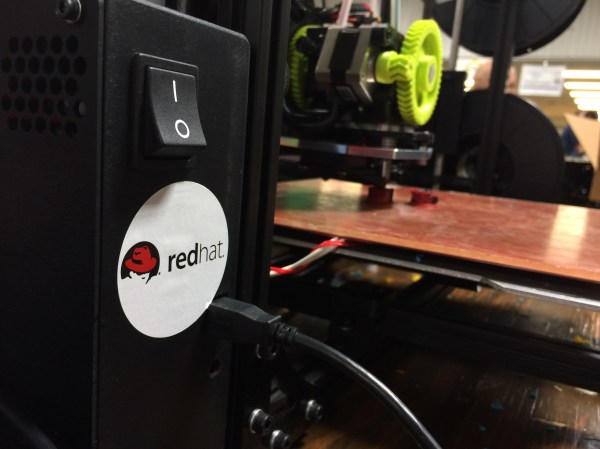
Red Hat is the world’s largest open source company. Run as a for profit company, it manages to give every line of code away and still rake in a cozy 1.5 to 2 billion US dollars a year. So, quite provably, Red Hat knows how to run an open source business. Despite being a software company, as a corporation, Red Hat has hopes for the future of open hardware, and they put their money where their ethos is.
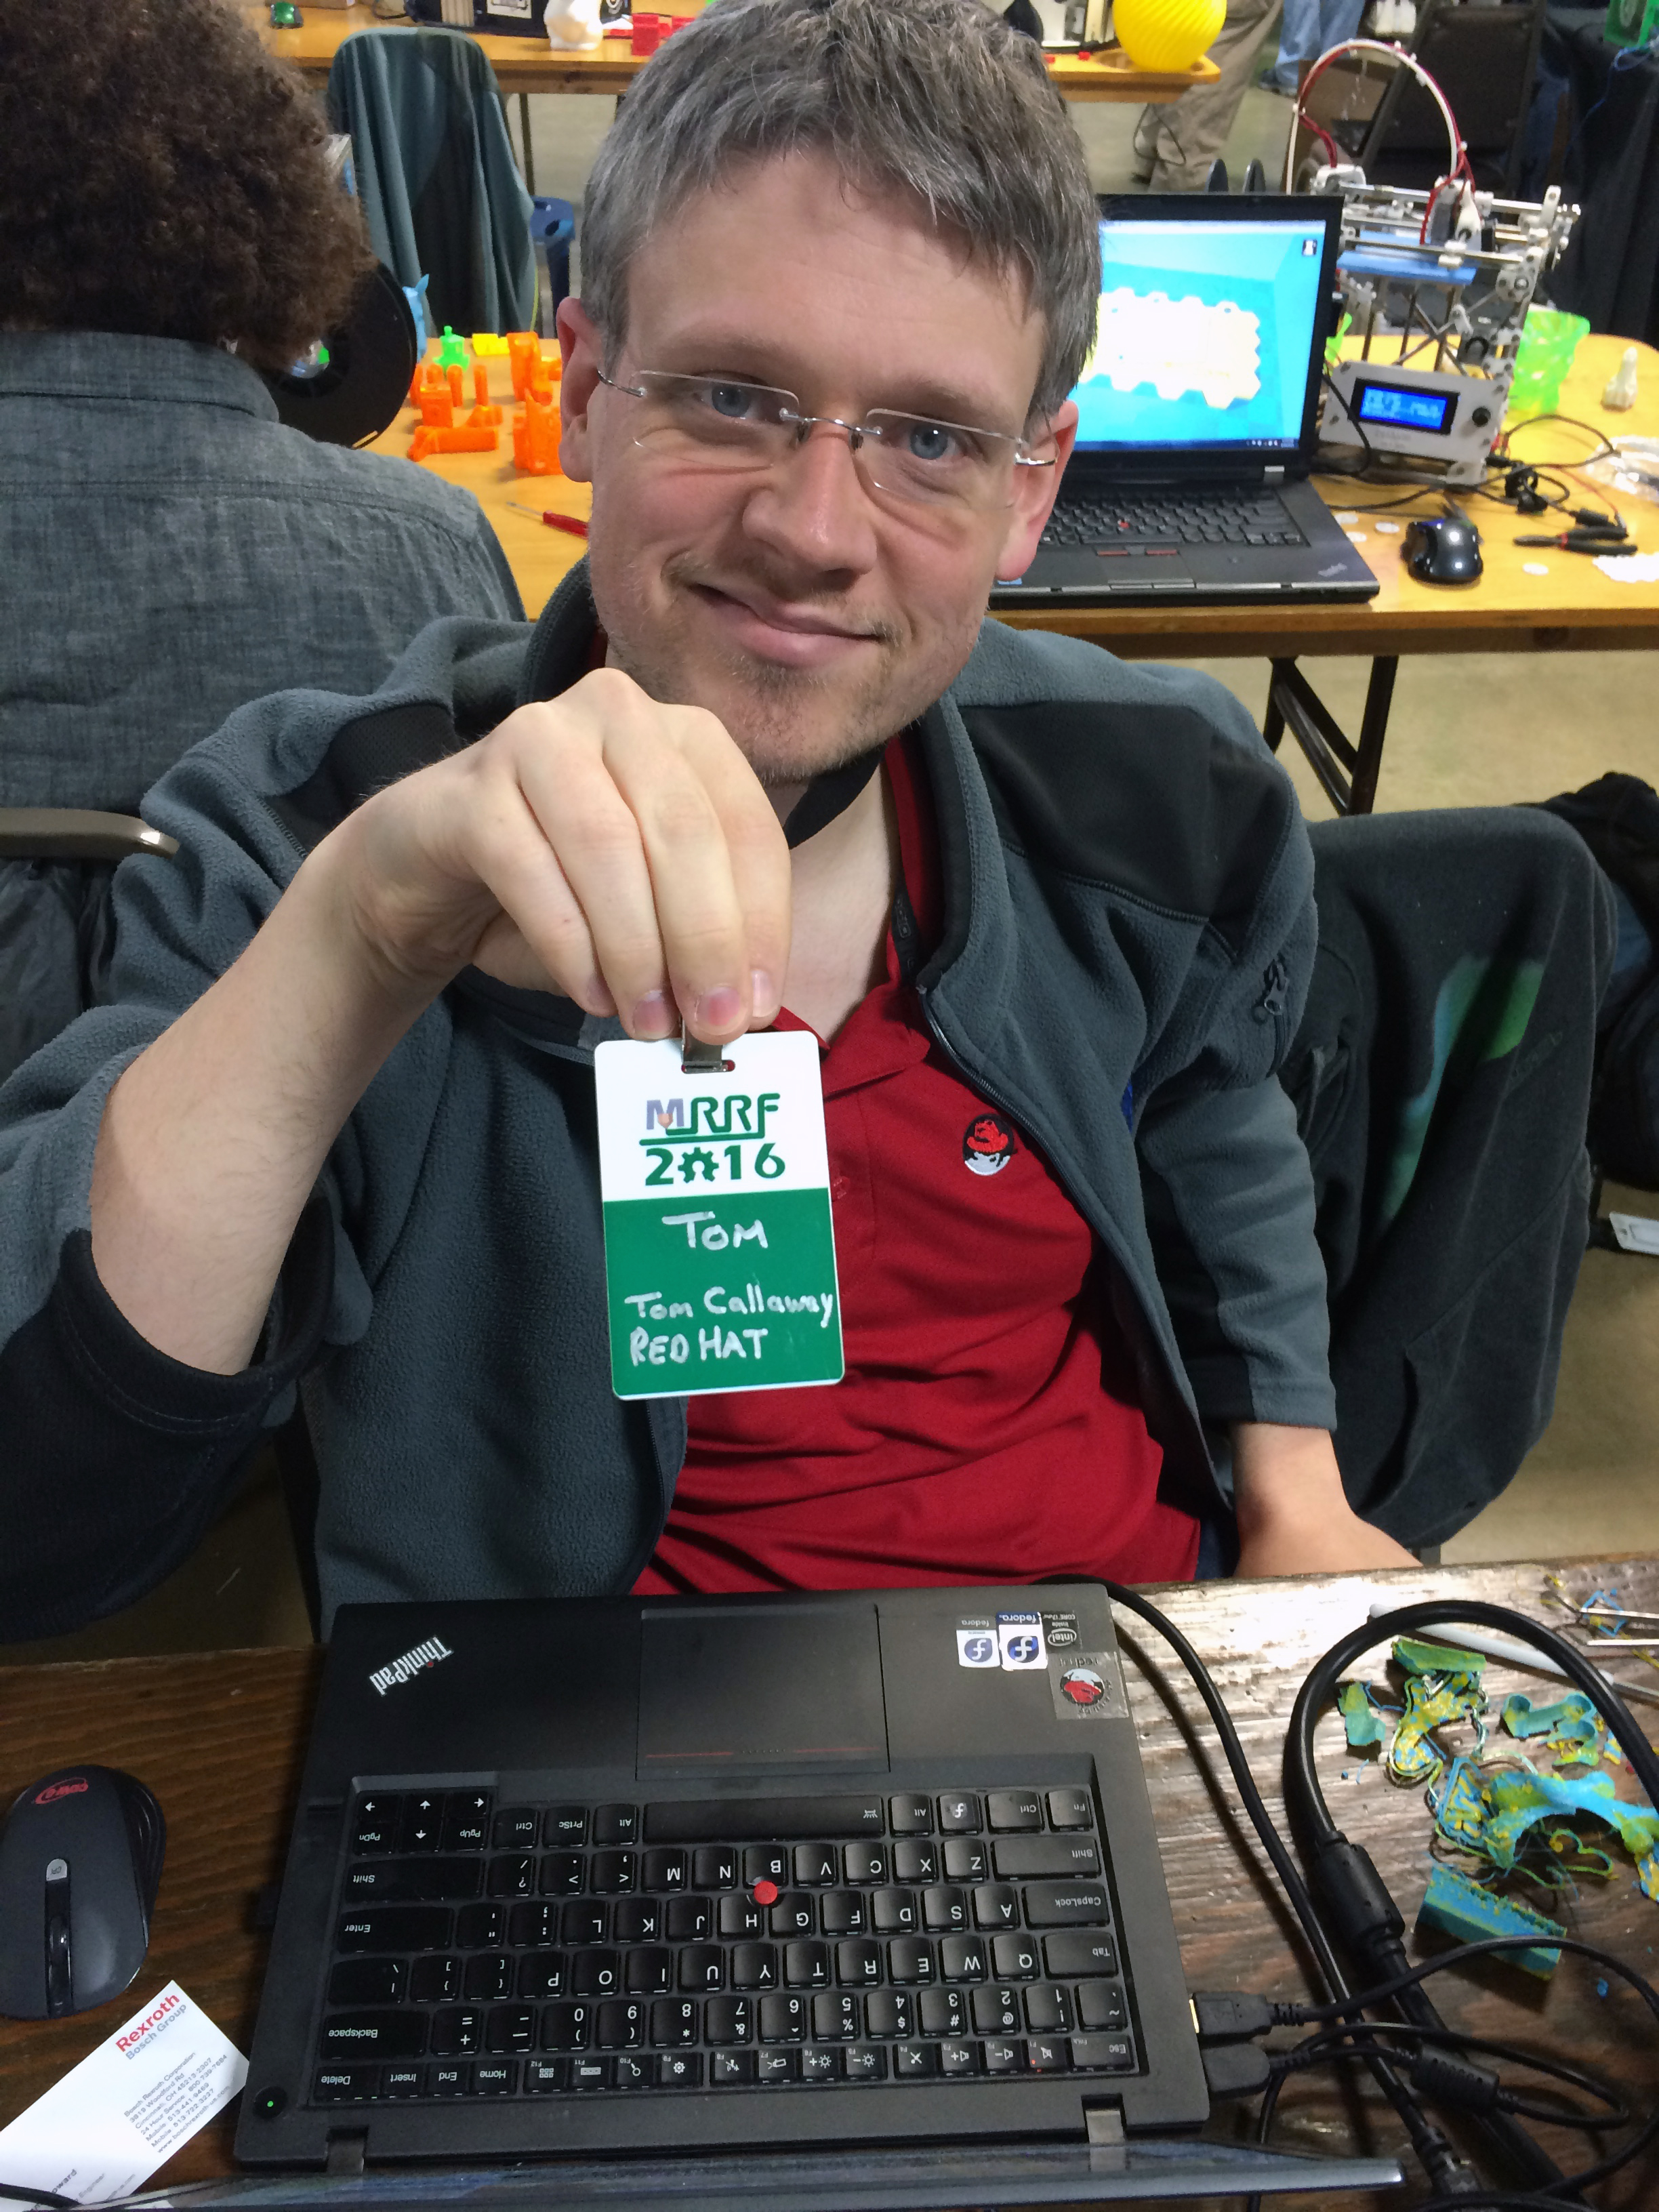
[Tom Callaway] is Red Hat’s full time 3d Printer guy. He works at Red Hat headquarters in Raleigh, North Carolina. We had a chance to talk to him at MRRF and figure out what it is that Red Hat does for 3D printing anyway.
Red Hat’s first interest is that anyone who uses their software to run a 3D printer or interacts with the files involved has an easy time of it in Linux. To that end Tom regularly tests the latest versions of the software we regularly use. He makes sure that the software is nicely packaged for Red Hat. On top of that he also contributes to the projects themselves. He has submitted patches for Cura and Slic3r to name a few.
To run the software through its paces, and as a nice perk for Red Hat employees, [Tom] runs Red Hat’s 3D printing lab. Employees can print anything they like in it, but it also gives Red Hat an opportunity to test the software for failure points. If you are a 3D printer manufacturer (open or closed) you can send them a printer and they’ll make sure it has a profile and runs faultlessly with each version update, not bad!
The face of 3D printing at Red Hat.
[Tom] also participates in the Red Hat Fedora 3D printing special interest group. This lets Red Hat Fedora users come together and work out problems they find in the wild. It’s also one of the best ways for him to stay ahead of the new software packages that come out as 3d printing develops.
The coolest thing about all this, is Red Hat’s support for manufacturers. Red Hat will make sure any software that supports a printer will run, for free. So if you’ve written a custom driver for your printer that only runs on windows. As long as you give Red Hat access to the source code, they’ll make sure it can run on Linux as well. Though, apparently none of the closed source printer manufacturers have taken them up on the offer. Red Hat does have a partnership with open manufacturers such as Lulz Bot.
Being primarily a software company, Red Hat has no personal interest in entering the open hardware market at this time. They do want to see it succeed, and to that end, their last and most interesting service is their willingness to talk about what has and hasn’t worked in running an open source business. People in the open hardware business can reach out to people like [Tom] and ask for advice on the every day aspects of the open source business. Red Hat has undoubtedly learned many lessons over the years, and like their software, they’re willing to share every line.
Edit: Lastly, thanks to [Miro] in the comments, who also works for Red Hat and contributes to 3d Printing. Cool! I just wanted to be clear that most of these things translate into the Fedora Project, which oversees Fedora Linux, a very popular distro (Apparently Linus Torvald’s preferred.) If you’d like to participate in any of this the Fedora Linux 3d Printer SIG (I mistakenly called it Red Hat SIG, which implies that it is only for paying customers of Red Hat Enterprise Linux, which is not true) is the place to go. It makes Fedora better and helps the 3d printing community as a whole:)
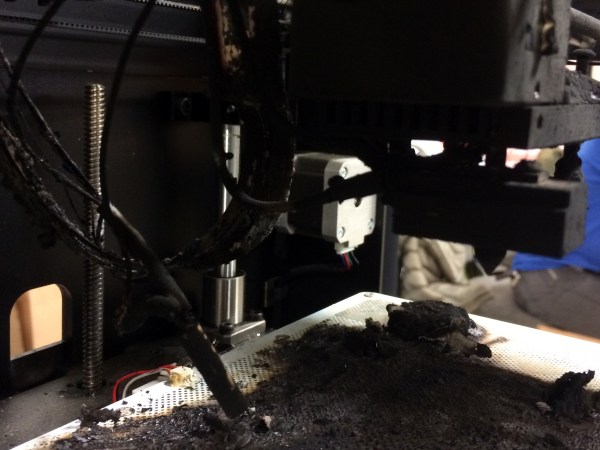
[Jay] out of the River City Labs Hackerspace in Peoria, IL cleared out a jam in his printer. It’s an operation most of us who own a 3D printer have performed. He reassembled the nozzle, and in a moment forgot to tighten down the grub nut that holds the heater cartridge in place. He started a print, saw the first layer go down right, and left the house at 8:30 for work. When he came back from work at 10:30 he didn’t see the print he expected, but was instead greeted by acrid smoke and a burnt out printer.
The approximate start time of the fire can be guessed by the height of the print before failure.
As far as he can figure, some time at around the thirty minute mark the heater cartridge vibrated out of the block. The printer saw a drop in temperature and increased the power to the cartridge. Since the cartridge was now hanging in air and the thermistor that reads the temperature was still attached to the block, the printer kept sending power. Eventually the cartridge, without a place to dump the energy being fed to it, burst into flame. This resulted in the carnage pictured. Luckily the Zortrax is a solidly built full metal printer, so there wasn’t much fuel for the fire, but the damage is total and the fire could easily have spread.
Which brings us to the topics of discussion.
How much can we trust our own work? We all have our home-builds and once you’ve put a lot of work into a printer you want to see it print a lot of things. I regularly leave the house with a print running and have a few other home projects going 24/7. Am I being arrogant? Should I treat my home work with a lesser degree of trust than something built by a larger organization? Or is the chance about the same? Continue reading “Ask Hackaday MRRF Edition: 3D Printers Can Catch Fire”→
[hhtat] wanted to build an arcade cabinet since his days in high-school. Only recently have the tech planets aligned. Looking into the night sky he saw a laser cutter, the Raspberry Pi, and lowering prices on key components and thought, “this is the year.”
Much like an arcade cabinet we posted earlier, this one sits on a counter top. With full controls and a nice screen, it provides a lot of the experience without the additional explaining to the SO why the living space should house a giant decaled MDF box.
The frame was designed in SketchUp and vectors were made in Inkscape. The frame was lasercut out of MDF and Acrylic. Decals were printed and applied. The resulting case, build from tab and slot construction, is attractive.
The internals are simple. A Raspberry Pi with a fast SD card acts as the brain. Rather than make it difficult on himself, [hhat] bought a pre-made controls kit from eBay. Apparently there is a small market for this stuff. He also purchased an IPS screen with built in controller. The IPS panel gives the arcade cabinet a desireable wide viewing angle.
The final product looks like a lot of fun and we can see it turning at least one person into an unintentional loner at any house party.