Exploring TapTo NFC Integration On The MiSTer

[Ken] from the YouTube channel What’s Ken Making is back with another MiSTer video detailing the TapTo project and its integration into MiSTer. MiSTer, as some may recall, is a set of FPGA images and a supporting ecosystem for the Terasic DE10-Nano FPGA board, which hosts the very capable Altera Cyclone V FPGA.

The TeensyROM C64 cart supports TapTo

The concept behind TapTo is to use NFC cards, stickers, and other such objects to launch games and particular key sequences. This allows an NFC card to be programmed with the required FPGA core and game image. The TapTo service runs on the MiSTer, waiting for NFC events and launching the appropriate actions when it reads a card. [Ken] demonstrates many such usage scenarios, from launching games quickly and easily with a physical ‘game card’ to adding arcade credits and even activating cheat codes.

As [Ken] points out, this opens some exciting possibilities concerning physical interactivity and would be a real bonus for people less able-bodied to access these gaming systems. It was fun to see how the Nintendo Amiibo figures and some neat integration projects like the dummy floppy disk drive could be used.

TapTo is a software project primarily for the MiSTer system, but ports are underway for Windows, the MiSTex, and there’s a working Commodore 64 game loader using the TeensyROM, which supports TapTo. For more information, check out the TapTo project GitHub page.

We’ve covered the MiSTer a few times before, but boy, do we have a lot of NFC hacks. Here’s an NFC ring and a DIY NFC tag, just for starters.

Continue reading “Exploring TapTo NFC Integration On The MiSTer”

Archiving Data On Paper Using 2D Images

It seems like only yesterday we covered a project using QR codes to archive data on paper (OK, it was last Thursday), so here’s another way to do it, this time with a dedicated codec using the full page. Optar or OPTical ARchiver is a project capable of squeezing a whopping 200 Kb of data onto a single A4 sheet of paper, with writing and reading achieved with a standard laser printer and a scanner. It’s a bit harder than you might think to get that much data on the page, given that even a 600 DPI printer can’t reliably place every dot each time. Additionally, paper is rarely uniform at the microscopic scale, so Optar utilizes a forward error-correcting coding scheme to cater for a little irregularity in both printing and scanning.

The error-correcting scheme selected was an Extended Golay code (24, 12, 8),  which, interestingly, was also used for image transmission by the NASA Voyager 1 and 2 missions. In information theory terms, this scheme has a minimum Hamming Distance of 8, giving detection of up to seven bit errors. This Golay code implementation is capable of correcting three-bit errors in each 24-bit block, with 12 bits available for payload. That’s what the numbers in those brackets mean.

Another interesting problem is paper stretch during printing. A laser printer works by feeding the paper around rollers, some of which are heated. As a printer wears or gets dirty, the friction coefficient along the rollers can vary, leading to twisting and stretching of the paper during the printing process. Water absorbed by the paper can also lead to distortion. To compensate for these effects, Optar regularly inserts calibration targets throughout the bit image, which are used to locally resynchronize the decoding process as the image is processed. This is roughly similar to how the alignment patterns work within larger QR codes. Finally, similar to the position detection targets (those square bits) in QR codes, Optar uses a two-pixel-wide border around the bit image. The border is used to align to the corners well enough to locate the rows of bits to be decoded.

In the distant past of last week, we covered a similar project that uses QR codes. This got us thinking about how QR codes work, and even if encoding capacity can be increased using more colors than just black and white?

Thanks to [Petr] for the tip!

Taking Back The Internet With The Tildeverse

For many of us of a particular vintage, the internet blossomed in the ’90s with the invention of the Web and just a few years of development. Back then, we had the convenience of expression on the WWW and the backup of mature services such as IRC for all that other stuff we used to get up to. Some of us still hang out there. Then something happened. Something terrible. Big-commerce took over, and it ballooned into this enormously complex mess with people tracking you every few seconds and constantly trying to bombard you with marketing messages. Enough now. Many people have had enough and have come together to create the Tildeverse, a minimalist community-driven internet experience.

A collaborative Minecraft server hosted on a Tilde site

Tilde, literally ‘ ~ ‘, is your home on the internet. You can work on your ideas on a shared server or run your own. Tilde emphasises the retro aesthetic by being minimal and text-orientated. Those unfamiliar with a command line may start getting uncomfortable, but don’t worry—help is at hand. The number of activities is too many to list, but there are a few projects, such as a collaborative Sci-Fi story, a radio station, and even a private VoIP server. Gamers are catered for as long as you like Minecraft, but we think that’s how it should go.

The Tildeverse also supports Gopher and the new Gemini protocol,  giving some people a few more options with which to tinker. The usual method to gain access is to first sign up on a server, then SSH into it; you’re then taken to your little piece of the internet, ready to start your minimalist journey into the Tildeverse.

A couple of videos after the break go into much more detail about the whys and hows of the Tildeverse and are worth a chunk of your time.

We’ve talked about the ‘small web’ before. Here’s our guide to Gemini.

Continue reading “Taking Back The Internet With The Tildeverse”

Create Custom Gridfinity Boxes Using Images Of Tools

Exhibit A: A standard-issue banana.

We love it when a community grabs hold of an idea and runs wild with it despite obvious practicality issues. Gridfinity by YouTuber [Zach Freedman] is one of those concepts. For the unaware, this is a simple storage system standard, defining boxes to hold your things. These boxes can be stacked and held in place in anything from a desk drawer to hanging off the side of a 3D printer. [Georgs Lazdāns] is one such Gridfinity user who wanted to create tool-specific holders without leaving the sofa. To do so, they made a web application using node.js and OpenCV to extract outlines for tools (or anything else) when photographed on a blank sheet of paper.

The OpenCV stack assumes that the object to be profiled will be placed on a uniformly colored paper with all parts of its outline visible. The first part of the stack uses a bilateral filter to denoise the image whilst keeping edge details.

Make a base, then add a banana. Easy!

Next, the image is converted to greyscale, blurred, and run through an adaptive threshold. This converts the image to monochrome, again preserving edge details. Finally, the Canny algorithm pulls out the paper contour. The object outline can be given an accurate scale with the paper contour and paper size specified. The second part of the process works similarly to extract the object outline. The second contour should follow the object pretty accurately. If it doesn’t, it can be manually tweaked in the editor. Once a contour is captured, it can be used to modify a blank Gridfinity base in the model editor.

Continue reading “Create Custom Gridfinity Boxes Using Images Of Tools”

Building A Multi-Purpose Electrochemistry Device

We don’t get enough electrochemistry hacks on these pages, so here’s [Markus Bindhammer] of YouTube/Marb’s lab fame to give us a fix with their hand-built general-purpose electrochemistry device.

The basic structure is made from plyboard cut to size on a table saw and glued’n’screwed together. The top and front are constructed from an aluminium sheet bent to shape with a hand-bender. A laser-printed front panel finishes the aesthetic nicely, contrasting with the shiny aluminium. The electrode holders are part of off-the-shelf chemistry components, with the electrical contacts hand-made from components usually used for constructing stair handrails. Inside, a 500 RPM 12 V DC geared motor is mounted, driving a couple of small magnets. A PWM motor speed controller provides power. This allows a magnetic stirrer to be added for relevant applications. Power for the electrochemical cell is courtesy of a Zk-5KX buck-boost power supply with a range of 0 – 36 V at up to 5 A  with both CV and CC modes. A third electrode holder is also provided as a reference electrode for voltammetry applications. A simple and effective build, we reckon!

Over the years, we’ve seen a few electrochemical hacks, like this DIY electroplating pen, a DIY electrochemical machining rig, and finally, a little something about 3D printing metal electrochemically.

Continue reading “Building A Multi-Purpose Electrochemistry Device”

Hacking An NVIDIA CMP 170HX Crypto GPU For EM Sim Work

A few years back NVIDIA created a dedicated cryptocurrency mining GPU, the CMP 170HX. This was a heavily restricted version of its flagship A100 datacenter accelerator, using the same GA100 chip. It was intended for accelerating Ethash, the Etherium proof-of-work algorithm, and nothing else. [niconiconi] bought one to use for accelerating PCB electromagnetic simulations and put a lot of effort into repairing the card, converting it to water-cooling, and figuring out how best to use this nobbled GPU.

Typically, the GA100 silicon sits in the center of the mighty A100 GPU card and would be found in a server rack, cooled by forced air. This was not an option at home, so an off-the-shelf water-cooling block was wedged in. During this process, [niconconi] found that the board wouldn’t power on, so they went on a deep dive into the power supply tree with the help of a leaked A100 schematic. The repair and modifications can be found in the appendix, right down to the end of the article. It is a long read to get there.

Continue reading “Hacking An NVIDIA CMP 170HX Crypto GPU For EM Sim Work”

Why Have Seven Segments When You Can Have 21?

IO user [monte] was pointed towards an 1898 display patent issued to a [George Mason] and liked the look of the ‘creepy’ font it defined. The layout used no less than 21 discrete segments to display the complete roman alphabet and numerals, which is definitely not possible with the mere seven segments we are all familiar with. [monte] then did the decent thing and created a demonstration digit using modern parts.

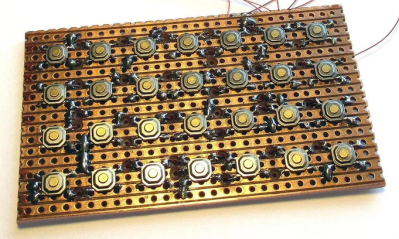
For the implementation, [monte] created a simple PCB by hand (with an obvious mistake) and 3D-printed an enclosure and diffuser to match. After a little debugging, a better PCB was ordered from one of the usual overseas factories. There isn’t a schematic yet, but they mention using a CH32V003 Risc-V micro, which can be seen sitting on the rear of the PCB.

Maximum flexibility is ensured by storing every glyph as a 32-bit integer, with each LED corresponding to a single bit. It’s interesting to note the display incorporates serifs, which are definitely optional, although you could display sans-serif style glyphs if you wanted to. There is now a bit of a job to work out how to map character codes to glyph codes, but you can have a go at that yourself here. It’s still early doors on this project, but it has some real potential for a unique-looking display.

We love displays—every kind. Here’s a layout reminiscent of a VFD digit but done purely mechanically. And if you must limit yourself to seven digits, what about this unique thing?

Continue reading “Why Have Seven Segments When You Can Have 21?”