Arduino Vs. Phidgets – Dev Time Trials

Is developing on an Arduino too slow? Are Phidgets too expensive? When might you use one or the other? Hackaday regular [Ken] breaks down what he learned from three experimental time trials.

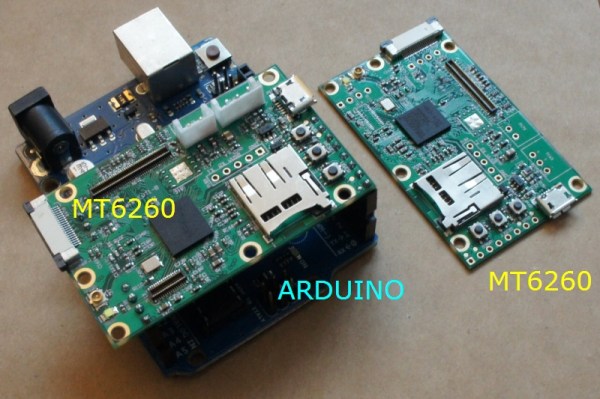
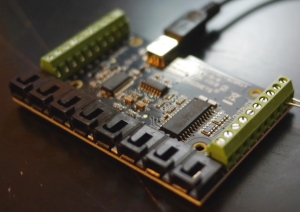
The main development differences between Arduino and Phidgets are a mix of flavor preferences and some hard facts. The Arduino is open source, Phidgets are proprietary. Arduino requires a mix of hard- and software where Phidgets only needs (and only allows) a connection to a full computer but enables high level languages – it is expected to get the job done sooner and easier. And finally, Arduinos are cheap, Phidgets are 3-5x the cost.

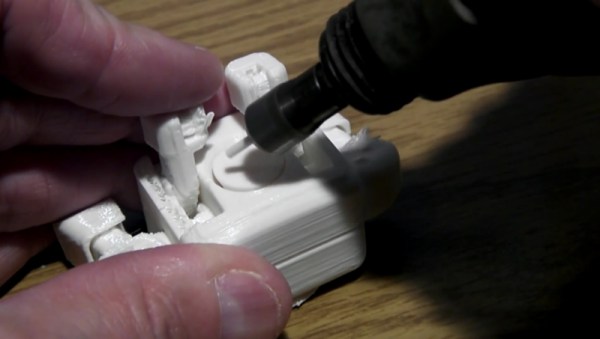
The three time trials were common tasks: 1. Blink an LED. 2. Use a pot to turn a servo. 3. Build a pedometer. For [Ken], the Phidgets won in each of the three experiments, but not significantly: 37%, 45%, and 25% respectively. The difference is only minutes. Even considering time value, for most hackers it is not worth the cost.

HAD - Phidgets3In context, the advantages of a mildly more rapid development on the simplest projects are wasted away by needing to rebuild a permanent solution. Chained to a PC, Phidgets are only useful for temporary or fixed projects. For many of our readers that puts them dead in the water. Arduinos may technically be dev kits but are cheap enough to be disposed of in the project as the permanent solution – probably the norm for most of us.

[Ken] points out that for the software crowd that abhor electronics, Phidgets plays to their preferences. Phidgets clips together their pricey peripherals and the rest is all done in code using familiar modern languages and libraries. We wonder just how large this group could still be; Phidgets might have been an interesting kit years ago when the gulf between disciplines was broader but the trend these days is towards everyone knowing a little about everything. Hackaday readers probably represent that trend more than most, but let us know if that seems off.

[Ken]’s article has much more and much better detailed explanations of the experiments and the tradeoffs between the platforms.

If you enjoy watching parallel engineering, see the time-lapse video below for a split screen of the time trials.

Continue reading “Arduino Vs. Phidgets – Dev Time Trials”

Boeing 777 From Manilla Folders, A 6+ Year Effort

The closer you look the more you will be in awe of this shockingly intricate 777 replica. The fully-articulating landing gear alone has over 2,000 parts and 200 hours of assembly, not even including the penny-sized tires with individually-cut lug nuts. All carved from manilla office folders by hand.

HAD - 777 WingA high school art architecture class in 2008 inspired this build by teaching a few papercrafting techniques. When [Luca] got a hold of a precision Air India 777-300ER schematic, he started building this 5 foot long 1:60 scale model. His project has received a fair amount of media attention over the years, including some false reports that he was so focused on the build that he dropped out of college (he did, for 2 years, but for other reasons). 6.5 years in the making, [Luca] is rounding the homestretch.

HAD - 777 Gear
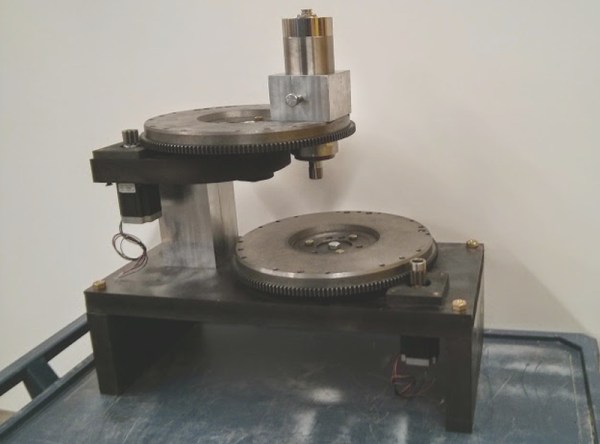
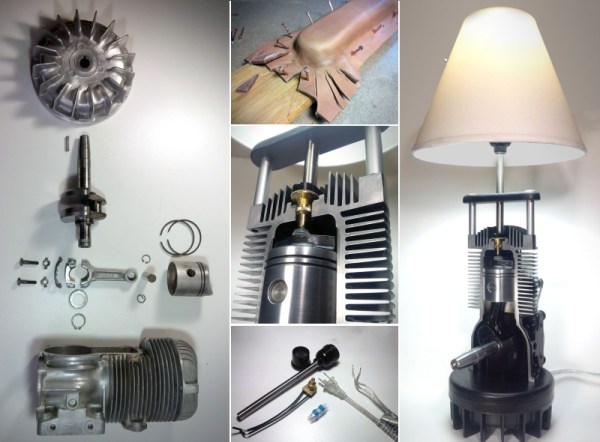
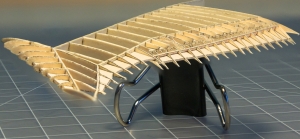
The design is manually drawn in Illustrator from the schematics, then is printed directly onto the manilla folders. Wielding an X-acto knife like a watch-maker, [Luca] cuts all the segments out and places them with whispers of glue. Pistons. Axles. Clamps. Tie rods. Brackets. Even pneumatic hoses – fractions of a toothpick thin – are run to their proper locations. A mesh behind the engine was latticed manually from of hundreds of strands. If that was not enough, it all moves and works exactly as it does on the real thing.

Continue reading “Boeing 777 From Manilla Folders, A 6+ Year Effort”

Peculiar Radial Mill From Car Parts

Whether 3D printer, lasercutter, or mill, most CNC machines use human-friendly, square-angle Cartesian geometry. This intriguing concept mill instead uses radial axes where motion is derived from scrap Chevy flywheels. It may look and feel weird at first, but it works – sort of.

Cartesian axes are intuitive. If you want to go to the right, increase X. If you want to go to away from you, increase Y. If you want to lift, increase Z. On a manual mill this is easy for making rectangles and blocks, or, with creative clamping, straight lines of any sort. But if you want to carve a circle? As we all learned on an Etch-A-Sketch, you increase your swearing and then throw it in the corner.

HAD - Radial Mill2[Jason] knew that with a CNC machine all geometry problems are reduced to math done by software. With two offset discs, any position is possible by rotating both the correct way. It may look odd that both plates drunkenly meander about just to draw a straight line but the computer is ambivalent. Software can be complicated without penalty and is free once written – more on that later. If a machine is physically simple then it can be built and repaired easily and cheaply. This design does away with almost all the familiar – and [Jason] argues complicated – components of normal hobby CNC machines. No slides, rails, carriages or belts here. His design uses only about a dozen parts.

Because automotive flywheels are made from cast iron the machine is rigid and naturally dampening. Sticking with the junkyard theme he pulled bearings from an F-450 truck, good for a few thousand pounds. Some steppers and a Raspberry Pi and he was done – well, sort of.

[Jason] let us know that his project has sat for long enough that he has become passionate about other things and decided to move on. He documented his progress and submitted the tip in hope to inspire someone else to continue the design further. Any type of CNC is possible, not just a mill. 3D printer perhaps?

Two big caveats: it needs a Z-axis (linear, probably standard) and there appears to be deeper-seated-than-expected G-code demands to chit-chat about rectangles and only rectangles. Nothing insurmountable, just nothing he has solved yet himself.

[Jason] said not to expect any further updates from him but he would love to see what the next person could do with it.

See the video after the break of the mill drawing our skull and wrenches logo, (soft of, without a Z-axis to lift).

Continue reading “Peculiar Radial Mill From Car Parts”

Reverse-Engineering A Superior Chinese Product

It makes an Arduino look like a 555.  A 364 Mhz, 32 bit processor. 8 MB RAM. GSM. Bluetooth. LCD controller. PWM. USB and dozens more. Smaller than a Zippo and thinner than corrugated cardboard. And here is the kicker: $3. So why isn’t everyone using it? They can’t.

Adoption would mandate tier after tier of hacks just to figure out what exact hardware is there. Try to buy one and find that suppliers close their doors to foreigners. Try to use one, and only hints of incomplete documentation will be found. Is the problem patents? No, not really.

[Bunnie] has dubbed the phenomenon “Gongkai”, a type of institutionalized, collaborative, infringementesque knowledge-exchange that occupies an IP equivalent of bartering. Not quite open source, not quite proprietary. Legally, this sharing is only grey-market on paper, but widespread and quasi-accepted in practice – even among the rights holders. [Bunnie] figures it is just the way business is done in the East and it is a way that is encouraging innovation by knocking down barriers to entry. Chinese startups can churn out gimmicky trash almost on whim, using hardware most of us could only dream about for a serious project.

Continue reading “Reverse-Engineering A Superior Chinese Product”

Bisected Engine Makes Cute Lamp – Still Cranks

As a beginner’s step towards the famous Top Gear V8 coffee table, [English Tea] converted a small single cylinder engine into a desk lamp that uses the mechanical actuation of the piston to turn on and off. No able-bodied engines were harmed in the making of this hack as this one was already a corpse — perfect for [Mr. Tea] to prop up and display in his home.

Regrettably lacking a lightsaber, he settled for 30 minutes on a hacksaw to split the cylinder followed by some sandblasting to clean all the rust, paint, and gunk off all the internals. Once it was clean he repainted it himself. Between paint and clearcoats, he figured he added 20 layers onto the metal.

Next he created some wood sections and wet-formed leather over them which he later dyed black. Caring less about a new Walmart lamp than the motor, he vivisected it for its electrical components and wired it up.

Without a crank on the shaft it looks a bit awkward to twist the lamp on or off, but, only enough pressure is needed to poke a latching momentary pushbutton and it seems to work just fine. For any readers looking to make their own, dead compressors and gas power tools are fairly common and nearly free at the junkyard. Engine-based projects can be intimidating to start if you need a working engine again at the end. Becoming familiar with them on a project like this where you are mostly only using the engine as a building material is an easy way to get your foot in the door.

See the video after the break of the piston bumping the light on and off.

Continue reading “Bisected Engine Makes Cute Lamp – Still Cranks”

New 3D Printing Technique – Friction Welding

Even though 3D printers can fabricate complex shapes that would be nearly impossible to mill, they are not well suited to designs requiring bridging or with large empty spaces. To overcome this, [Scorch] has applied an easy plastic welding technique that works with both ABS and PLA. All you need is a rotary tool.

Friction welding” is the process of rubbing two surfaces together until the friction alone has created enough heat to join them. Industrially, the method is applied to joining large, metal workpieces that would otherwise require a time-consuming weld. In 2012, [Fran] reminded us of a toy from decades ago that allowed children to plastic weld styrene using friction. This modified method is similar to stick welding in that a consumable filler rod is added to the molten joint. Inspired by our coverage of [Fran], [Scorch] experimented and discovered that a stick of filament mounted into a Dremel works just as well for joining 3d prints.

That is all there is to it. Snip off a bit of filament, feed it into your rotary tool, and run a bead to join parts and shapes or do repairs. Friction welded plastic is shockingly strong, vastly superior to glued plastic for some joints. Another tool for the toolbox. See the videos below for [Scorch]’s demo.

Continue reading “New 3D Printing Technique – Friction Welding”

Ultimate Oscilloscope Hack – Quake In Realtime

[Pekka] set himself up with quite the challenge – use an oscilloscope screen to display Quake in realtime – could it even be done? Old analog scope screens are just monochromatic CRTs but they are designed to draw waveforms, not render graphics.

Over the years Hackaday has tracked the evolution of scope-as-display hacks: Pong, Tetris, vector display and pre-rendered videos. Nothing that pushed boundaries quite like this.

[Pekka]’s solution starts off the same as many others, put the scope in X-Y mode and splice up your headphone cable – easy. He then had to figure out some way to create an audio signal that corresponded to the desire image. The famous “Youscope” example demos this, but that demo is pre-rendered. [Pekka] wanted to play Quake in realtime on the scope itself, not just watch a recording.

With only so much bandwidth available using a soundcard, [Pekka] figured he could draw a maximum of about a thousand lines on screen at a time. The first headache was that all of his audio cards had low-pass filters on them. No way around it, he adjusted his ceiling accordingly. ASIO and PortAudio were his tools of choice to create the audio on the fly from a queue of XY lines given.

To tell his audio engine what lines to draw, he solicited Darkplaces – an open source Quake rendering engine – and had it strip polygons down to the bare minimum. Then he had to whip out the digital hedge trimmers and continue pruning. This writeup really cannot do justice to all the ingenious tricks used to shove the most useful data possible through a headphone jack. If this kind of thing interests you at all, do yourself a favor and check out his well-illustrated project log.

In the end [Pekka] was not entirely happy with the results. The result is playable, but only just barely. The laptop struggles to keep it simple enough, the soundcard struggles to add enough detail and the scope struggles to display it all quickly enough. At the very least it sets the bar extraordinarily high for anyone looking to one-up him using this method. There is only so much water that can be squeezed from a rock.

See the video below of [Pekka] playing the first level of Quake.

Continue reading “Ultimate Oscilloscope Hack – Quake In Realtime”