A Very Large VU Meter Indeed

It used to be a must-have on any hi-fi, a pair of moving coil meters or LED bar graphs, the VU meter. Your 1980s boombox would have had them, for example. VU, for “Volume Units”, is a measure of audio level, and the fashion for its visual measure in consumer audio equipment seems now to have largely passed.

The LED bar graph VU meters were invariably driven by the LM3915, a chip that contains a resistor ladder and a stack of comparators which can drive LEDs directly. [Juvar] has taken an LM3915, and used it to drive a set of opto-isolated triacs which in turn drive a stack of appropriately coloured mains LED bulbs concealed within an Ikea Vidja lamp. The result is a huge and very bright VU meter that is as much a lighting effect as it is a measure of sound level.

He’s posted a video of the lights in action, and we’ve placed it below the break. There is a cameo appearance from his cat, and one can’t escape the feeling that it is wasted on a small room and would be at its best before a dance floor. Still, it’s a neat lighting effect and a new use for a classic integrated circuit.
Continue reading “A Very Large VU Meter Indeed”

Reverse Engineering An Ultrasonic Car Parking Sensor

It has become a common sight, a must-have feature on modern cars, a row of ultrasonic sensors embedded in the rear bumper. They are part of a parking sensor, an aid to drivers for whom depth perception is something of a lottery.

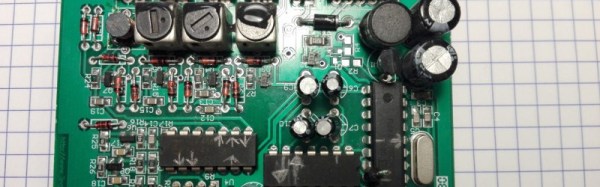
[Haris Andrianakis] replaced the sensor system on hs car, and was intrigued enough by the one he removed to reverse engineer it and probe its workings. He found a surprisingly straightforward set of components, an Atmel processor with a selection of CMOS logic chips and an op-amp. The piezoelectric sensors double as both speaker and microphone, with a CMOS analogue switch alternating between passing a burst of ultrasound and then receiving a response. There is a watchdog circuit that is sent a tone by the processor, and triggers a reset in the event that the processor crashes and the tone stops. Unfortunately he doesn’t delve into the receiver front-end circuitry, but we can see from the pictures that it involves an LC filter with a set of variable inductors.

If you have ever been intrigued by these systems, this write-up makes for an interesting read. If you’d like more ultrasonic radar goodness, have a look at this sweeping display project, or this ultrasonic virtual touch screen.

If The I And Q Of Software Defined Radio Are Your Nemesis, Read On

For those of us whose interests lie in radio, encountering our first software defined radio must have universally seemed like a miracle. Here is a surprisingly simple device, essentially a clever mixer and a set of analogue-to-digital or digital-to-analogue converters, that can import all the complex and tricky-to-set-up parts of a traditional radio to a computer, in which all signal procession can be done using software.

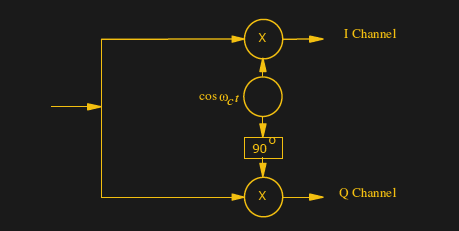
A quadrature mixer. Jugandi (Public domain).

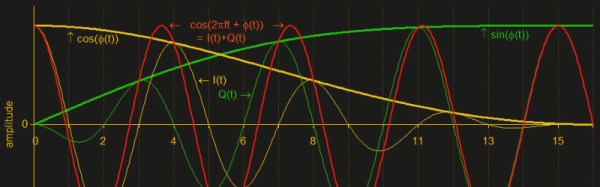
When your curiosity gets the better of you and you start to peer into the workings of a software defined radio though, you encounter something you won’t have seen before in a traditional radio. There are two mixers fed by a two local oscillators on the same frequency but with a 90 degree phase shift, and in a receiver the resulting mixer products are fed into two separate ADCs. You encounter the letters I and Q in relation to these two signal paths, and wonder what on earth all that means.

Continue reading “If The I And Q Of Software Defined Radio Are Your Nemesis, Read On”

Reusing A Wire Bonded Chip

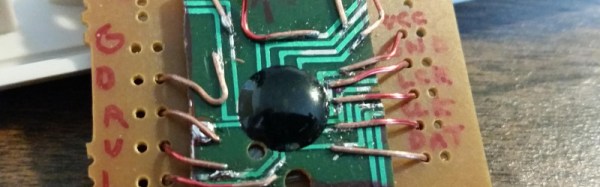
We will all at some point have opened up a device to investigate its internal workings, and encountered a blob of resin on the PCB concealing an integrated circuit. It’s usually a cost thing, the manufacturer has sourced the chip as bare silicon rather than in encapsulated form, and it has been bonded to the board with its connections made directly using fine wires. The whole fragile component is then hidden by a protective layer of resin.

Normally these chips are off-limits to we experimenters because they can not be removed from the board without damage, and we have no information such as a part number about their function. Today though we have a rare example of a wire bonded chip being reused courtesy of Reddit user [BarockObongle], who has incorporated the controller from a multi-game joystick into his handheld NES project by cutting a square of PCB containing the chip, and soldering lengths of wire to the PCB tracks.

Of course, he’s in the rare position of knowing the function of the chip in question, and having a ready application for it. But it’s probable that few of us have considered the possibility of taking a resin blob from its original board and using it in a different way, so even though this is quite a straightforward piece of work it is sufficiently unusual to be worth a look. Sadly we don’t have the rest of the build to see it in context, it would be nice to think we’ll be able to feature it when it is completed.

If you are interested in what goes on underneath the blob, have a look at SparkFun’s explanation. Or charge your laser.


A Mini-ITX Atari 800

As a community has grown up around the 8-bit microcomputers of the 1980s, there have been some beautifully crafted rebuilds of classic machines to take advantage of newer hardware or to interface to peripherals such as keyboards or displays that were unavailable at the time. Often these have taken the form of small boards, or boards that are designed to follow the form factor of the original machine, and fit in an original case.

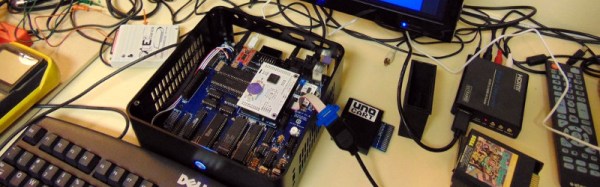
[mytekcontrols] has taken a different tack with his Atari 800 build, he’s produced an Atari clone designed to take the most popular upgrade boards produced by the 8-bit Atari community, as daughter boards. And he’s followed an existing form factor, though it’s not one from the Atari world. Instead, he’s made it as a mini-ITX motherboard of the type you may well be familiar with from the world of PCs.

He’s calling it the 1088XEL, because with a popular 1MB upgrade board fitted it boasts a generous 1088k of memory. It sports the original five Atari LSI chips, and manages the task without resorting to surface-mount construction.

The forum thread linked above is a long one that makes for a fascinating read as it deals in depth with the design of an 8-bit micro clone. But if you want to skip straight to the hardware, start at about page 13.

We’ve had more than one 8-bit Atari on these pages over the years. Most memorable though is probably this laptop.

Thanks [Lenore Underwood].

A Remotely Tuned Magnetic Loop Antenna

If you are a radio amateur, you may be familiar with the magnetic loop antenna. It’s different from most conventional wire antennas, taking the form of a tuned circuit with a very large single-turn coil and a tuning capacitor. Magnetic loops have the advantage of extreme selectivity and good directionality, but the danger of a high voltage induced across that tuning capacitor and the annoyance of needing to retune every time there is a frequency change.

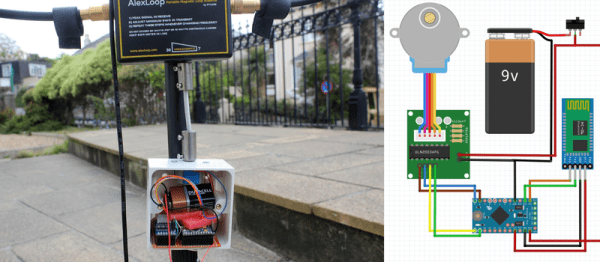
[Oleg Borisov, RL5D] has a magnetic loop, and soon tired of the constant retuning. His solution is an elegant one, he’s made a remote retuning setup using a stepper motor, an Arduino, and a Bluetooth module (translated here). The stepper is connected to the capacitor via a short flexible coupling, and tuning is performed with the help of a custom Android app. We’d be interested to know what the effect of a high RF field is on these components, but he doesn’t report any problems so it must be working.

He’s posted a video of the unit in operation which we’ve posted below the break, if you’ve ever had to constantly retune a magnetic loop you will appreciate the convenience.

Continue reading “A Remotely Tuned Magnetic Loop Antenna”

Cooking With The Awesome Power Of Plasma!

There is something special about food that has been cooked in a grill, barbecue, or broiler. The charred surface brings both flavour and texture to the food, that other cooking methods fail to emulate. Of course, should you come from a part of the world in which the locals steam their hamburgers those are fighting words, but for [Robots Everywhere] the prospect of a flaccid patty cooked in a microwave oven was too much.

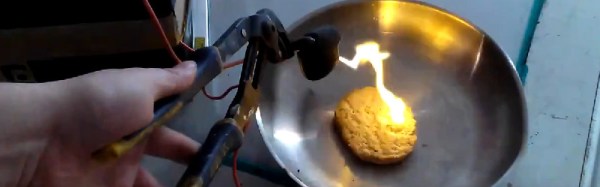
His solution? Broil the microwaved meat in double-quick time, using a plasma arc generated with a high voltage supply. The patty is placed in a grounded metal frying pan, and the high voltage probe is run over each side with accompanying plasma and sparks to lend that essential grilled exterior.

The power supply is a fairly simple affair, if a little hair-raising. A simple push-pull MOSFET oscillator drives a pair of flyback transformers whose secondaries are connected in series. It’s not the most efficient way to generate high voltages with a flyback transformer – the key is in the word “flyback” – but it generates enough juice for the job in hand.

It’s hardly the safest cooking method, and we’d be worried about contamination from whatever metal the electrode is made from. But it’s entertaining to watch, as you’ll be able to see from the video below the break.

Continue reading “Cooking With The Awesome Power Of Plasma!”