Seeing the unseen is one of the great things about using an infrared (IR) camera, and even the cheap-ish ones that plug into a smartphone can dramatically improve your hardware debugging game. But even fancy and expensive IR cameras have their limits, and may miss subtle temperature changes that indicate a problem. Luckily, there’s a trick that improves the thermal resolution of even the lowliest IR camera, and all it takes is a little tweak to the device under test and some simple math.
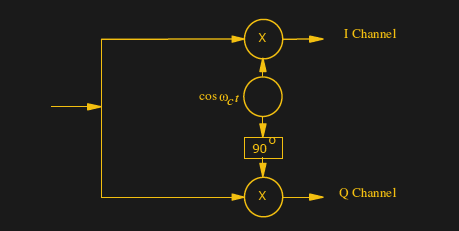
According to [Dmytro], “lock-in thermography” is so simple that his exploration of the topic was just a side quest in a larger project that delved into the innards of a Xinfrared Xtherm II T2S+ camera. The idea is to periodically modulate the heat produced by the device under test, typically by ramping the power supply voltage up and down. IR images are taken in synch with the modulation, with each frame having a sine and cosine scaling factor applied to each pixel. The frames are averaged together over an integration period to create both in-phase and out-of-phase images, which can reveal thermal details that were previously unseen.
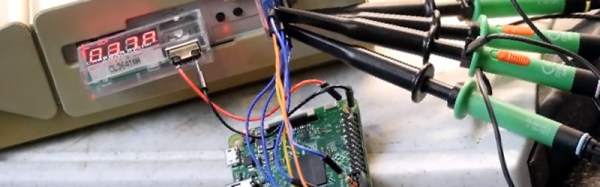
With some primary literature in hand, [Dmytro] cobbled together some simple code to automate the entire lock-in process. His first test subject was a de-capped AD9042 ADC, with power to the chip modulated by a MOSFET attached to a Raspberry Pi Pico. Integrating the images over just ten seconds provided remarkably detailed images of the die of the chip, far more detailed than the live view. He also pointed the camera at the Pico itself, programmed it to blink the LED slowly, and was clearly able to see heating in the LED and onboard DC-DC converter.
The potential of lock-in thermography for die-level debugging is pretty exciting, especially given how accessible it seems to be. The process reminds us a little of other “seeing the unseeable” techniques, like those neat acoustic cameras that make diagnosing machine vibrations easier, or even measuring blood pressure by watching the subtle change in color of someone’s skin as the capillaries fill.