Customizing The Start-Up Chime On A 1999 G3 IMac

The start-up chime on Macs is probably as recognizable as the default Nokia ringtone in this day and age. Yet much like a ringtone, so too one might want to change the start-up chime on a Mac. This is something which [Doug Brown] has done in the past already on a Power Mac G3 in 2012, which made him instantly an expert on the topic in the eyes of a reader who wanted to know how to change the chime on a 1999 iMac. While the firmware on both these systems is written in Forth, it did take a bit of sleuthing to figure out where the chime was hiding in the firmware image, and how to change it.

The target iMac is somewhat unique in that it has a G4 PPC CPU rather than the more common G3. The firmware is similar enough that it was a snap to simply search the newer iMac’s firmware for the signature of the chime sound data. This turned out to be the identical QuickTime IMA ADPCM format-encoded data, yet what was different was how this data was integrated into the firmware image. Key is finding the area in the firmware where not only the address of the chime data’s start is defined, but also its length. Finally, the checksums in the firmware image have to be updated so that it matches the patched data.

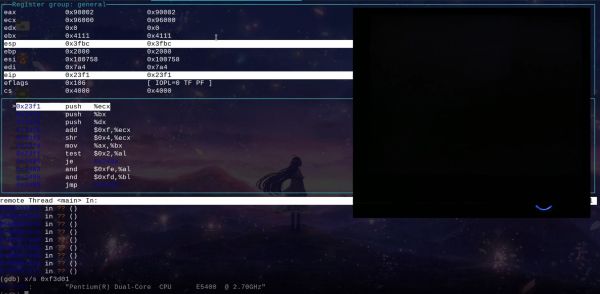
Reverse-engineering the checksum calculation in the Forth code turned out to be fairly straightforward, but getting the new firmware on the iMac turned out to be the biggest struggle, as [Doug] didn’t want to inflict running a manual firmware update onto this reader he was doing all this work for. This led [Doug] to do some more reverse-engineering using Ghidra to enable the use of the automatic updater like a regular firmware update.

In the end it all worked out great, and now another iMac no longer has the Mac chime on start-up.

Building A Truss-Braced Model Airplane: Sense Or Nonsense?

Following NASA’s recent results with truss-braced wing airplanes and the benefits this could bring to full-sized airplanes, [Think Flight] figured that if it helps with those airplanes, perhaps it may also be a boon for model airplanes. With the recent construction of a carrier airplane for smaller drones, he decided to give the concept a whirl to see whether it would make a difference compared to a regular wing design. This carrier airplane features a payload bay that can be opened in flight to release the drones stored inside it, making any potential increased payload capacity and improvements to the flight characteristics very welcome.

Continue reading “Building A Truss-Braced Model Airplane: Sense Or Nonsense?”

Efficient X86_64 Emulation With Box86

Running applications on a different architecture than the one for which they were compiled is a common occurrence, not in the least with Apple’s architectural migration every decade or so. It’s also commonly used with for example ARM, OpenRISC, and RISC-V systems to run applications that are only available for x86 or x86_64. While QEMU and kin are often used here, they’re pretty resource heavy, which is where an option like Box86 and its 64-bit sibling Box64 are attractive options. Unlike QEMU, both offer dynamic recompilation and redirection of dynamic library calls to native libraries, including those for SDL and OpenGL.

Both are available on GitHub under an MIT license, with Box64 probably the most interesting these days as applications and games have moved on to a 64-bit only world. The only hard requirement that Box64 has for a host system is that it is little-endian, which is a pretty easy requirement to meet. The most recent release was on March 10th, with Box86 0.3 and Box64 0.2.2. As essentially a translation layer, it does not offer full compatibility with every bit of software out there, but it’s already good enough to run Steam, GoG, and Epic Game Store clients and install and run Windows games via Wine for x86.

A simple set of benchmarks comparing it with QEMU and FEX (another emulator) shows it to run both more applications, and with significantly better performance.

Building The Sanni Cartridge Reader To Back Up And Restore Games And Saves

Game cartridges are generally seen as a read-only medium with the contents as immutable as text chiseled into a granite slab, and with accompanying save files on the cartridge surviving for generations. The unfortunate truth is that as with any media storage, cartridges can and do fail, and save files are often just ethereal bits in battery-backed SRAM. This makes being able to copy not only the game data but also the save files off these cartridges essential. Projects like the Open Source Cartridge Reader by [sanni] make this something that everyone can do.

Intended to be a kind of Swiss Army knife of game cartridges, many game systems are supported directly, and many others via (user-created) adapters. A how-to-build tutorial is provided on the project wiki, though anyone interested in building such a system would do well to look at the expected price tag on the BOM page, which comes in at $134. A recent video by [Kytor Industries] (also included below) demonstrates how to assemble one of these systems, including some modding of the preassembled components.

The main components are the Arduino Mega 2560 Pro MCU module, a Makerbase assembly with LCD, control knob, and SD card slot, an SI5351-based clock generator, a PIC12F629 MCU (for snesCIC and handling SNES DRM) and a lot of pin headers and card edge connectors for specific cartridge types. The assembly is rounded off with a surface-mounted GBA card reader and an enclosure.

One important gotcha is that some of these cartridges run on 5V, while others use 3.3V.  N64 cartridges require the dedicated voltage switch to be set to 3.3V, lest 5V gets sent into the unsuspecting cartridge. Once everything is configured properly, the firmware is flashed onto the Mega 2560 Pro module. The Sanni reader is then ready to run. You can use it to dump ROMs onto SD cards, along with dumping and restoring save files and loading ROMs onto new cartridges.

(Thanks to [Roman] for the tip)

Continue reading “Building The Sanni Cartridge Reader To Back Up And Restore Games And Saves”

Making Dry Ice At Home Is Just As Hard As It Sounds

Along the road to developing his own cryocooler to produce liquid nitrogen, there are a number of interesting rabbit holes [Hyperspace Pirate] has found himself taking a look at. For example, using dry ice for a pre-cooling stage and subsequently wondering what it’d take to make this dry ice oneself.

Getting the CO2 required for the dry ice is the easy part, requiring nothing more complicated than baking soda and a suitable acid (like hydrochloric acid). The other options to gather CO2 include using yeast, capturing the gas from the air people breathe out, calcium hydroxide, etc., none of which are as easy or convenient.

The acid is mixed with the baking soda, with the produced gas led through a bubbler and subsequent dehumidification stage before being collected. For the more involved part of getting dry ice, a bit more science is needed. First, a compressor is used to get pressurized CO2 into a previously evacuated tank at 160 psi (~12 bar). For the next phase the compressed gas has to be compressed further so that it condenses into a liquid. This involves a second compressor stage and a repurposed paintball tank. At the needed pressure of 1000 psi (69 bar), safety is essential.

With liquid carbon dioxide in the paintball tank, all it takes at this point is to turn the tank upside-down to get the liquid part near the exhaust valve and crank it open. Capturing the dry ice at this point is another fascinating challenge, which was partially solved by a 3D printed mold, with plenty of room for improvement still.

Given the cost and effort involved in producing it, just buying dry ice at the local store looks like it’s still the way to go for your Halloween fog machine this year. But it’s a fascinating experiment regardless, especially since it actually produced results — unlike some of the attempts we’ve covered previously.

Continue reading “Making Dry Ice At Home Is Just As Hard As It Sounds”

Supercon 2022: Alec Vercruysse Can See Through Murky Water

Detecting objects underwater isn’t an easy challenge, especially when things get murky and dark. Radio waves don’t propagate well, so most techniques rely on sound. Sonar is itself farily simple, simply send out a ping and listen for an echo, and that will tell you how far something is. Imaging underwater is significantly harder, because you would additionally need to know where each echo is coming from.

To answer the question of whether it is possible to put together an ultrasonic 3D imager that would cheaply enable anyone to image objects underwater, [Alec Vercruysse] and fellow team members at the Harvey Mudd College set out to create a system that does exactly that. You can read the presentation slides (PDF) or check out the entire project in the GitHub repository.

Continue reading “Supercon 2022: Alec Vercruysse Can See Through Murky Water”

Hacking A €15 8051-Based Portable Soldering Iron With Custom Firmware

With soldering irons being so incredibly useful, and coming on the heels of the success of a range of portable, all-in-one soldering irons from the likes of Waveshare and Pine64, it’s little wonder that you can get such devices for as little as 10 – 15 Euro from websites like AliExpress. Making for both a great impulse buy and reverse-engineering target, [Aaron Christophel] got his mittens on one and set to work on figuring out its secrets.

The results are covered in a brief video, as well as a Twitter thread, where this T12 soldering iron’s guts are splayed around and reprogrammed in all their glory. Despite the MCU on the PCB having had its markings removed, some prodding and poking around revealed it to be an STC8H3K62S2, an 8051-based MCU running at a blistering 11 MHz. As a supported PlaformIO target, reprogramming the MCU wasn’t too complicated after wiring up a USB-TTL serial adapter.

Completing this initial foray into these cheap T12 soldering irons is the GitHub repository, which contains the pin-outs, wiring diagrams and further information. Although [Aaron] indicates that he’ll likely not pursuing further development, the mixed responses by people to the overall quality of the firmware on the as-purchased T12 may inspire others to give it a shake.

Continue reading “Hacking A €15 8051-Based Portable Soldering Iron With Custom Firmware”