A Cycle-Accurate Sega Genesis With FPGA

The Field-Programmable Gate Array (FPGA) is a powerful tool that is becoming more common across all kinds of different projects. They are effectively programmable hardware devices, capable of creating specific digital circuits and custom logic for a wide range of applications and can be much more versatile and powerful than a generic microcontroller. While they’re often used for rapid prototyping, they can also recreate specific integrated circuits, and are especially useful for retrocomputing. [nukeykt] has been developing a Sega Genesis clone using them, with some impressive results.

The Sega Genesis (or Mega Drive) was based around the fairly common Motorola 68000 processor, but this wasn’t the only processor in the console. There were a number of coprocessors including a Z80 and several chips from Yamaha to process audio. This project reproduces a number of these chips which are cycle-accurate using Verilog. The chips were recreated using images of de-capped original hardware, and although it doesn’t cover every chip from every version of the Genesis yet, it does have a version of the 68000, a Z80, and the combined Yamaha processor working and capable of playing plenty of games.

The project is still ongoing and eventually hopes to recreate the rest of the chipset using FPGAs. There’s also ongoing testing of the currently working chips, as some of them do still have a few bugs to work out. If you prefer to take a more purist approach to recreating 90s consoles, though, we recently featured a project which reproduced a Genesis development kit using original hardware.

Thanks to [Anonymous] for the tip!

An Open-Source Antikythera Mechanism

When the Antikythera Mechanism was first discovered, it wasn’t viewed as the wonder that we know it today. Originally the divers who found the device and the first scientists to look at it wrote it off as an astrolabe or other some other common type of clock. It wasn’t until decades later when another set of scientists x-rayed the device and surveyed more of the shipwreck where it was found that it began to become one of the more important archaeological discoveries in history. There have been plenty of attempts to recreate this device, and this replica recreates the mechanisms of the original but is altered so it can be built in a modern workshop.

The build, which took the creators several years of research and development to complete, started off with the known gear schemes found on the original device. However, the group wanted to make it with modern technology including 3D printers and laser cutters, so although they worked from an understanding of the original 2000-year-old device there are some upgrades and changes to accommodate those who want to build this in a modern workshop. Gears made from plastic instead of brass have more friction, which needed to be reduced by building custom bearings machined out of brass. And to complete the machine a number of enclosures of various styles are available to use as well.

Additionally, all of the designs and schematics for this build are open source for anyone to build or modify as they would like, although the group putting this together does plan to sell various parts for this as well. There will be some issues with use, as they point out, since the ancient Greeks didn’t have a full enough understanding of cosmology to get a machine like this to stay accurate for two thousand years, but it’s a fascinating build nonetheless. Reasearchers are still discovering new things about this device too, including the recent find of an earliest possible start date for the machine.

Recreating The ZX Spectrum Unboxing Experience By Manufacturing A New Boxed One

Why scour the internet for a rare-as-hen’s-teeth new in box ZX Spectrum computer when you can instead order up some parts, assemble a basically all new ZX Spectrum along with the box, instruction manuals and more?

That seems to have been the reasoning behind [Lost Retro Tapes] when they decided to do exactly that. Along with the announcement of the completion on Reddit, the website details the BOM and sourcing the components.

For the mainboard, an existing, redrawn ZX Spectrum 48 Issue 3B PCB was found and ordered from PCBWay. As a UK-based entity, many of the other components were sourced from retro computing shops around the UK, but with all but the LM1889N IC being available for new or with currently produced alternative, it should be viable to source them locally.

Perhaps most impressive was the creation of the box (unfortunately not detailed on the website at this point), and having the manuals (system and BASIC) professionally printed and bound. Along with a few other bits and pieces, including a tape recorder and fresh Horizons tape, the total price tag came to around £412.

Thanks to [Lee Hodgson] for the tip.

Scratch Built Amiga 2000 Stacks Up The Mods

Around these parts, we most often associate [Drygol] with his incredible ability to bring damaged or even destroyed vintage computers back to life with a seemingly endless bag of repair and restoration techniques. But this time around, at the request of fellow retro aficionado [MrTrinsic], he was given a special assignment — to not only build a new Amiga 2000 from scratch, but to pack it with so many mods that just physically fitting them into the case would be a challenge in itself.

The final product, dubbed Tesseract, took two and a half years to complete and has been documented over the course of six blog posts. The first step was to get a brand new motherboard, in this case a modern recreation designed by Floppie209, and start populating it with components. With some modifications, the new board slipped neatly into a slick metal case. Unfortunately it quickly became clear some of the mods the duo wanted to install wouldn’t work with the reverse-engineered motherboard. This was around Spring of 2021, which is the last time we checked in on the project. Continue reading “Scratch Built Amiga 2000 Stacks Up The Mods”

Retro Computer Enclosure Without The Sacrifice

The unique look of early desktop computer systems remains popular with a certain segment of geekdom, so it’s no great surprise when we occasionally see a modern hacker or maker unceremoniously chuck 40+ year old electronics from a vintage machine just to reuse its plastic carcass. We try not to pass judgement, but it does sting to see literal museum pieces turned into glorified Raspberry Pi enclosures.

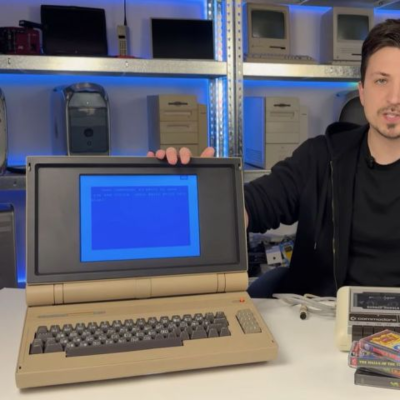
But with a little luck, perhaps the Retro Wedge Computer case designed by [AndyMt] will be able to save a few of those veteran computers from an unnecessary lobotomy. As the name implies, this 3D printable model is designed to resemble “wedge” desktop computers such as the Atari ST, TI-994A, and Commodore 128. But don’t be put off by its considerable size — the model has been chopped up so no piece is larger than what can fit on a fairly standard 230 x 230 mm print bed. Continue reading “Retro Computer Enclosure Without The Sacrifice”

New Commodore VIC-20 Build

In a recent episode of [The Retro Shack], a new Commodore VIC-20 is built, using a ‘Vicky Twenty’ replacement PCB by [Bob’s Bits] as the base and as many new components as could be found. The occasion for this was that a viewer had sent in a VIC-20 that turned out to be broken, so in order to diagnose it, building a new one with known working parts seemed incredibly useful.

Advantages of the reproduction PCB are a number of board-level fixes that negate the need for certain bodge wires, while also having footprints for a wider range of round DIN connectors. The non-proprietary ICs were obtained along with other standard parts from a retro computing store, while the proprietary Commodore components were scrounged up from your friendly used component selling sites.

The result is what from the outside looks like a genuine VIC-20, and which should prove to be very useful in diagnosing the broken VIC-20 system in the future, as well as presumably to play some games on.

Continue reading “New Commodore VIC-20 Build”

Peer-Reviewed Continuity Tester

One of the core features of the scientific community is the concept of “peer review” where any claims made by a scientist are open to be analyzed and reproduced by others in the community for independent verification. This leads to either rejection of ideas which can’t be reproduced, or strengthening of those ideas when they are. In this community we typically only feature the first step of this process, the original projects from various builders, but we don’t often see someone taking those instructions and “peer reviewing” someone’s build. This is one of those rare cases.

[oxullo] came across [Leo]’s original build for the ultimate continuity tester. This design is much more sensitive than the function which is built in to most multi-meters, and when building this tool specifically some other refinements can be built in as well. [oxullo] began by starting with the original designs, but made several small modifications. Most of these were changing to surface-mount parts, and switching some components for ones already available. Even then, there was still a mistake in the PCB which was eventually corrected. The case for this build is also 3D printed instead of being made out of metal, and with the original video to work from the rest fell into place easily.

[oxullo] is getting comparable results with this continuity tester, so we can officially say that this design is peer reviewed and tested to the highest of standards. If you’re in need of a more sensitive continuity sensor, or just don’t want to shell out for a Fluke meter when you don’t need the rest of its capabilities, this is the way to go. And don’t forget to check out our original write-up for this tester if you missed it the first time around.