Auto Dimmer Hacked Into Keyboard Backlight

keyboard-backlight-auto-adjustment

As the title says, [José Faria] added the ability to adjust his keyboard backlight based on ambient light levels. But that’s just one of the things he did during his hacking extravaganza with this Razer BlackWidow Ultimate.

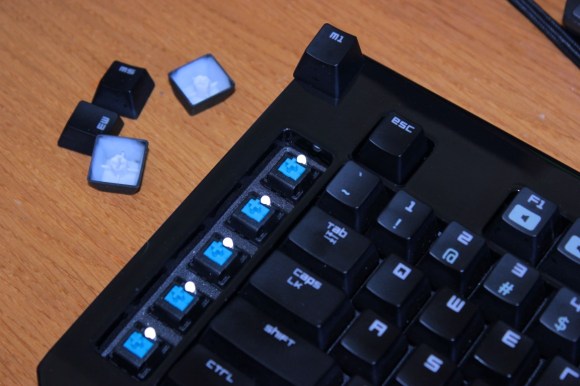
When he first received the peripheral he didn’t like the blue LEDs used as backlights. So he removed all of them and put in white ones. He doesn’t talk too much about that but we’d image it was a ton of work. The new color was pleasing, but then the ability to adjust their brightness started to irritate him. There are four predefined levels and that’s all you get. Even the GUI which has a slider for adjustment couldn’t go outside of those levels.

His solution was to augment the controller with his own. He patched in an AVR chip to the transistor which controls the low side of the LED circuits. While at it he also noticed that the keyboard case was actually translucent. This let him hide a photosensor inside which automatically adjusts the light levels. But he did it in a way that still allows him to use the original functionality with the flip of a switch. See for yourself after the break.

Continue reading “Auto Dimmer Hacked Into Keyboard Backlight”

LEGO Jukebox Choses From Different CDs

lego-jukebox

Music used to be delivered on round plastic sheets called Compact Discs. [Ralph] still has some of them lying around which he used in his latest project. It’s a CD changer built out of LEGO pieces. It reminds us of the mid-century jukeboxes that changed out 45s on a record player.

You can’t tell from this image, but the entire disc changer build is shaped to sit atop a computer case. The system is built in two parts. There is a transport arm which moves left and right along the rack of CDs. It uses that black and white strip as an encoder to track its movement. It can reach in, grab a disc, and take it all the way down to the right where it drops it off in a staging area. The second part of the build now takes over, grabbing the disc from the staging holder and rotating it down into the CD tray of the PC. All of this is demonstrated after the jump.

If you’re like us you prefer digital delivery for your music. We haven’t crossed that watershed with video games yet and that’s why we still love this Xbox 360 disc changer hack.

Continue reading “LEGO Jukebox Choses From Different CDs”

Laser Cutter Helps Make Dual Sided PCBs

laser-cutter-dual-sided-pcb

[Rich Olson] wrote in to share his technique for making dual-sided printed circuit boards using a laser cutter. Unfortunately this still depends on etching copper clad boards with chemicals. But his process makes it really easy to produce well-defined and precisely aligned etch resist on both sides of the board all at once.

This can be really tough to do with the toner transfer method. The most common way would be to use a light box to align the two printouts of resist, taping them together before putting the copper clad in between and sending the whole thing though a laminator. [Rich] uses a scrap of acrylic to ensure alignment. He tapes it to the bed of his Epilog laser cutter and cuts the board outline out (that’s the void you see in the image). He removes the scrap and uses it as a stencil for cutting out the copper clad. After prepping the board he coats both sides and sends it through the laser cutter to burn away the paint where he wants to remove copper. Don’t miss his video embedded after the break.

The acrylic outline trick is similar to the laser cutter fence we heard about several weeks back.

Continue reading “Laser Cutter Helps Make Dual Sided PCBs”

Low Water Indicator For Coffee Maker Couldn’t Be Simpler

low-water-indicator-for-coffee-maker

The coffee maker which [Donald Papp] uses every morning has a water reservoir on the back that can last for several days. This means he forgets to check it and from time to time will return to find that nothing has brewed. He decided to add a low-water indicator to the machine. His approach is about as simple as it gets and we admire that accomplishment.

If it were our project we’d probably try to complicate it in one way or another. The use of a microcontroller and ultrasonic rangefinder (like this tank level indicator from a February links post) would be overkill. No, [Donald] boiled down the electronics to a homemade switch, a blinking LED, and a battery. The switch is a flexible piece of metal attached to a plastic cap using some monofilament. The cap goes in the reservoir and floats until the water gets too low, it then pulls on that metal, completing a circuit between the battery and the LED. That’s it, problem solved.

Now he just needs to plumb the coffee maker into a water line and he’ll really be set.

Update: Lost PLA Metal Casting — The Movie

lost-pla-metal-casting-movie

Turning 3D printed plastic parts into metal objects is not a new concept. But we don’t see a lot of it and enjoyed watching the documentary version of [3DTOPO’s] lost PLA metal casting process so much we figured you’d want to see it too.

The thirty-five minute video walks through every part of the process which we originally learned about in September of last year. The process was developed as a way to fabricate parts that will be used in high-stress applications. For instance, the part seen above is a mounting bracket for the ball screws that moves the Z axis on a huge CNC build he’s been working on. A plastic part will break under the strain so he needed to make it out of aluminum alloy.

To start, the piece is modeled and printed in plastic to check the fit. Once it’s just right he scales it to 103% and prints it again to account for the shrinking of the metal as it cools. The next step is pictured above, adding paths using rigid foam insulation that allow for the metal pour and for air to escape. This is packed into a plaster and sand mold which dries before being cooked in a furnace to vaporize the foam and PLA. This leaves a perfect mold for the metal pour.

After the break you can see a 5-minute overview version of the project.

Continue reading “Update: Lost PLA Metal Casting — The Movie”

Microcontroller Enumerates As USB Printer — Can Be Programmed By Printing

avr-programming-by-printing

This is a fascinating concept. We’re not sure of its usefulness, but it definitely stands on its own just for the concept. [Dean Camera] just added a new HID class to the LUFA project that lets you flash AVR chips by printing to them. This means once you have a file like the one seen open in Notepad above, you can just click on File, then on Print, and the firmware will be uploaded to the chip.

[Dean] is the creator of the LUFA project and still likes to get his hands dirty hacking around with it. This idea came to him while he was exploring the concept of using the MIDI protocol to program a chip. That didn’t pan out because of the way Microsoft has handled MIDI in newer versions of Windows. But he did get the idea of making LUFA identify itself as a simple USB printer. He dug into the specification and figured out how to do that. Once Windows connects to the device it doesn’t really care what data gets sent to it. So [Dean] wrote a parser for the bootloader which could accept the incoming hex code and write it to the chip’s program memory.

Voice Controlled Chess Robot

voice-controlled-chess-robot

[Ben Yeh] wrote in to tell us about this voice-controlled chess robot he built along with three others as a final project for their Georgia Tech ECE 4180 Embedded Systems Design class.

To handle the speech recognition they grabbed an EasyVR board. This is a fine solution because it prevents the need for a computer to process voice commands (remember, it’s an embedded systems class). This concept breaks down when you find out that the desktop computer next to the robot is where the chess game is running. Perhaps that can be moved to a microcontroller by the next set of 4180 students.

The robot arm portion of the project is shown off well in the clip after the break. Normally we’d expect to see stepper motors driving the axes of a CNC machine but in this case they’re using servo motors with built-in encoders. The encoders are i2c devices which feed info back to the main controller. There was a parts ordering snafu and the z axis motor doesn’t have an encoder. No problem, they just added a distance sensor and a reflector to measure the up and down movement of the claw.

Continue reading “Voice Controlled Chess Robot”