Full-color EBook Reader Needs Only 8-bits Of Muscle

[Rossum’s] still coming up with great ways to use his microtouch hardware. This time, he’s taken his inspiration from Amazon’s announcement that a full-color eBook reader (and movie player) is on the way. Judging from the video after the break, his fully functional reader is a big win for the device.

You’re probably familiar with the hardware, an ATmega644-based board connected to a touch sensitive LCD screen. You can make your own or buy one pre-assembled (but currently out-of-stock). The board has a microSD card slot making it quite easy to add books to the device. At the start of the project [Rossum] thought he might be able to read ePub files directly, but the embedded images, and unzip function needed to open the package file is a bit too much for the 8-bit processor’s restrictions. One simple step does the trick. A helper script can be used to format the files before transferring them to the device. This does the unzipping, scales the images, and repaginates the text into a format friendly for the display size.

Now if we only had a nice little case to house the hardware we’d be in business.

Continue reading “Full-color EBook Reader Needs Only 8-bits Of Muscle”

Ultrasonic Rangefinder As Scanning Radar

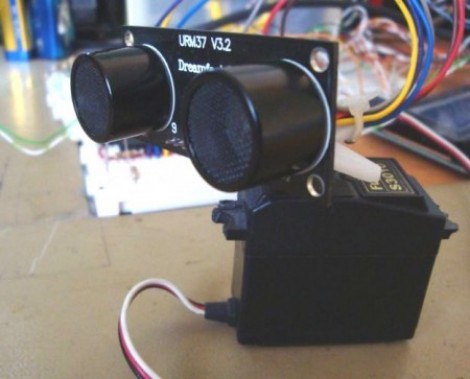
Ultrasonic rangfinders are a cheap and easy way to gather obstacle avoidance data. When added to a servo motor they form something of a scanning radar for near-proximity objects.

In this implementation, [Rui Cabral] is driving the servo, and collecting data from the sensor using a PIC 18F4520. The servo rotates 180 degreees, taking sensor measurements in increments of nine degrees. If it discovers obstacles, the distance and orientation are recorded. Feedback is displayed on a 20-LED bar graph display which shows a moving LED to track the sensor orientation, with LEDs remaining lit whenever an object is found. Right now the obstacle data is pushed over a serial connection with a PC, but could easily be injected into navigation logic for a robot in order to triangulate a path around the obstruction. You can see [Rui’s] project in action after the break.

We looked in on the same concept with a different display technique a couple of years back. That hack used an Arduino and Processing to map sensor data with a traditional green sweep display.

Continue reading “Ultrasonic Rangefinder As Scanning Radar”

How To Build A 23″ Android Tablet

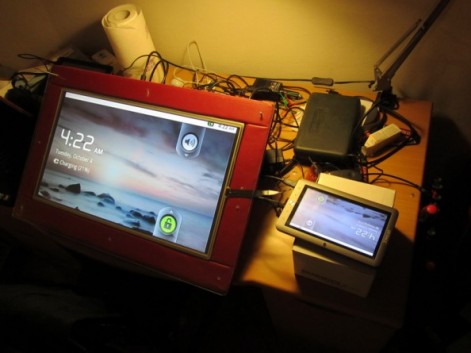
If you’re looking to build a really big Android tablet the trick is not to start from scratch. [Peter] pulled off a 23″ Android Tablet hack using a collection of easily acquired parts, leaving the hard work up to hardware that was designed to do it.

He didn’t really build a tablet, as much as he built a big touch-screen add-on for one. He already had a couple of inexpensive tablets on hand to play around with. One of them has an HDMI out port, which let him easily push the display onto a 23″ monitor. He knew the tablet was a 4-wire resistive touchscreen, but he didn’t know if other touchscreens with the same number of connectors and be directly swapped and still work. To test this, he cracked open a second tablet device and connected its touchscreen to the first one’s hardware. When he was met with success it was time to source a couple of 23″ touchscreen overlays to test with the external monitor. As you can see in the clip after the break, it works like a charm!

[Peter] was inspired to write about his experiences after seeing the 23″ Android tablet video in our recent links post.

Continue reading “How To Build A 23″ Android Tablet”

Tinywrench Controls Motors With ATtiny24 Chips

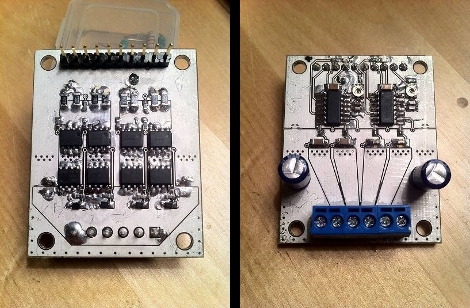
Tinywrench is [Tanjent’s] take on a motor controller board. It aims to replicate all of the functions that a standalone motor controller chip offers at as low a cost as possible. Early results are in. It works, and as seen can be assembled for about $8.

The top of the device offers a terminal block for connecting motors, ground, and 24V input. A pin header on the bottom has all the connections you would expect to find with a stepper motor driver board. Looking back on top there’s also a pair of ATtiny24 chips, each with its own trimpot for balancing the constant current output. Hiding on the underside of the board are two H-bridges built using high and low-side MOSFETs along with some diodes for protection, and various passive components for driving them.

As it stands, each of those H-bridges can handle around 9 amps which should be more than enough for projects with small motors. [Tanjent] mentions that one of the main advantages of working with this instead of a single motor-driver chip is that if you fry one of the MOSFETs you can replace it instead of trashing the entire board.

RF Sniffing On-the-go

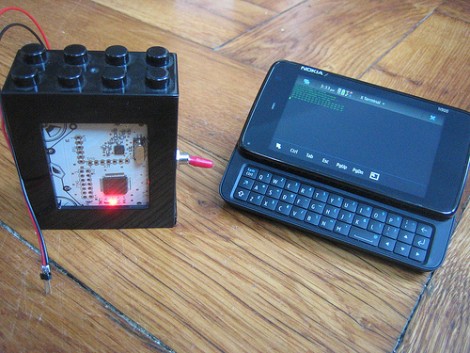
It’s been a while since we checked in on [Travis Goodspeed]. His latest post makes RF sniffing with the Next HOPE badge more portable by ditching the need to display data on a computer. He’s built on the work he did at the beginning of the year, replacing the FTDI chip on the badge with a Bluetooth module. Now he can use his Nokia N900 as a GoodFET terminal to not only display the packets pulled from the air, but the control the badge as well.

Previously, the client running on the computer was communicating with the badge via a serial connection. To get it working on the N900 [Travis] transitioned from using py-serial over to using py-bluez. All of the code changes are available from the GoodFET repository.

He’s got a few other tricks planned for this concept. He put in a parts order to add Bluetooth to the Girltech IM-ME. The pretty pink pager has the same radio chip on board, so adding Bluetooth connectivity will allow it to be used in the same way. There are also plans in the works to add a couple other packet sniffing protocols to the bag of tricks, including ZigBee.

Making The Most Of Your Diy Development Boards

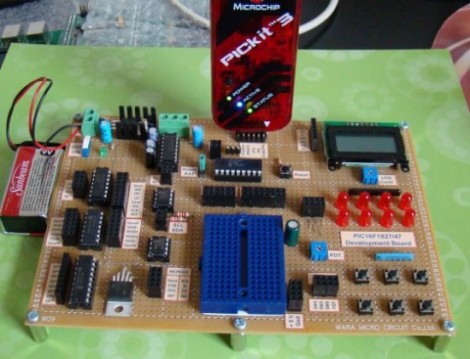
[Rajendra] built a rather impressive development board based around a PIC microcontroller. At its center, he’s got a PIC 16F1827 chip, but we think the design is easily adapted to your microcontroller of choice.

The I/O pins on the microcontroller aren’t actually connected to any of the components on the board. Instead, female pin headers neatly organize the pins grouped by their register. Jumper wires make for quick connections to all of the available peripheral devices. There’s an additional header for connecting the PICKit programmer, and the small blue breadboard lets you add your own components to the mix, or lets you utilize the board with a different microcontroller.

[Rajendra] took the time to carefully label all of the connectors, removing the guesswork (or pin counting) from the setup process. Many of the peripherals are i2c devices, and there’s a pin header to connect more, or to sniff the data using a Bus Pirate or other tool.

8-pin Micro Plays Pong On Your Widescreen

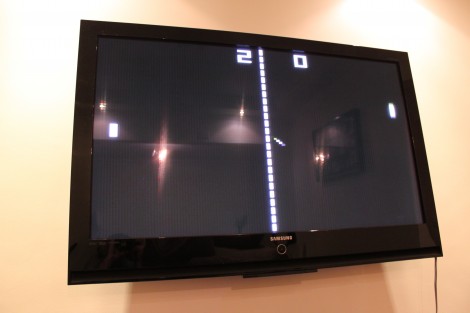
[Fernando] sent in a tangential project update that uses an ATtiny45 to play Pong on his television. Last time we looked in on his work he had just finished getting the eight-pin chip to display a big number on the TV via the VGA port. This expands on the idea while he continues to wait for parts.

Right now the chip plays against itself, but he’s got one input pin left and we’d love to see a button added for a simple one-player game. We’re thinking the paddle would always be moving in one direction or the other, with a click of the button to reverse that direction. The part that he’s waiting for is a Bluetooth module, which we’d love to see used for 2-player games via a pair of Wiimotes (we’re just wishing at this point and don’t know if that would even be possible). The end goal for the hardware is a Bluetooth connected scoreboard for Android devices.

The code is written in Assembly, and we found it relatively easy to follow what [Fernando] is doing with the game logic. On the graphics side of things he gets away with a 120×96 resolution because Pong is supposed to look pixelated. We love the result, which you can see for yourself after the break.

Continue reading “8-pin Micro Plays Pong On Your Widescreen”