CNC-PBDU (pancake Batter Dispenser Unit)

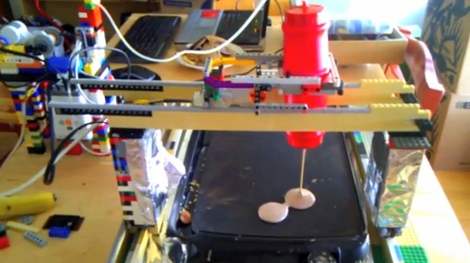
Flapjacks taste infinitely better when they’re machine-made. Well, that’s true for [Mexican Viking] who built an automatic pancake maker to the delight of his family.

Obviously, the building material of choice is Lego. The machine consists of a base with two linear gears on either side. A gantry is held high above this base, travelling upon geared towers to either side. The writing nozzle, fashioned out of ketchup bottles, can move back and forth along this gantry for a full range of motion along the X and Y axes. Lego pneumatic pumps supply pressurized air which forces the batter out of the bottle reservoir. This dispensing system is extremely clever and worth reading a bit more about. But if you just want us to make with the good stuff, you can see it grilling up pancakes in the video after the break.

The only thing missing is automatic flipping.

Continue reading “CNC-PBDU (pancake Batter Dispenser Unit)”

Importing PCB Layout Into Google Sketchup

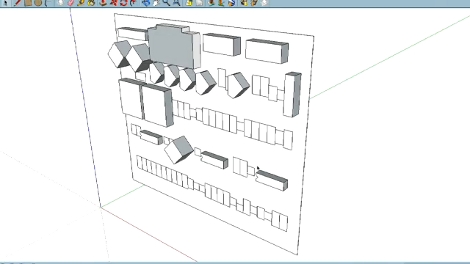
If you’ve been spending hours with the digital calipers while designing enclosures for your circuit boards there may be a better way. [Phil] tipped us off about a new software package that will let you import PCB layout files into Google Sketchup. This way you can start working on the enclosure in CAD before you’ve populated your first board. Of course this adds to the pain of realizing there’s an error in your layout, but what are you going to do?

The free software was developed by RS Components, a European component distributor. It takes IDF files, which can be exported from most PCB design software, and converts them to a format compatible with Sketchup, Google’s 3D design software. For those who enjoy a very dry demonstration video you won’t want to skip seeing what we’ve embedded after the jump.

We’re kind of surprised that this hasn’t already been done. If it has, leave a link in the comments.

Continue reading “Importing PCB Layout Into Google Sketchup”

Androcade Is A Controller And Stand In One

We remember when retro-gaming required a lot of equipment and a serious time commitment to put together a gaming interface. [Scooter2084] proves that we’ve come a long way with this gaming controller built to complement Android hardware.

It’s not immediately obvious from the image above, but the controller itself looks just like Andy the Android. His head is tilted upward and acts as the tablet stand, while his torso hosts the controls. We don’t the arms and legs have a functional use but they are necessary to complete the look.

Traditionally arcade controls have used a hacked gamepad, or dedicated hardware like the MAME cabinets that use iPac control boards. But this rendition interfaces the joystick and four buttons using an Arduino. A Bluetooth shield lets you control the Android device wirelessly, and opens up the possibility to use this as a controller for laptop-based emulators and the like. Don’t miss the video after the break.

Continue reading “Androcade Is A Controller And Stand In One”

Driving And Old Receipt Printer

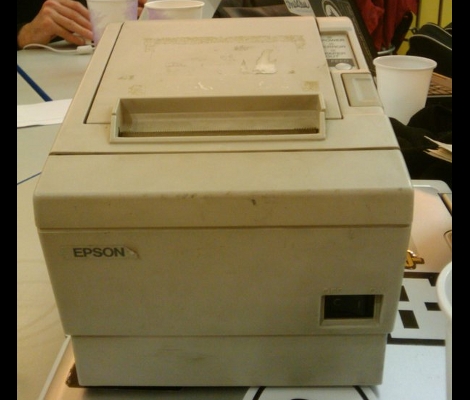
It seems like receipt printers are pretty popular as hacking targets lately. Aside from the wasted paper, they cooler than plain old blinking LEDs and we’d image there’s a ton of them floating around out there as advances in technology have prompted retailers to trade in the bulky dinosaurs for slimmer thermal printers. [Philip Hayton] picked up this Epson model at some type of equipment sale and set to work figuring out how to control it.

This unit is addressed via a parallel interface. After assessing the pinout and searching a bit for protocol information [Philip] hooked up his Arduino and printed out a fitting first message that reads: “Hello World”. He’s got a few tricks you can learn from when trying to talk to hardware with which you are not well acquainted.

Need a reason to go out and find your own receipt printer? Check out this paper-based gaming system for some inspiration. Now develop your own paper recycling setup and we can file this one under ‘green hacks‘.

[Thanks Andy]

Put Your ARM Skills To The Test With The Freescale Make It Challenge

Throw down your mad skills and you might win some cash while you’re at it. [Zeta] tipped us off that Freescale just announced a new challenge. They call it the Make It Challenge and it centers around their 32-bit Kinetis microcontrollers. These are ARM Cortex-M4 chips and if you’re selected to compete they’ll offer their development hardware at a discount for you to get started.

You’ll need to jump through a few hoops. To be considered as a contestant you’ll need to preregister, cruise through some online training, and complete a quiz. From there, just come up with an idea and submit a design paper as the first round of competition. Ten finalists will rise from the group and take their design through to completion for judging in the fall. The top three will get some serious cash ($11,000 for first place) and be treated to an expense paid trip to Austin, Texas.

Circuit Design For Multiple UART Connections

[Bill Porter] has a tip for designing circuits that have multiple connections to a single microcontroller UART. This stemmed from a review of a friend’s circuit design that used the UART in the project, but also called for an FTDI chip in order to reprogram via USB and a bootloader. Unlike the schematic above, the circuit called for straight connections without any resistors. With that design, a conflict will occur if two devices are connected and attempting to communicate at the same time.

The fix is easy. [Bill] discusses how to prioritize the connection by adding the pair of current limiting resistors seen above. This helps to ensure that damage will not occur, and that the FTDI chip will take precedence. Now the external hardware will not preclude the FTDI chip from accessing and programming via the bootloader. The tutorial is intended for those rolling their own boards out of an Arduino-based prototype, but it will work in any situation where you need multiple connections to a single set of UART pins.

[Bunnie’s] Archives: Unlocking Protected Microcontrollers

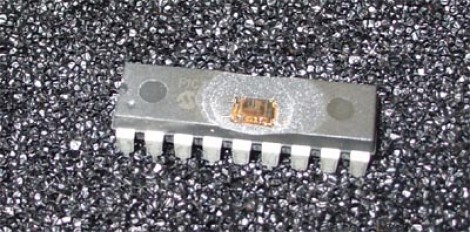
A few years back [Bunnie] took a crack at cracking the security fuses on a PIC microcontroller. Like most of the common 8-bit microcontrollers kicking around these days, the 18F1320 that he’s working with has a set of security fuses which prevent read back of the flash memory and EEPROM inside. The only way to reset those security fuses is by erasing the entire chip, which also means the data you sought in the first place would be wiped out. That is, if you were limited to using orthodox methods.

[Bunnie] had a set of the chips professionally uncapped, removing the plastic case without damaging the silicon die inside. He set to work inspecting the goodies inside with an electron microscope and managed to hammer out a rudimentary map of the layout. Turns out that flash memory can be erased with ultraviolet light, just like old EPROM chips. Microchip thought of that and placed some shielding over the security fuses to prevent them being reset in this manner. But [Bunnie] managed to do so anyway, creating an electrical tape mask to protect the rest of the data stored in the chip while bouncing UV light underneath the shielding at an angle.

Want to uncap some chips of your own without enlisting the help of others? Give this method a try.

[via Dangerous Prototypes]