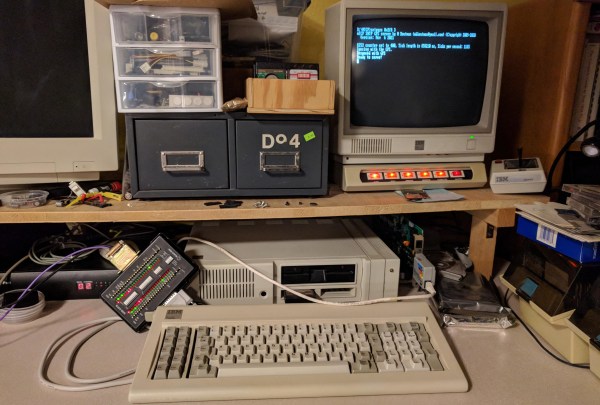
A PCjr running an SNTP server

IBM PCjr From 1984 Keeps Today’s Clocks Running In Sync

We’ve gotten used to the fact that the clocks on our internet-connected computers and smartphones are always telling the right time. Time servers, provided by a variety of government agencies as well as tech giants, provide them with the exact time and date thanks to accurate atomic clocks and the clever Network Time Protocol (NTP). But it wasn’t always like this: back in the 1990s when many computers didn’t have an internet connection, we had to adjust our computers’ clocks manually. Go back one more decade, and many PCs didn’t even have a battery-backed clock at all; you either set the proper date and time when the computer booted, or just lived with the fact that all new files were timestamped 01-01-1980.

[Michael Brutman] decided to mix today’s world of network time synchronization with the old world of batteryless PCs, and built an SNTP Time Server that runs on a DOS PC. He tried it with two different hardware setups: a 40 MHz 386 PC from 1993, and the (in)famous IBM PCjr from 1984. A standard GPS module serves as an accurate time reference; these units can often be directly connected to old hardware thanks to the eternal RS-232 standard.

Continue reading “IBM PCjr From 1984 Keeps Today’s Clocks Running In Sync”

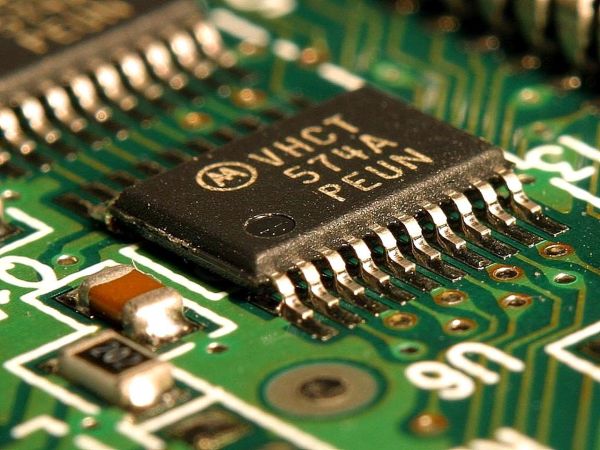
A close-up view of surface-mount components on a circuit board

Smaller Is Sometimes Better: Why Electronic Components Are So Tiny

Perhaps the second most famous law in electronics after Ohm’s law is Moore’s law: the number of transistors that can be made on an integrated circuit doubles every two years or so. Since the physical size of chips remains roughly the same, this implies that the individual transistors become smaller over time. We’ve come to expect new generations of chips with a smaller feature size to come along at a regular pace, but what exactly is the point of making things smaller? And does smaller always mean better?

Smaller Size Means Better Performance

Over the past century, electronic engineering has improved massively. In the 1920s, a state-of-the-art AM radio contained several vacuum tubes, a few enormous inductors, capacitors and resistors, several dozen meters of wire to act as an antenna, and a big bank of batteries to power the whole thing. Today, you can listen to a dozen music streaming services on a device that fits in your pocket and can do a gazillion more things. But miniaturization is not just done for ease of carrying: it is absolutely necessary to achieve the performance we’ve come to expect of our devices today. Continue reading “Smaller Is Sometimes Better: Why Electronic Components Are So Tiny”

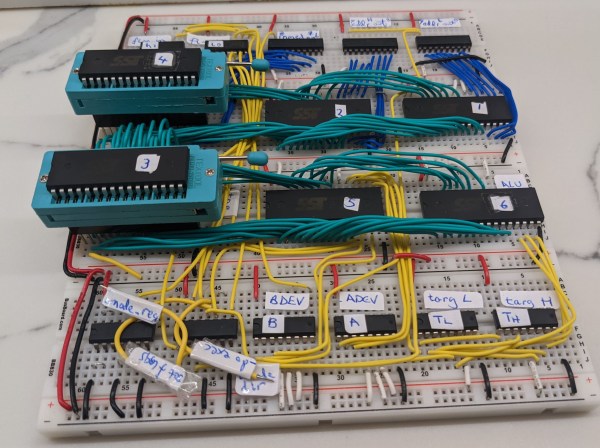
A breadboard filled with logic chips and wiring

SPAM-1 Is A Well-Documented Discrete CPU With An Impressive Software Library

Here at Hackaday we love projects that are so well-documented that you can spend days reading up on what the designer has achieved. [John Lonergan] didn’t disappoint when he designed the SPAM-1, an 8-bit CPU built from discrete logic gates. His detailed log contains a wealth of information on such things as designing opcodes, optimizing program counter logic, running a digital simulation, as well as his thoughts on microcode design. The sheer volume of it may be a bit off-putting to beginners, so it might be best to start with the video series that describes the architecture and goes into detail on several sub-blocks.

The design has changed a bit since [John] first started on the project, as he decided to add more and more features, but the final result is a well-thought out architecture that keeps the simplicity needed for discrete hardware but still has enough features to keep it interesting for seasoned CPU aficionados. The instruction size is rather large (48 bits) to simplify the instruction decoding at the expense of larger code size. Conditional jump instructions are not present; instead, all instructions have an optional control flag to make them conditional, a feature inspired by the ARM instruction set.

Once the design was mature enough, [John] modelled the entire thing in Verilog and simulated his design to verify correct operation and to check the timings, estimating it to be workable up to 5 MHz or so. A large stack of breadboards and DIP chips from the 74xx series then brought the design to life.

Not content with simply designing, simulating and implementing a custom CPU in hardware, [John] also spent significant effort on the software side of things, writing an assembler and even a C-like compiler for the SPAM-1 platform. And if that wasn’t enough, he also added an emulator for the classic CHIP-8 language, which allows it to run existing programs like Pong and Tetris. Input and output for all this software is mostly through a UART connection to a PC. A VGA interface is still on [John]’s to-do list, but he did build an adapter to connect a classic NES controller to the system.

The SPAM-1 is a worthy addition to the long list of discrete-logic CPUs we’ve seen here, such as this breadboard computer running a UNIX-like OS or this minimalistic one. If you’d like to see one that implements an existing instruction set, try this homebrew RISC-V computer.

Continue reading “SPAM-1 Is A Well-Documented Discrete CPU With An Impressive Software Library”

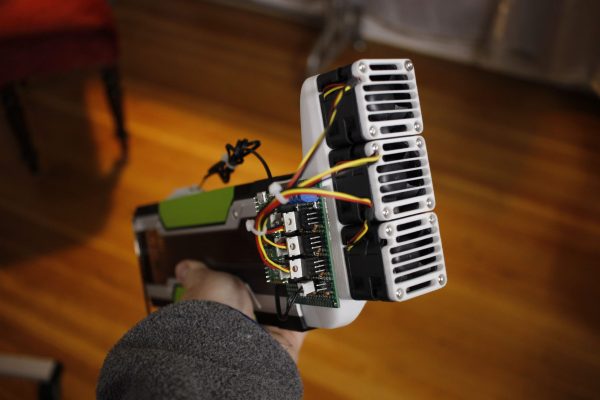
A GPU card with a home-made fan assembly

3D-printed Fan Mount Keeps Server GPU Cool In Desktop Case

Most readers of Hackaday will be well aware of the current shortages of semiconductors and especially GPUs. Whether you’re planning to build a state-of-the art gaming PC, a mining rig to convert your kilowatt-hours into cryptocoins, or are simply experimenting with machine-learning AI, you should be prepared to shell out quite a bit more money for a proper GPU than in the good old days.

Bargains are still to be had in the second-hand market though. [Devon Bray] chanced upon a pair of Nvidia Tesla K80 cards, which are not suitable for gaming and no longer cost-effective for mining crypto, but ideal for [Devon]’s machine-learning calculations. However, he had to make a modification to enable proper thermal management, as these cards were not designed to be used in regular desktop PCs.

The reason for this is that many professional-grade GPU accelerators are installed in rack-mounted server cases, and are therefore equipped with heat sinks but no fans: the case is meant to provide a forced air flow to carry away the card’s heat. Simply installing the cards into a desktop PC case would cause them to overheat, as passive cooling will not get rid of the 300 W that each card pumps out on full load.

[Devon] decided to make a proper thermal solution by 3D printing a mount that carries three fans along with an air duct that snaps onto the GPU card. In order to prevent unnecessary fan noise, he added a thermal control system consisting of a Raspberry Pi Pico, a handful of MOSFETs, and a thermistor to sense the GPU’s temperature, so the fans are only driven when the card is getting hot. The Pi Pico is of course way more powerful than needed for such a simple task, but allowed [Devon] to program it in MicroPython, using more advanced programming techniques than would be possible on, say, an Arduino.

We love the elegant design of the fan duct, which enables two of these huge cards to fit onto a motherboard side-by-side. We’ve seen people working on the opposite problem of fitting large fans into small cases, as well as designs that discard the whole idea of using fans for cooling.

Continue reading “3D-printed Fan Mount Keeps Server GPU Cool In Desktop Case”

A miniature iMac clone running MacOS Monterey

Cute Little IMac Clone Runs MacOS On A Tiny Screen

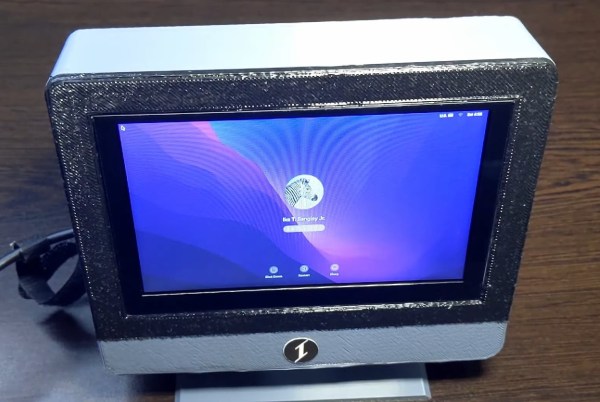
Building a Hackintosh – a non-Apple computer running MacOS – has been a favorite pastime of hackers ever since Apple made the switch from PowerPC to Intel hardware. Though usually built from commodity PC parts, some have successfully installed Apple’s OS onto various kinds of Intel-based single-board computers. [iketsj] used such a board to build a cute little Hackintosh, and apparently decided that if he was going to imitate Apple’s hardware, he might as well take some clues from their industrial design. The result can be seen in the video (embedded below) where [Ike] demonstrates a tiny iMac-like device with a 5″ LCD screen.

The brains of this cute little all-in-one are a Lattepanda, which is a compact board containing an Intel CPU, a few GB of RAM and lots of I/O interfaces. [Ike] completed it with a 256 GB SSD, a WiFi/Bluetooth adapter and the aforementioned LCD, which displays 800×480 pixels and receives its image through the mainboard’s HDMI interface.

The case is a 3D-printed design that vaguely resembles a miniaturized iMac all-in-one computer. The back contains openings for a couple of USB connectors, a 3.5 mm headphone jack and even an Ethernet port for serious networking. A pair of speakers is neatly tucked away below the display, enabling stereo sound even without headphones.

The computer boots up MacOS Monterey just like a real iMac would, just with a much smaller display. [Ike] is the first to admit that it’s not the most practical thing in the world, but that he would go out and use it in a coffee shop “just for the lulz”. And we agree that’s a great reason to take your hacks outside.

[Ike] built a portable Hackintosh before, and we’ve seen some pretty impressive MacOS builds, like this Mini iMac G4, a beautiful Mac Pro replica in a trash can, and even a hackintosh built inside an actual Mac Pro case.

Continue reading “Cute Little IMac Clone Runs MacOS On A Tiny Screen”

A portrait-drawing robot on a table

Drawing Robot Creates Portraits Using Pen, Paper And Algorithms

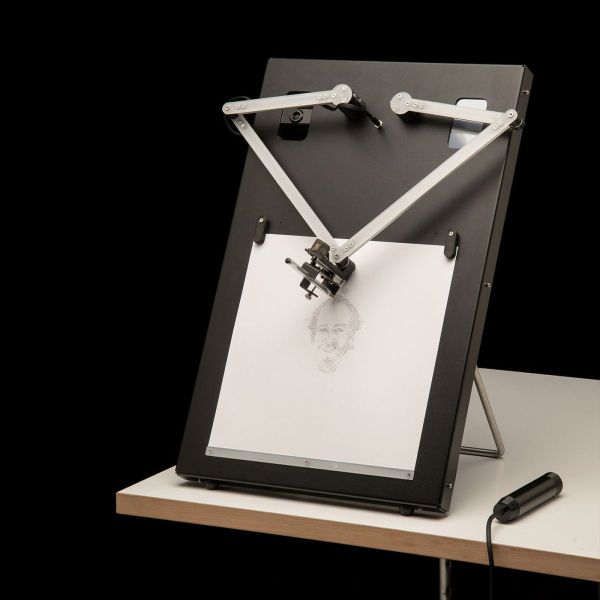
Although the market for hand-drawn portraits largely collapsed following the invention of photography, there’s something magical about watching an artist create a lifelike image using nothing but a pencil, some paper, and their fine motor skills. Watching a machine do the same is a similarly captivating experience, though often the end result is not so great. Trying to fix this deficiency, [Joris Wegner] and [Felix Fisgus] created the Pankraz Piktograph which seems to do a pretty good job at capturing faces. They were inspired by classic picture-drawing automatons, and made a 21st-century version to be used in museums or at events like trade shows.

The operation of the Piktograph is very simple: you stand in front of the machine, look into the camera and take a selfie. If you like what you see, the robot will then begin to draw your portrait on a piece of paper. It does this using two human-like arms which are made from aluminium and driven by two stepper motors. An ordinary ballpoint pen is held in a spring-loaded carrier, which provides just enough pen-to-paper pressure to reliably draw lines without lifting off or scratching the paper. We can’t help but be impressed with the overall look of the machine: with a sleek, powder-coated aluminium case and a stainless steel stand it’s a work of art by itself.

Inside, the Piktograph is powered by a Raspberry Pi 3, which runs a rather sophisticated algorithm to generate a vector image which doesn’t take too long to draw, but still results in a recognizable image of the subject. The makers’ thesis goes into quite some detail to explain the process, which uses Canny edge detection to create an outline drawing, then fills in the empty bits to create bright and dark areas. A certain amount of noise and wigglyness is added to the lines to give it a more “handmade” feel, and the resulting drawing is divided into continuous lines for efficient drawing by the plotter.

We’ve seen several types of specialized art robots before, capable of drawing portraits with a pen, painting them, or even using an Etch-a-Sketch, but [Joris] and [Felix]’s creation seems to win on speed, workmanship, and the quality of the end result. Video embedded after the break.
Continue reading “Drawing Robot Creates Portraits Using Pen, Paper And Algorithms”

An Arduino Nano connected to a portable tape recorder

Audio Tape Interface Revives Microcassettes As Storage Medium

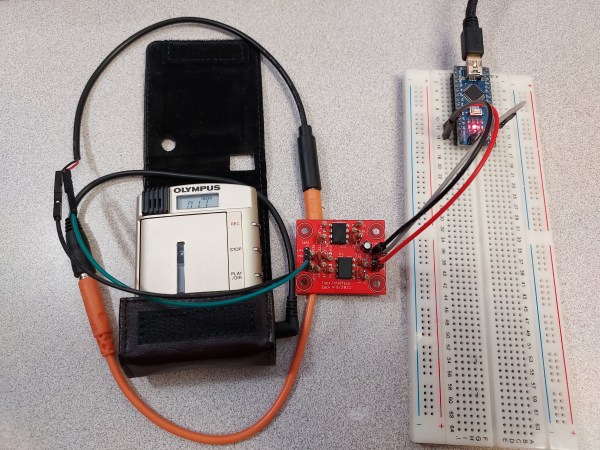
In the early 1980s cassette tapes were the standard storage medium for home computer users; readers of a certain age will remember fiddling with audio jacks, tape counters and signal levels, then waiting for several minutes while a program (hopefully) loaded correctly. While most people happily upgraded to much more reliable floppy disks, [Zack Nelson] decided to go back in time and add a suitably classic storage medium to a retrocomputing project, in the form of a cassette interface. The cassette player he had available was a Pearlcorder L400, which uses the smaller microcassette instead of the familiar audio tapes used in your Walkman or boombox.

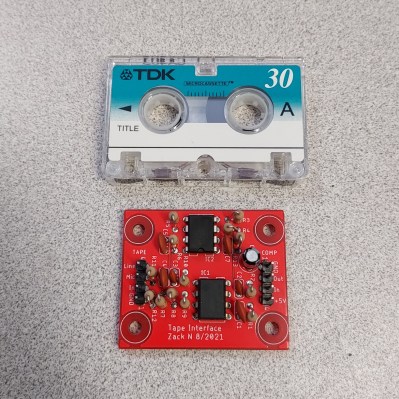
A microcassette and a computer interface for a tape recorder[Zack] designed the entire thing from the ground up: first he decided to use differential Manchester encoding,  which provides immunity against common disturbances like speed variations (which cause wow and flutter). The data is encoded in the frequency range from 1 kHz to 2 kHz, which suits the bandwidth of the cassette player. Next, he designed the interface between the computer and the tape recorder; built from an op-amp and a comparator with a handful of discrete components, it filters the incoming signal and clips it to provide a clean digital signal to be read out directly by the computer.

The system is demonstrated by hooking it up to an Arduino Nano, which reads out the data stream at about 3000 baud. The noise it makes should bring back memories to anyone brought up with the “PRESS PLAY ON TAPE” message; if it inspires you to make your own, we’re happy to report that full schematics and source code are available. [Zack] is not the first one to make his own cassette interface; we’ve seen a somewhat more complicated analog design before, as well as one based on an FPGA.