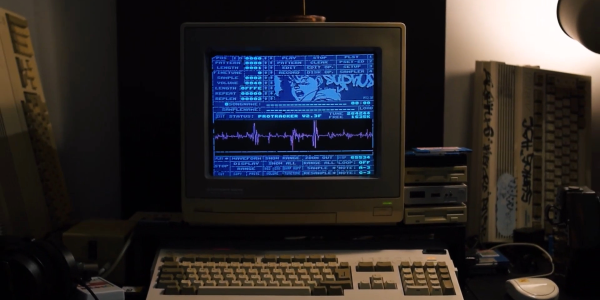
screenshot of C programming on Macintosh Plus

Programming Like It’s 1986, For Fun And Zero Profit

Some people slander retrocomputing as an old man’s game, just because most of those involved are more ancient than the hardware they’re playing with. But there are veritable children involved too — take the [ComputerSmith], who is recreating Conway’s game of life on a Macintosh Plus that could very well be as old as his parents. If there’s any nostalgia here, it’s at least a generation removed — thus proving for the haters that there’s more than a misplaced desire to relive one’s youth in exploring these ancient machines.

So what does a young person get out of programming on a 1980s Mac? Well, aside from internet clout, and possible YouTube monetization, there’s the sheer intellectual challenge of the thing. You cant go sniffing around StackExchange or LLMs for code to copy-paste when writing C for a 1986 machine, not if you’re going to be fully authentic. ANSI C only dates to 1987, after all, and figuring out the quirks and foibles of the specific C implementation is both half the fun, and not easily outsourced. Object Pascal would also have been an option (and quite likely more straightforward — at least the language was clearly-defined), but [ComputerSmith] seems to think the exercise will improve his chops with C, and he’s likely to be right. 

Apparently [ComputerSmith] brought this project to VCS Southwest, so anyone who was there doesn’t have to wait for Part 2 of the video to show up to see how this turns out, or to snag a copy of the code (which was apparently available on diskette). If you were there, let us know if you spotted the youngest Macintosh Plus programmer, and if you scored a disk from him.

If the idea of coding in this era tickles the dopamine receptors, check out this how-to for a prizewinning Amiga demo.  If you think pre-ANSI C isn’t retro enough, perhaps you’d prefer programming by card?

Continue reading “Programming Like It’s 1986, For Fun And Zero Profit”

Five-minute(ish) Beanie Is The Fastest We’ve Seen Yet

Yes, you read that right– not benchy, but beanie, as in the hat. A toque, for those of us under the Maple Leaf. It’s not 3D printed, either, except perhaps by the loosest definition of the word: it is knit, by [Kevr102]’s motorized turbo knitter.

The turbo-knitter started life as an Addi Express King knitting machine. These circular knitting machines are typically crank-operated, functioning  with a cam that turns around to raise and lower special hooked needles that grab and knit the yarn. This particular example was not in good working order when [Kevr102] got a hold of it. Rather than a simple repair, they opted to improve on it.

A 12 volt motor with a printed gear and mount served for motorizing the machine. The original stitch counter proved a problem, so was replaced with an Arduino Nano and a hall effect sensor driving a 7-digit display. In theory, the Arduino could be interfaced with the motor controller and set to run the motor for a specific number of stitches, but in practice there’s no point as the machine needs babysat to maintain tension and avoid dropping stitches and the like. Especially, we imagine, when it runs fast enough to crank out a hat in under six minutes. Watch it go in the oddly cropped demo video embedded below.

Five minutes would still be a very respectable time for benchy, but it’s not going to get you on the SpeedBoatRace leaderboards against something like the minuteman we covered earlier.

If you prefer to take your time, this knitting machine clock might be more your fancy. We don’t see as many fiber arts hacks as perhaps we should here, so if you’re tangled up in anything interesting in that scene, please drop us a line

Continue reading “Five-minute(ish) Beanie Is The Fastest We’ve Seen Yet”

Touch Lamp Tracks ISS With Style

In the comments of a recent article, the question came up as to where to find projects from the really smart kids the greybeards remember being in the 70s. In the case of [Will Dana] the answer is YouTube, where he’s done an excellent job of producing an ISS-tracking lamp, especially considering he’s younger than almost all of the station’s major components.*

There’s nothing ground-breaking here, and [Will] is honest enough to call out his inspiration in the video. Choosing to make a ground-track display with an off-the-shelf globe is a nice change from the pointing devices we’ve featured most recently. Inside the globe is a pair of stepper motors configured for alt/az control– which means the device must reset every orbit, since [Willis] didn’t have slip rings or a 360 degree stepper on hand.  A pair of magnets couples the motion system inside the globe to the the 3D printed ISS model (with a lovely paintjob thanks to [Willis’s girlfriend]– who may or may be from Canada, but did show up in the video to banish your doubts as to her existence), letting it slide magically across the surface. (Skip to the end of the embedded video for a timelapse of the globe in action.) The lamp portion is provided by some LEDs in the base, which are touch-activated thanks to some conductive tape inside the 3D printed base.

It’s all controlled by an ESP32, which fetches the ISS position with a NASA API. Hopefully it doesn’t go the way of the sighting website, but if it does there’s more than enough horsepower to calculate the position from orbital parameters, and we are confident [Will] can figure out the code for that. That should be pretty easy compared to the homebrew relay computer or the animatronic sorting hat we featured from him last year.

Our thanks to [Will] for the tip. The tip line is for hackers of all ages,  but we admit that it’s great to see what the new generation is up to.

*Only the Roll Out Solar Array, unless you only count on-orbit age, in which case the Nakua module would qualify as well.

Continue reading “Touch Lamp Tracks ISS With Style”

When Is A Synth A Woodwind? When It’s A Pneumatone

Ever have one of those ideas that’s just so silly, you just need to run with it? [Chris] from Sound Workshop ran into that when he had the idea that became the Pneumatone: a woodwind instrument that plays like a synth.

In its 3D printed case, it looks like a giant polyphonic analog synth, but under the plastic lies a pneumatic heart: the sound is actually being made by slide whistles. We always thought of the slide whistle as a bit of a gag instrument, but this might change our minds. The sliders on the synth-box obviously couple to the sliders in the whistles. The ‘volume knobs’ are actually speed controllers for computer fans that feed air into the whistles. The air path is possibly not ideal– there’s a bit of warbling in the whistles at some pitches– but the idea is certainly a fun one. Notes are played by not blocking the air path out the whistle, as you can see in the video embedded below.

Since the fans are always on, this is an example of a drone instrument, like bagpipes or the old hacker’s favourite, the hurdy gurdy. [Chris] actually says in his tip– for which we are very thankful– that this project takes inspiration not from those projects but from Indian instruments like the Shruthi Box and Tanpura. We haven’t seen those on Hackaday yet, but if you know of any hacks involving them, please leave a tip.

Continue reading “When Is A Synth A Woodwind? When It’s A Pneumatone”

IR Point And Shoot Has A Raspberry Heart In A 35mm Body

Photography is great, but sometimes it can get boring just reusing the same wavelengths over and over again. There are other options, though and when [Malcolm Wilson] decided he wanted to explore them, he decided to build a (near) IR camera. 

The IR images are almost ethereal.
Image : Malcom Wilson.

The housing is an old Yashica Electro 35 — apparently this model was prone to electrical issues, and there are a lot of broken camera bodies floating around– which hides a Pi NoIR Camera v3. That camera module, paired with an IR pass filter, makes for infrared photography like the old Yashica used to do with special film. The camera module is plugged into a Pi Zero 2 W, and it’s powered by a PiSugar battery. There’s a tiny (0.91″) OLED display, but it’s only for status messages. The viewfinder is 100% optical, as the designers of this camera intended. Point, shoot, shoot again.

There’s something pure in that experience; we sometimes find stopping to look at previews pulls one out of the creative zone of actually taking pictures. This camera won’t let you do that, though of course you do get to skip on developing photos. [Malcom] has the Pi set up to connect to his Wifi when he gets home, and he grabs the RAW (he is a photographer, after all) image files via SSH.  Follow the link above to [Malcom]’s substack, and you’ll get some design details and his python code.

The Raspberry Pi Foundation’s NoIR camera shows up on these pages from time to time, though rarely so artistically. We’re more likely to see it spying on reptiles, or make magic wands work.  So we are quite grateful to [Malcom] for the tip, via Petapixel. Yes, photographers and artists of all stripes are welcome to use the tips line to tell us about their work.

Follow the links in this article for more images like this.
Image: Malcom Wilson

160-core RISC V Board Is The M.2 CoProcessor You Didn’t Know You Needed

Aside from GPUs, you don’t hear much about co-processors these days. [bitluni] perhaps missed those days, because he found a way to squeeze a 160 core RISC V supercluster onto a single m.2 board, and shared it all on GitHub.

OK, sure, each core isn’t impressive– he’s using CH32V003, so each core is only running at 48 MHz, but with 160 of them, surely it can do something? This is a supercomputer by mid-80s standards, after all.  Well, like anyone else with massive parallelism, [bitluni] decided to try a raymarcher. It’s not going to replace RTX anytime soon, but it makes for a good demo.

Like his previous m.2 project, an LED matrix,  the cluster is communicating over PCIe via a WCH CH382 serial interface. Unlike that project, blinkenlights weren’t possible: the tiny, hair-thin traces couldn’t carry enough power to run the cores and indicator LEDs at once. With the power issue sorted, the serial interface is the big bottleneck. It turns out this cluster can crunch numbers much faster than it can communicate. That might be a software issue, however, as the cluster isn’t using all of the CH382’s bandwidth at the moment. While that gets sorted there are low-bandwidth, compute-heavy tasks he can set for the cluster. [bitluni] won’t have trouble thinking of them; he has a certain amount of experience with RISCV microcontroller clusters.

We were tipped off to this video by [Steven Walters], who is truly a prince among men. If you are equally valorous, please consider dropping informational alms into our ever-present tip line

Continue reading “160-core RISC V Board Is The M.2 CoProcessor You Didn’t Know You Needed”

Pretty purple PCBs, made in the USA

Does Made-in-America Make Sense For PCB Prototyping?

These are tough times for American hackers, and rife with uncertainty. Trade wars are on, off, on again– who can keep track? If you’re used to getting everything from China, that can really cramp your style. [Jeremy Cook] took the time to write up his experience prototyping with American-made PCBs, just in time for us to totally miss Independence Day.

The project was a simple nightlight, using a single LED, a photoresistor, a transistor, and a CR2032 battery. The CR2032 battery does complicate things, though: [Jeremy] figured out a neat way to hold the battery using a PCB cutout, but it needs to be a 0.8 mm board. (That’s going to matter in a moment.) He’s put that PCB on GitHub if you’re interested.

To start off, JLBPCB is the Chinese clearing house of choice for [Jeremy], and they quoted a very cheap $7.10 for 20 boards. The problem was that shipping across the Pacific Ocean, plus the ever-wavering tariff charge, brought the price to $48.08. About five dollars of which was from tariffs; the rest you can put down to the cost of jet fuel and the size of the Pacific Ocean.

On the other hand, OSH Park, was able to get [Jeremy] three of their pretty purple PCBs for $7.75 all-inclusive. Overall, since he’s prototyping and does not want 20 boards this revision, [Jeremy] saves quite a lot by staying local– including the environmental impact of shipping and laxer regulations in China, if that sort of thing matters to you. 

The suprizing thing is the turnaround time: [Jeremy] got his pretty purple PCBs from OSH Park a full twenty days after ordering. Similar orders from China take only a week, which is just mind-blowing when you stop and think about the great honking ocean in the way. We could perhaps cut OSH Park some slack in that 0.8 mm boards are not the most common, but their quoted turnaround time for two-layer prototypes is minimum 12 days.

They do offer a “super-swift” option for two-layer boards, but then they lose on price. As [Jeremy] points out, there are always tradeoffs. If you’re really in a hurry, nothing’s faster than milling the boards yourself. Or you could go the old-school toner-transfer etching route.

Our thanks to [Jeremy] for the tip. If you’ve got a better way to prototype, do send us a tip about it. Also, please us know in the comments if you’ve tried an in-country PCB fabricator, and how it compared to the usual offerings from the PRC.