Overclock Your Raspberry Pi The Right Way

The Raspberry Pi came upon us as an educational platform. A credit card sized computer capable of running Linux from a micro SD card, the Raspberry Pi has proven useful for far more than just education. It has made its way into every nook and cranny of the hacker world. There are some cases, however, where it might be a bit slow or seem a bit under powered. One way of speeding the Raspi up is to overclock it.

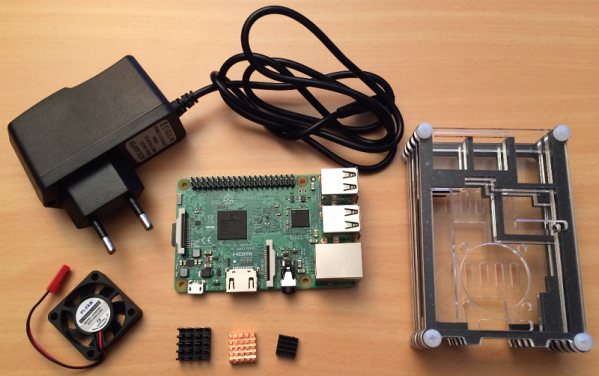
[Dmitry] has written up an excellent overclocking guide based upon Eltech’s write up on the subject. He takes it a bit further and applies the algorithm to both Raspi 2 and Raspi 3. You’ll need a beefier power supply, some heat sinks and fans – all stuff you probably have lying around on your workbench. Now there’s no excuse stopping you from ratcheting up the MHz and pushing your Pi to the limit!

We’ve seen several guides to overclocking the Raspi here on Hackaday, including the current record holder. Be sure to check out [dmitry’s] IO page for the overclocking details, and let us know of any new uses you’ve found by overclocking your Raspi in the comment below.

ESP32 Makes Not-So-Smart Lights Smart

Long taken for granted – lights are a basic necessity of modern life. From the time of the first light bulb, we’ve been able to navigate the dark without the use of fire. With the advent of the Internet of Things, it has become somewhat of a requirement to bring a little intelligence to lights before labeling yourself as a hardware hacker. There are many ways to do this; one of the most common being making use of an ESP32. [Luca Dentella] is somewhat of an ESP32 expert, and has written a fantastic tutorial on how to use the chip. The tutorial builds up to making a set of lights controllable from a smartphone web browser as well a light intensity sensor.

Now before you brush this off as simple n0Ob stuff – consider the following. He’s using a Lolin32 lite dev board, a BH1750 light intensity sensor and a relay to interface with mains for the lights. He wrote his own firmware and gets into the gritty details of developing the HTTP interface and flashing code to the correct memory.

We’ve seen a lot of ESP32 projects here at Hackaday, including this most interesting clock. Be sure to check out the video below to see the smart lights in action.

Continue reading “ESP32 Makes Not-So-Smart Lights Smart”

Huge 3D Printer Ditches Lead Screw For Belt Driven Z Axis

The vast majority of desktop 3D printers in use today use one or more lead screws for the Z-axis. Sometimes you need to think outside of the box to make an improvement on something. Sometimes you need to go against the grain and do something that others wouldn’t do before you can see what good will come out of it. [Mark Rehorst] had heard the arguments against using a belt drive for the Z-axis on a 3D printer build:

  1. The belt can stretch, causing inaccurate layer height.
  2. If power fails, gravity will totally ruin your day.

He decided to go for it anyway and made a belt driven Z axis for his huge printer. To deal with the power loss issue, he’s using a 30:1 reduction worm gear on the drive — keeping the bed in one place if power goes. And after a few studies, he found the belt stretch was so minimal that it has no effect on layer height.

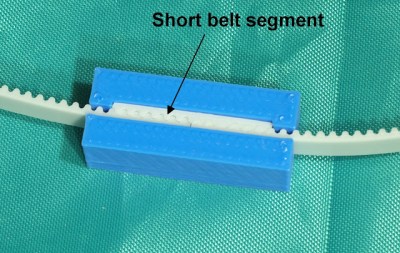
Of course those two issues are but a small portion of the overall ingenuity that [Mark] poured into this project. You’ll want to see it in action below, printing a vase that is 500 mm tall (took about 32 hours to get to 466 mm and you can see the top is a hairy wobbly at this point). Luckily we can geek out with the rest of his design considerations and test by walking through this fantastic build log from back in July. Of note is the clamp he designed to hold the belt. It uses a small scrap of the belt itself to lock together the two ends. That’s a neat trick!

The introduction of a belt driven Z-axis eliminates Z-axis wobble — an issue that can be exacerbated in tall printers. Desktop 3D printers are constantly improving, and we’re always excited to see a new trick work so well. Let us know if you’ve seen any other handy Z-axis modifications out there.

Continue reading “Huge 3D Printer Ditches Lead Screw For Belt Driven Z Axis”

LED Christmas Tree Is Perfect Holiday Build

Soon the most wonderful time of the year will be upon us. Families all over the globe will gather together to exchange gifts, eat good food and enjoy some quality time with each other. For many, it will be the first time they’ve seen each other since the last holiday season. For us hackers –  this translates to a time we get to talk about ourselves and show off a little about what we do. Been taking it easy this year? Have no hacks to talk about? Well, it’s not too late! Break out the soldering iron and whip up the perfect conversation starter – an LED Christmas tree!

[Gumix] took a handful of those flickering LEDs and a step down DC-DC converter to make his simple but elegant tree. No microcontroller here… no code is running. As soon as power is applied, the flickering LEDs do all the work to create a visual delight.

Flickering LEDs have been the focus of a few hackers. They’re basically LEDs designed to flicker like a real candle. [cpldcpu] hooked a scope to one and guessed that a linear shift-register was responsible for the randomness behind the flickering, which would be confirmed several months later.

Be sure to check out [Gumix] LED tree and the video demonstration below.

Continue reading “LED Christmas Tree Is Perfect Holiday Build”

POV Display Is FAN-tastic

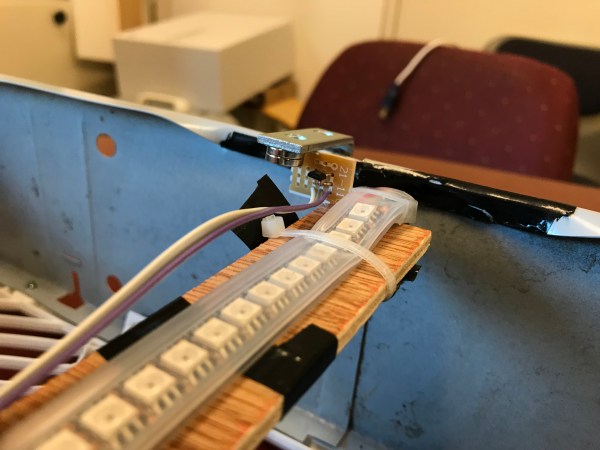
Persistence-of-vision displays come in all shapes and sizes. But when you get a couple of [Bruce Land’s] students involved, well let’s just say they tend to up the ante. When [Emily] and [Han] decided to make a POV display for their next class project, they did so with style. Unsatisfied with smaller displays they saw on YouTube – they decided to make a larger one out of an old box fan and a DotStar LED strip, which are similar to NeoPixels except they use SPI, which means you can update the LEDs at a much faster rate. This makes them perfect for a POV display!

As usual with projects out of Cornell’s EE class – this POV project is extremely well documented and it’s nice to see the fundamental details of a POV display explained. So be sure to check out this project if you’re rusty on the inner workings of POV displays.

We’ve seen some interesting POV displays here at Hackaday, including one strapped to a dog to display its running speed. What’s the coolest POV display you’ve seen?

Floating Death Star Is Just In Time

Unless you’ve been living under a high voltage transformer, you’re aware of the latest release in the Star Wars Saga.  [John] has a relative that is clearly a big Star Wars fan, so he set about to build them the perfect Christmas present – a levitating Death Star! Instead of reinventing the wheel, [John] decided to start off with a magnetically levitating model of the Earth –  a globe. He then took a Death Star mood lamp and gracefully cut it half with his trusty Dremel.

A nice twist for the mood lamp is that it was powered by a hacker’s best friend – five volts from a USB power supply. This made it easy to wire in a LiPo battery along with a charger and some fiber optic lighting.  A pile of cat litter to represent a smoldering planet blown to bits ties the whole build together as only cat litter can.

Be sure to visit [John’s] Instructable page for full details along with a video, which you can also see below.

Read Home Power Meters With RTL-SDR

[k-roy] hates electricity. Especially the kind that can be lethal if you’re not careful. Annoyed by the constant advertisements for the popular Sense Home Energy monitors (which must be installed in the main breaker box by an electrician), [k-roy] set out to find a cheaper and easier way. He wondered how the power company monitored his meter, and guessed correctly that it must be transmitting the information wirelessly. Maybe he could just listen in?

Using a cheap RTL-SDR, it didn’t take long for [k-roy] to tap into this transmission and stumbled across the power readings for his entire neighborhood using a simple command:

~/gocode/bin/rtlamr -msgtype=idm --format=json -msgtype=scm+

Ironically, the hardest part wasn’t snooping on everyone’s power and water usage patterns in the neighborhood, it was trying to figure out which meter was his. In the end, he was able to make some nice graphical layouts of the data with PHP.

We’ve seen some righteous power meter hacks in our time, but this one stands out for its simplicity and elegance. Be sure to check out [k-roy’s] blog for more details, and [rtlamr’s] github for the program used to read the meters.

Thanks to [Jasper J] for the tip!