Touch Panels Make This Christmas Tree Interactive

The city of Liverpool, famously known as both the home port of the Titanic and the birthplace of The Beatles, also seems to have a thing for interactive public art installations. Witness this huge interactive Christmas tree that can be played by passersby.

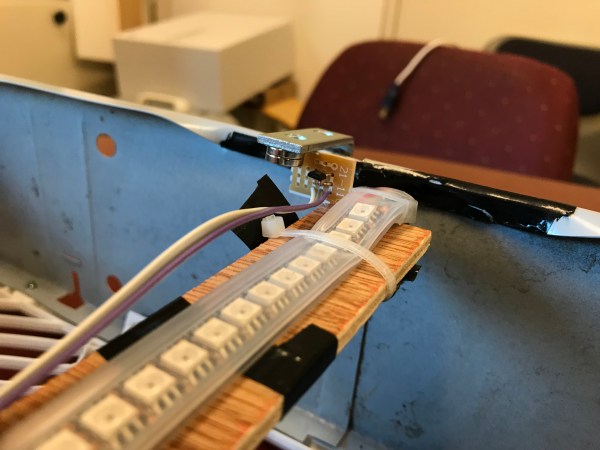
The display in the city’s busy Williamson Square was commissioned by a municipal business group and built by [Adrian McEwen]. The idea was to adorn the 10-meter natural tree with large geometric ornaments covered with Neopixel strips. [Adrian] documents the build process in some detail, including that fact that over 170 meters of WS2812b strips went into the ornaments for the tree. While the strips themselves at IP68 rated, the connections needed when attaching them to the custom-made frames were not, and that had to be overcome with ample application of heat-shrink tubing. OctoWS2811 adapter boards were dangled about the tree to control the lights and connected together with garlands of Ethernet cables. Pressure sensors were used to control the lights when the EMI from the beefy power supplies needed to run everything proved too much for the original touch sensors. After a lot of bench testing and a few long nights working with the city crew to hang the display, passing Liverpudlians can now play the tree and enjoy the Christmas season.

Would you rather a smaller display for your own Christmas tree? This somewhat hyperactive indoor light show might be what you’re looking for.

Continue reading “Touch Panels Make This Christmas Tree Interactive”

POV Display Is FAN-tastic

Persistence-of-vision displays come in all shapes and sizes. But when you get a couple of [Bruce Land’s] students involved, well let’s just say they tend to up the ante. When [Emily] and [Han] decided to make a POV display for their next class project, they did so with style. Unsatisfied with smaller displays they saw on YouTube – they decided to make a larger one out of an old box fan and a DotStar LED strip, which are similar to NeoPixels except they use SPI, which means you can update the LEDs at a much faster rate. This makes them perfect for a POV display!

As usual with projects out of Cornell’s EE class – this POV project is extremely well documented and it’s nice to see the fundamental details of a POV display explained. So be sure to check out this project if you’re rusty on the inner workings of POV displays.

We’ve seen some interesting POV displays here at Hackaday, including one strapped to a dog to display its running speed. What’s the coolest POV display you’ve seen?

New Life For An Obscure Apple Plotter

We’ve all at some point or other seen something done online by somebody else, and thought “I’d like to have a go at that!”. When [Phooky] saw the artwork on the #PlotterTwitter hashtag, he remembered a past donation of a plotter to the NYC Resistor hackerspace. Some searching through the loft revealed a dusty cardboard box containing not the lovely Hewlett-Packard he’d hoped for, but instead an Apple 410 Color Plotter. This proved to be such an obscure part of the legacy Apple product line that almost no information was available for it save for a few diagrams showing DIP switch settings for the serial port.

Undeterred, he took a look inside and found a straightforward enough control board featuring a Z80 processor and support chips with 1983 date codes. The ROMs were conveniently socketed, so after dumping their contents, he was able to identify the routine for the plotter’s test program, and thus work from there to deduce its command set.  A small matter of the plotter using hardware handshaking lines to signal a full buffer later, and he was able to use it to produce beautiful plots. Should you be one of the lucky few remaining Apple 410 owners, you may find his software library for it to be of some use.

If you’d like to see some more aged plotter action on these pages, we’ve had an analog Hewlett Packard here in the past, as well as a vintage drum plotter.

Thanks [Sophi] for the tip.

Micro-ATX Arduino Is The Ultimate Breakout Board

If you’ve been hanging around microcontrollers and electronics for a while, you’re surely familiar with the concept of the breakout board. Instead of straining to connect wires and components to ever-shrinking ICs and MCUs, a breakout board makes it easier to interface with the device by essentially making it bigger. The Arduino itself, arguably, is a breakout board of sorts. It takes the ATmega chip, adds the hardware necessary to get it talking to a computer over USB, and brings all the GPIO pins out with easy to manage header pins.

But what if you wanted an even bigger breakout board for the ATmega? Something that really had some leg room. Well, say no more, as [Nick Poole] has you covered with his insane RedBoard Pro Micro-ATX. Combining an ATmega32u4 microcontroller with standard desktop PC hardware is just as ridiculous as you’d hope, but surprisingly does offer a couple tangible benefits.

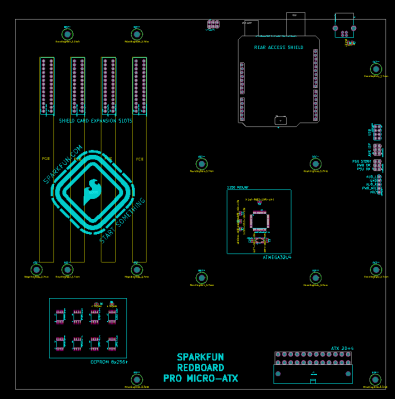
RedBoard PCB layout

The RedBoard is a fully compliant micro-ATX board, and will fit in pretty much any PC case you may have laying around in the junk pile. Everything from the stand-off placement to the alignment of the expansion card slots have been designed so it can drop right into the case of your choice.

That’s right, expansion slots. It’s not using PCI, but it does have a variation of the standard Arduino “shield” concept using 28 pin edge connectors. There’s a rear I/O panel with a USB port and ISP header, and you can even add water cooling if you really want (the board supports standard LGA 1151 socket cooling accessories).

While blowing an Arduino up to ATX size isn’t exactly practical, the RedBoard is not without legitimate advantages. Specifically, the vast amount of free space on the PCB allowed [Nick] to add 2Mbits of storage. There was even some consideration to making removable banks of “RAM” with EEPROM chips, but you’ve got to draw the line somewhere. The RedBoard also supports standard ATX power supplies, which will give you plenty of juice for add-on hardware that may be populating the expansion slots.

With as cheap and plentiful as the miniITX and microATX cases are, it’s no surprise people seem intent on cramming hardware into them. We’ve covered a number of attempts to drag other pieces of hardware kicking and screaming into that ubiquitous beige-box form factor.

Floating Death Star Is Just In Time

Unless you’ve been living under a high voltage transformer, you’re aware of the latest release in the Star Wars Saga.  [John] has a relative that is clearly a big Star Wars fan, so he set about to build them the perfect Christmas present – a levitating Death Star! Instead of reinventing the wheel, [John] decided to start off with a magnetically levitating model of the Earth –  a globe. He then took a Death Star mood lamp and gracefully cut it half with his trusty Dremel.

A nice twist for the mood lamp is that it was powered by a hacker’s best friend – five volts from a USB power supply. This made it easy to wire in a LiPo battery along with a charger and some fiber optic lighting.  A pile of cat litter to represent a smoldering planet blown to bits ties the whole build together as only cat litter can.

Be sure to visit [John’s] Instructable page for full details along with a video, which you can also see below.

Tiny Transmitter Tracks Targets

It is a staple of spy movies. The hero — or sometimes the bad guy — sticks a device never any bigger than an Alka Seltzer to a vehicle or a person and then tracks it anywhere it goes in the world. Real world physics makes it hard to imagine a device like that for a lot of reasons. Tiny power supplies mean tiny lifetime and low power. Tiny antennas and low power probably add up to short range. However, [Tom’s] Hackaday.io project maybe as close as you can get to a James Bond-style tracker. You can see a video of the device, below.

The little transmitter is smaller than a thumbnail — not counting the antenna and the battery — and draws very little current (180 uA). As you might expect, the range is not great, but [Tom] says with a Yagi and an RTL-SDR he can track the transmitter on 915 MHz for about 400 meters.

Continue reading “Tiny Transmitter Tracks Targets”

Control A Quadcopter Over Websockets

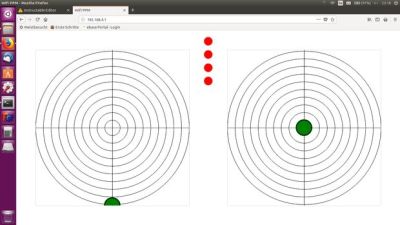
The interface

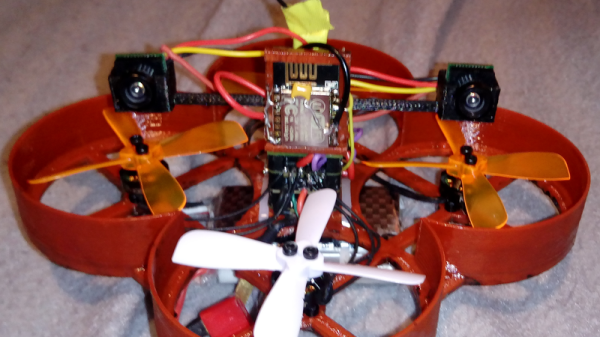
Everyone’s favourite IOT module, the ESP8266, is often the go-to choice for any project that needs quick and cheap control over the web. [Andi23456] wanted to control his quadcopter using the luxury of his mobile phone and thought permanently tethering an ESP12-E module to the quadcopter was exactly what he required.

The ESP8266, really showcasing its all-round prowess, hosts both a web server for a HTML5 based joystick and a Websockets server so that a client, such as a phone, could interact with it over a fast, low latency connection. Once the ESP8266 receives the input, it uses interrupts to generate the corresponding PPM (Pule Position Modulation) code which the RC receiver on the quadcopter can understand. Very cool!

What really makes this realtime(ish) control viable is Websockets, a protocol that basically allows you to flexibly exchange data over an “upgraded” HTTP connection without having to lug around headers each time you communicate. If you haven’t heard of Websockets you really should look really check out this library or even watch this video to see what you can achieve.