Easy Direction Finding Thanks To Quad SDRs

Direction finding has long been a pastime of the ham radio community. Fox hunts and other DF events have entertained many, as they swept their antennas hunting for a transmitter. As with rock and roll and flared pants, time changes all things, and [Corrosive] has been experimenting with a very modern way to go about direction finding with SDR.

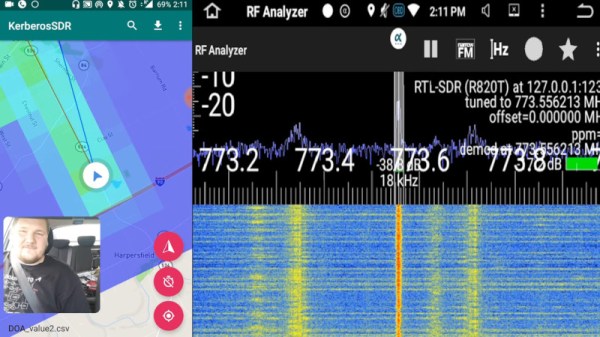
The work is made possible through the use of Kerberos SDR, a device which is essentially four RTL-SDR radios operating in unison. By fitting these with the appropriate antennas and running the right calibrations, the hardware can be used as a powerful direction finding tool.

[Corrosive] demonstrates this ably, by fitting the rig to his car and driving around on the hunt for a transmitter. Hunting for a P25 control station, he demonstrates the configuration of the hardware to help find the FM modulated signal. The software part of the equation is integrated with GPS maps, so one can follow the bearing towards the signal source while data is collected. Over time, the software takes more samples until it builds up an expected location for the transmitter.

The setup is remarkably effective, and largely does all of the heavy lifting, leaving the user to simply handle driving the car. The heat mapping feature is also incredibly cool, and would look great in your next spy movie. We’ve featured Kerberos SDR before, and fully expect to see more great work on this platform. Video after the break.

Continue reading “Easy Direction Finding Thanks To Quad SDRs” →
A Cheap And Cheerful Geiger Counter Build

Hackers often have broad interests across the sciences, of which nuclear topics are no exception. The Geiger counter remains a popular build, and could be a handy tool to have in a time of rising tensions between nuclear powers. [Leonora Tindall] had tinkered with basic units, but wanted a better idea of actual radiation levels in her area. Thus began the build!

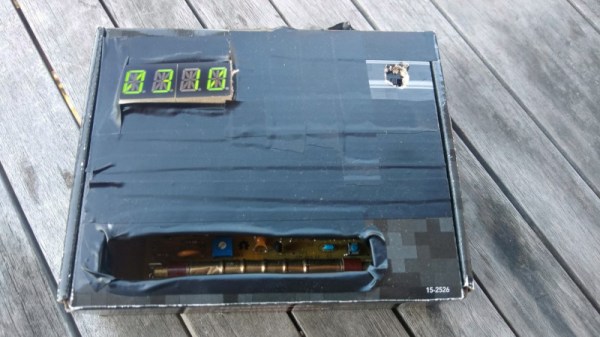
The project began by leveraging the Geiger counter kit from the Mighty Ohm. [Leonora] had built one of these successfully, but wished for a visual readout to supplement the foreboding ticking noises from the device. This was achieved by installing a Metro Mini microcontroller along with a 4-character, 14-segment alphanumeric display. This, along with the cardboard enclosure, makes the build look like a prop from an 80s hacker movie. Very fitting for the Cold War-era technology at work.

By using a pre-built kit and upgrading it with display hardware, [Leonora] now has readings at a glance without having to reinvent the wheel and design her own board from scratch. Of course, if you’re thinking of taking on a more complex build, you might consider a scintillation detector instead.

Fantastic Micrometeorites And Where To Find Them

Space is very much the final frontier for humanity, at least as far as our current understanding of the universe takes us. Only a handful of countries and corporations on Earth have the hardware to readily get there, and even fewer are capable of reaching orbit. For these reasons, working in this field can seem out of reach for many. Nevertheless, there’s plenty about the great expanse beyond our atmosphere that can be studied by the dedicated citizen scientist. With the right equipment and know-how, it’s even possible to capture and study micrometeorites yourself!

While you don’t see a meteor shower every day, micrometeorites are actually astoundingly common. They’re just hard to find!

For those new to the field, the terms used can be confusing. Meteoroids are small metallic or rocky objects found in outer space, up to around 1 meter in size. When these burn up upon entering the atmosphere, they are referred to as a meteor, or colloquially known as a shooting star. If part of the object survives long enough to hit the ground, this is referred to as a meteorite, and as you’d expect the smaller ones are called micrometeorites, being on the scale of 2mm or less.

Stardust Proves Hard To Find

Being tiny and having fallen from space, micrometeorites present certain challenges to those who wish to find and identify them. In spite of this, they can be found by using the right techniques and a heck of a lot of hard work.

Continue reading “Fantastic Micrometeorites And Where To Find Them” →

Rocket Jacket Looks Sharp For CCCamp 2019

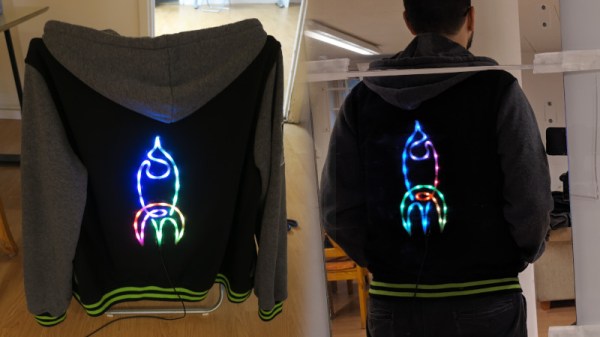
Making your own clothing can be fun, but it’s even better if you can throw some LEDs into the mix and give a new meaning to the term “glow up”. [arturo182] did just that with this custom rocket jacket for CCCamp2019.

We’re getting kind of a stained-glass vibe here.

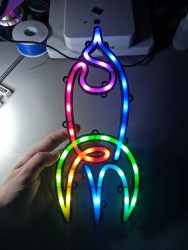
To create the jacket, a 3D printed frame was created in the shape of CCCamp’s rocket logo. This was then filled with hot glue to act as a diffuser, and fitted with WS2818B LEDs. A Digispark is used as the microcontroller, with its compactness serving well for the wearable application. The assembly is then sewn into the back of a hoodie, with cardboard used on the inside as a backer to help keep things flat and support the weight of the hardware.

Hot glue works great as a diffuser in this application, and animation is easy thanks to the addressable LEDs used in the construction. It’s a great way to get a neon-like look, and we fully expect to see more of these glowy wearables in future!

Get Ready For Games Night With 3D Catan

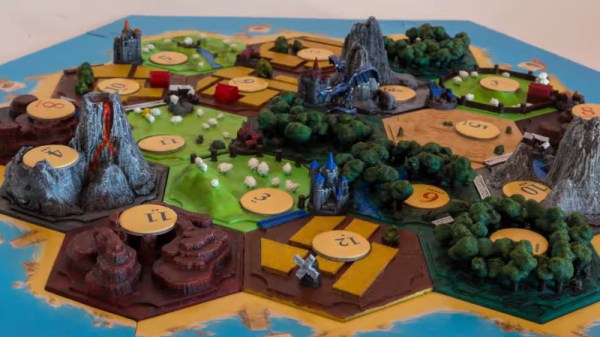
Settlers of Catan is a staple for boardgaming aficionados. Some fans like to express themselves by building a custom set of their own, and [Maclsk] is no different. Enter 3D Catan!

The models for the various pieces were designed in Blender, a great open source 3D modelling program. They were then printed on an Anycubic i3 Mega, taking about 80 hours and using 700 grams of PLA filament. With 116 game pieces, there was plenty of filing and sanding to do.

With this completed, it was then time for paint. [Maclsk] shows off a strong understanding of model painting fundamentals, from dry brushing to using PVA glue to give water elements a glossy sheen. If you’re new to the techniques, sit down with your local Warhammer players – they’ll be more than able to point you in the right direction.

Overall, it’s a great build that really pops on the gaming table. We’ve seen other die-hard Catan fans come out with their own builds, too. Video after the break.

Continue reading “Get Ready For Games Night With 3D Catan” →

Putting The Coanda Effect To Work On A Quadcopter

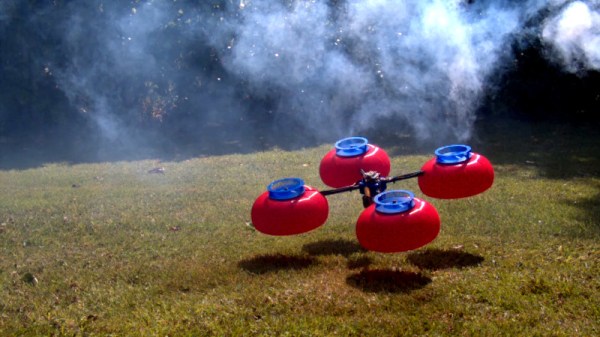
The Coanda effect is an aerodynamic principle regarding the way fluids tend to flow along curved surfaces. This can be used to direct a flow, and [Tom Stanton] wanted to try out its application on a quadcopter. (Video embedded below.)

The project began by firing up the 3D printer, which made experimenting with a variety of different aerodynamic forms easy. Wishing to avoid simply putting a large obstruction in the way of an otherwise efficient propeller, the experiment first used impellers to direct flow sideways, over the edge of the Coanda domes. The impellers, combined with the Coanda domes, were a factor of 5 less efficient at generating thrust compared to a standard prop setup, but [Tom] persevered.

In testing, the drone was unable to fly outside of ground effect, with its weight exceeding its maximum thrust. However, [Tom] noted that the Coanda domes helped create a cushion of air when flying in this ground effect region that was far more than experienced with a typical prop drone.

Wanting some further success, [Tom] then replaced the impellers with standard drone props. This greatly improved performance, with the drone now able to fly out of ground effect and use far less power. However, its performance was still worse than a standard drone without Coanda domes fitted. [Tom] suspects that this is due to the weight penalty most of all.

While it’s unlikely you’ll see Coanda effect drones going mainstream anytime soon, [Tom]’s project goes to show that you can perform viable aerodynamic research at home with little more than a 3D printer and a fog machine. There’s plenty more fun you can have with the Coanda effect, too. Video after the break.

Continue reading “Putting The Coanda Effect To Work On A Quadcopter” →

DIY Gimbal For The Raspberry Pi Camera

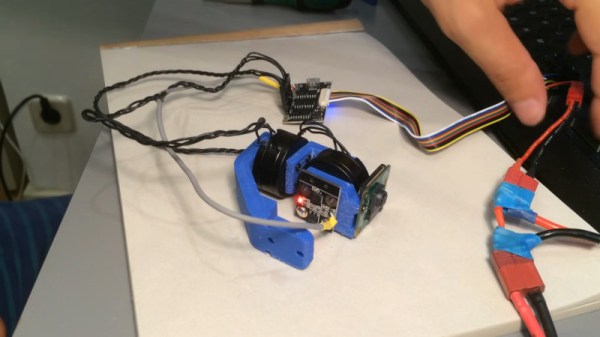
If one wants a stabilized video feed from a drone, a gimbal setup is the way to go. However, the cheaper offerings are all rather similar, suited to a certain size and type of drone. [Jean] was building a smaller craft, so set out to create his own design specifically fit for purpose.

The build begins in the CAD suite, with a series of 3D printed parts designed to link together with a pair of brushless motors to make a 2-axis set up. After printing, the gimbal arms are bolted together with the motors and the camera and IMU are installed, with everything being wired up to a GLB MiniSTorM32 brushless gimbal controller. These controllers make the process of building a gimbal easy, meaning that individual makers don’t have to go to the trouble of designing motor controller circuitry again and again.

The final result is a compact gimbal sized perfectly for the Raspberry Pi camera in [Jean]’s design. If you’re very particular about your gimbal’s performance, building your own doesn’t hurt. Video after the break.

Continue reading “DIY Gimbal For The Raspberry Pi Camera” →