Following the trend of stuffing more electronics in everyday devices, the new Philips Sonicare electric toothbrush that [Cyrill Künzi] purchased ended up having a ‘brush head replacement reminder’ feature that wasn’t simply a timer in the handle or base of the unit, but ended up involving an NFC chip embedded in every single brush head containing the usage timer for that particular head. Naturally, this asked for it to be solidly reverse-engineered and hacked.
The NFC chip inside the brush head turned out to be an NXP NTAG213, with the head happily communicating with the NFC reader in a smartphone and the NFC Tools app. This also revealed the memory layout and a few sections that had write access protected by a password, one of which was likely to be the counter. This turned out to be address 0x24, with a few experiments showing the 32-bit value at this address counting the seconds the brush head had been used.
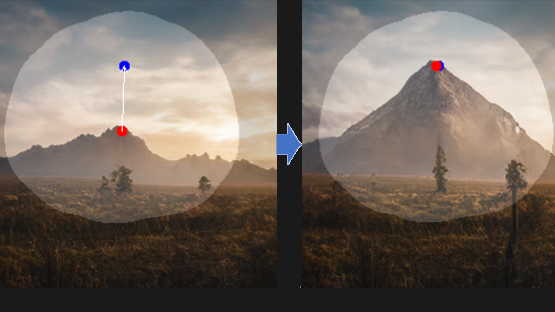
AI image generators have gained new tools and techniques for not just creating pictures, but modifying them in consistent and sensible ways, and it seems that every week brings a fascinating new development in this area. One of the latest is Drag Your GAN, presented at SIGGRAPH 2023, and it’s pretty wild.
It provides a point-dragging interface that modifies images based on their implied structure. A picture is worth a thousand words, so this short animation shows what that means. There are plenty more where that came from at the project’s site, so take a few minutes to check it out.
GAN stands for generative adversarial network, a class of machine learning that features prominently in software like image generation; the “adversarial” part comes from the concept of networks pulling results between different goalposts. Drag Your GAN has a GitHub repository where code is expected to be released in June, but in the meantime, you can read the full paper or brush up on the basics of how AI image generators work, as well as see how image generation can be significantly enhanced with an understanding of a 2D image’s implied depth.
Original SMT antenna (blue component) offers small size, but poor range.
This particular headset relies on a USB dongle to transmit audio from PC to headset over its own 2.4 GHz wireless connection. By popping open the USB dongle, [rafii6312] was able to identify an SMT antenna and easily desolder it, replacing it with a wired connection to a spare 2.4 GHz external antenna. That’s all it took to boost the headset’s range from barely one room to easily three rooms, which is a success by any measure.
Sadly, the USB transmitter dongle doesn’t have any intention of being opened and puts up a fight, so the process was a bit destructive. No problem, [rafii6312] simply fired up Fusion360 to design a new 3D-printed enclosure that accommodated the new antenna. Pictures, instructions, and 3D model files are all available on the project page, if you want to improve your headset, too.
Minecraft is a simple video game. Well, it’s a simple video game that also has within it the ability to create all of the logic components that you’d need to build a computer. And building CPUs in Minecraft is by now a long-standing tradition.
Enter CHUNGUS II. The Computational Humongous Unconventional Number and Graphics Unit by [Sammyuri] is the biggest and baddest Minecraft computer that we’ve ever seen. So big, in fact, that it was finally reasonable to think about porting a stripped-down version of Minecraft to the computer itself. Yes, that’s right, Minecraft running in Minecraft. (Video embedded below.) Writing the compiler and programming the game brought two more hackers to the party, [Uwerta] and [StackDoubleFlow], and quite honestly, we’re amazed that a team as small as three people pulled this off.
Anyway, once you’ve picked your jaw up off the floor, also check out [Sammyuri]’s video on just the CHUNGUS II computer itself. (Also embedded below.) Seeing the architecture is interesting, even if you don’t speak Redstone as fluently as our heroes here. We love that the assembler creates a block of ROM – out of Minecraft blocks – that you can then cut/paste into the game’s reality.
For a “simple” game about breaking blocks and punching trees, Minecraft has inspired hackers to make the game better both inside and outside of the real world. For instance, for the latest in performant open-source Minecraft servers, check out Folia. Maybe, one day, they’ll build CHUNGUS II in the real world. It could happen.
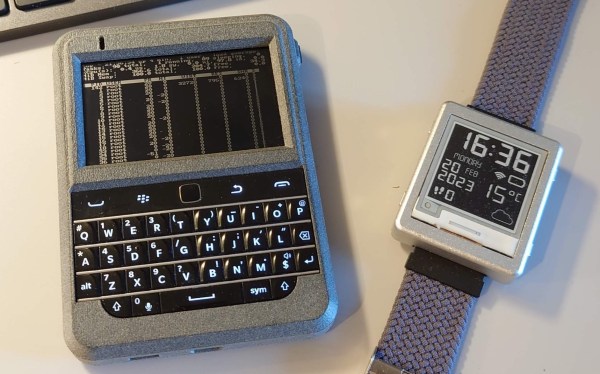
As the 2020s are seeing the return of the flip phone, could we see a rebirth of other device form factors from before the slab era? [Eric Migicovsky] and [SQFMI] are working on a new physical keyboard device with the Beepberry.
Featuring a high contrast Sharp Memory LCD and the tried-and-true reliability of a BlackBerry keyboard, the device is designed for messaging all your contacts over WiFi without the distractions of a smartphone. As this is a collaboration with the Matrix-based chat service Beeper, the device is designed around the CLI version of their client.
If you want to eschew the distraction-free nature of the device, since it’s Pi-powered it can run any ARM Linux programs you might want as well being a playground for hardware mods. Add a DSP and headphone jack and this could be a neat little pianobar player. [Migicovsky] stresses this is currently a dev board and by no means should be assumed to be an off-the-shelf piece of kit.
If this looks like a familiar reuse of a BlackBerry keyboard, you might be remembering [arturo182]’s Keyboard Featherwing or this LoRa Messenger.
Here at Hackaday, we definitely love to celebrate the hard hacks: the insane feats of reverse engineering, the physics-defying flights of fancy, or the abuse of cutting edge technology. But today I’d like to raise a rhetorical glass in tribute of the simple hacks. Because, to be perfectly honest, the vast majority of my hacks are simple hacks, and it’s probably the same for you too. And these often go unsung because, well, they’re simple. But that doesn’t mean that something simple can’t be helpful.
Case in point: an ESP8266 press-buttons device that we featured this week. It doesn’t do much. It’s main feature is that it connects to a home automation network over WiFi and enables you to flip three relays. Wires coming off the board are to be soldered to the not-yet-smart device in question, simply connected to each side of the button you’d like to press. In the example, a coffee machine was turned on and the “go” button pressed, automating one of the most essential kitchen rituals. While recording the podcast, I realized that I’ve built essentially this device and have it controlling our house’s heating furnace.
For the experienced hacker, there’s not much here. It’s a simple board design, the software heavily leverages ESPHome, so there’s not much work on that front either. But imagine that you lacked any of the wide-ranging skills that it takes to make such a device: PCB layout, ESP8266 software wrangling, or the nuances of designing with relays. You could just as easily build this device wrong as right. The startup costs are non-trivial.
Making a simple design like this available to the public isn’t a technical flex, and it’s not contributing to the cutting edge. But it just might be giving someone their first taste of DIY home automation, and a sweet taste of success. There’s not much easier than finding a switch and soldering on two wires, but if that’s the spark that pushes them on their path to greater hacks, that’s awesome. And even if it doesn’t, at least it’s another appliance under user control, connected to a private WiFi network rather than spying you out and phoning home to Big Toaster.
So here’s to the simple hacks!
This article is part of the Hackaday.com newsletter, delivered every seven days for each of the last 200+ weeks. It also includes our favorite articles from the last seven days that you can see on the web version of the newsletter.
Want this type of article to hit your inbox every Friday morning? You should sign up!
[Sebastian Staacks] built a video booth for his wedding, and the setup was so popular with family, that it was only fitting to do one better and make some improvements to the setup, Matrix-style. The “bullet time” video effect was introduced by the classic movie franchise and makes for a splendid video transition effect for video montages.
Hardware-wise, the effect is pretty expensive, requiring many cameras at various angles to be simultaneously triggered, in order to capture the subject in a fixed pose with a rotating camera. Essentially you need as many cameras as frames in the sequence, so even at 24 frames per second (FPS), that’s a lot of hardware. [Sebastian] cheated a bit, and used a single front-facing camera for the bulk of the video recording, and twelve individual DSLRs covering approximately 90 degrees of rotation for the transition. More than that is likely impractical (not to mention rather expensive) for an automated setup used in as chaotic an environment as a wedding reception! So, the video effect is quite the same as in the movies, as this is a fixed pose, but it still looks pretty good.
A Pico-W hidden in there providing a BT connected interface button
[Sebastian] did consider going down the Raspberry Pi plus Pi-cam route, but once you add in a lens and the hassle of the casing and mounting hardware, not to mention availability and cost, snagging a pile of old DLSRs looks quite attractive. Connectivity to the camera is a simple 3.5 mm jack for the focus and trigger inputs, with frames read out via a USB connection.
For practical deployment, the camera batteries were replaced with battery eliminator adapters which step-up the 5 V from the USB connection to the 7.4 V the cameras need, but the current spike produced by the coordinated trigger of all twelve cameras overwhelmed any power supply available. The solution, to be practical, and not at all elegant, is to just have lots of power supplies hidden in a box. Sometimes you’ve just got a job to do.
Reproducing this at home might be a bit awkward unless you have exactly the same hardware to hand, but the principles are sound, and there are a few interesting details to dig into, if you were so inclined.