Creating The World’s Most Efficient Quadcopter Drone

Keeping an eye on remaining battery charge. (credit: Luke Maximo Bell, YouTube)

Although not a typical focus of people who fly quadcopter drones for a hobby or living, endurance flying has a certain appeal to it for the challenge it offers. Thus, as part of his efforts to collect all the world records pertaining to quadcopter drones, [Luke Maximo Bell] has been working on a design that would allow him to beat the record set by SiFly Aviation at 3 hours and 11 minutes.

By using knowledge gained from his PV solar-powered quadcopter, [Luke] set about to take it all a few steps further. The goal was to get as much performance out of a single Watt, which requires careful balancing of weight, power output and many other parameters.

Crucial is that power usage goes up drastically when you increase the RPM of the propellers, ergo massive 40″ propellers were picked to minimize the required RPM to achieve sufficient lift, necessitating a very large, but lightweight frame.

The battery packs are another major factor since they make up so much of the weight. By picking high-density Tattu batteries and stripping these down even more this was optimized for as well, before even the wire gauge of the power wires running to the motors were investigated to not waste a single Watt or gram.

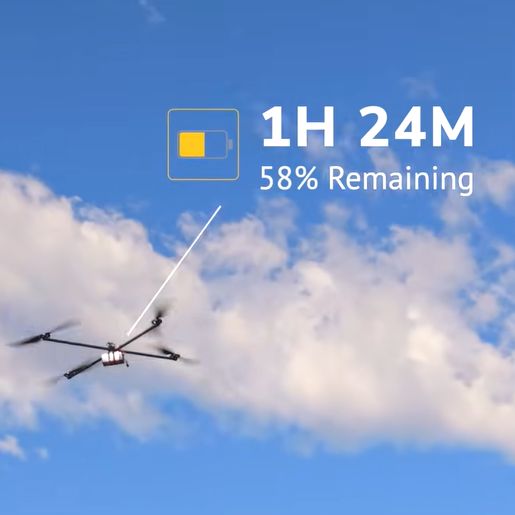
All of this seems to have paid off, as a first serious test flight resulted in a 3 hour, 31 minutes result, making it quite feasible that [Luke] will succeed with his upcoming attempt at the world’s longest flying electric multirotor record. Another ace up his sleeve here is that of forward movement as well as wind provides effectively free lift, massively reducing power usage and possibly putting the 4 hour endurance score within easy reach.

Continue reading “Creating The World’s Most Efficient Quadcopter Drone”

The Dismal Repairability Of Milwaukee Tools

Despite the best efforts of the manufacturers, there are folks out there that try to repair power tools, with [Dean Doherty] being one of them. Recently he got a Milwaukee M18 cordless planer in for repairs, which started off with just replacing some dodgy bearings, but ended up with diagnosing a faulty controller. Consequently the total repair costs went up from reasonable to absolutely unreasonable, leading to a rant on why Milwaukee tools are terrible to repair.

Among the symptoms was the deep-discharged battery, which had just a hair over 7 V while unloaded. Question was what had drained the battery so severely. What was clear was that the tool was completely seized after inserting a working battery with just a sad high-pitched whine from a stalled motor.

After replacing both bearings and grumbling about cheap bearings, the tool had a lot of drywall dust cleaned out and was reassembled for a test run. This sadly showed that the controller board had been destroyed due to the seized rotor bearing, explaining the drained battery. Replacing the controller would have cost €60-70 as it comes with the entire handle assembly, rendering the repair non-viable and a waste.

Perhaps the one lesson from this story is that you may as well preventively swap the cheap bearings in your Milwaukee tools, to prevent seizing and taking out the controller board. That said, we’d love to see an autopsy on this controller board fault.

Continue reading “The Dismal Repairability Of Milwaukee Tools”

An Open Source Client For World Of Warcraft

When World of Warcraft was launched in 2004, it became somewhat of a juggernaut in the MMORPG space. Millions of players continue to login every month. [Kelsi Davis] is one such player, but she doesn’t always log in with the regular client anymore. That’s because she put together WoWee—an open-source alternative of her very own.

WoWee is an acronym—World of Warcraft Engine Experiment. Coded in native C++, it’s a homebrewed client that uses a custom OpenGL renderer to display the game world. [Kelsi] notes that it’s strictly an “educational/research” project, built without using any official Blizzard assets, data or code. Instead, it grabs some client data from a legally-obtained install to operate and loads certain assets this way.

It’s currently compatible with the vanilla game as well as The Burning Crusade and Wrath of the Lich King expansions. It should be highlighted how much work this project has already involved—with [Kelsi] needing to recreate various functional minutae in the game, from character creation screens to weather systems and skyboxes. There’s still a lot to do, as well, like adding 3D audio support and making it more interoperable with the quest system.

It’s rare that any MMO gets an open-source client, even less so while the original game is still being actively supported by the developers. Still, we do see some creative hacks in this space.

Continue reading “An Open Source Client For World Of Warcraft

The Raspberry Pi As A Studio Camera

The Raspberry Pi has brought digital camera experimentation within the reach of everybody, with its combination of an accessible computing platform and some almost-decent camera sensors. If there’s a flaw in the Pi as a camera though, it lies in the software, which can be slow and frustrating to use. [Martijn Braam] is here with an interesting project that might yield some useful results in this direction, he’s making a Raspberry Pi studio camera.

His camera hardware is very straightforward, a Pi 5 and touchscreen with the HD camera module in a rough but serviceable wooden box. The interesting part comes in the software, in which he’s written a low-latency GUI over an HDMI output camera application. It’s designed to plug into video mixing hardware, and one of the HDMI outputs carries the GUI while the other carries the unadulterated video. We can see this used to great effect with for example OBS Studio. It’s for now a work in progress as you can see in the video below the break, but we expect that it can only get better.

The video below exposes the obvious flaw in many Pi camera setups, that the available lenses don’t match the quality of the sensor, in that good glass ain’t cheap. But we think it’s one to watch, and could provide competition for CinePi.

Continue reading “The Raspberry Pi As A Studio Camera”

Custom VR Headset Uses Unconventional Displays

Cathode ray tubes (CRTs) are a fascinating display technology that has been largely abandoned outside of retro gaming and a few other niche uses. They use magnets to steer a beam of electrons rapidly across a screen, and while a marvel of engineering for their time, their expense, complexity, and weight all led to them being largely replaced by other displays like LCDs and LEDs. They were also difficult to miniaturize, but there were a few companies who tried. [dooglehead] located a few of the smallest CRT displays he could find and got to work putting them in the most unlikely of situations: a virtual reality headset.

The two displays for his headset come from Sony Watchmans, compact over-the-air black-and-white handheld televisions from the late 1900s. [dooglehead] had to create a method for sending video to these units which originally had no input connections, and then also used an FPGA to split a video signal into two parts, with one for each display. The two displays are placed side by side and attached to a Google Cardboard headset, with an off-the-shelf location tracker attached at the top. An IMU tracks head rotation while this location tracker tracks the motion of the unit through 3D space.

With everything assembled and ready to go, the CRT VR headset only weighs in a few grams heavier than [dooglehead]’s modern HTC headset, although it’s lacking a case (which is sorely needed to cover up the exposed high voltage of the CRTs). He reports surprisingly good performance, with notable interlacing and focus issues. He doesn’t plan to use it to replace any of his modern VR displays anytime soon, but it was an interesting project nonetheless. There are some rumors that CRTs are experiencing a bit of a revival, so we’d advise anyone looking to toss out an old CRT to at least put it on an online market place before sending it to a landfill.

Continue reading “Custom VR Headset Uses Unconventional Displays”

3D Printed Jack Mixes Two Filaments For Great Performance

If you’re looking to jack up your car and you don’t have anything on hand, your 3D printer might not be the first tool you look towards. With that said, [Alan Reiner] had great success with a simple idea to create a surprisingly capable scissor jack with a multi-material print.

The design will look familiar if you’ve ever pulled the standard jack out of the back of your car. However, this one isn’t made fully out of steel. It relies on an M6 bolt and a rivet nut, but everything else is pure plastic. In this scissor jack design, rigid PETG arms are held in a scissor jack shape with a flexible TPU outer layer. Combined with the screw mechanism, it’s capable of delivering up to 400 pounds of force without failing. It’s an impressive figure for something made out of 80 grams of plastic. The idea came about because of [Alan’s] recent build of a RatRig VCore4 printer, which has independent dual extruders. This allowed the creation of single prints with both rigid and flexible filaments included.

[Alan] did test the jack by lifting up his vehicle, which it kind of achieved. The biggest problem was the short stroke length, which meant it could only raise the back of the car by a couple inches. Printing a larger version could make it a lot more practical for actual use… if you’re willing to trust a 3D-printed device in such use.

Files are on Printables if you wish to make your own. It’s worth paying attention to the warning upfront that [Alan] provides—”THIS CAN CREATE A LOT OF FORCE (400+ lbs!), WHICH MEANS IT CAN STORE A LOT OF ENERGY THAT MIGHT BE RELEASED SUDDENLY.  Please be cautious using 3d-printed objects for high loads and wear appropriate safety equipment!”

Funnily enough, we’ve featured 3D printed jacks before, all the way back in 2015! Video after the break.

Continue reading “3D Printed Jack Mixes Two Filaments For Great Performance”

LEGO Orrery Gets A Real-Time Drive Upgrade

An orrery is a beautiful type of mechanical contrivance, built to demonstrate the motion of heavenly objects. LEGO happens to offer just such a device, built using its Technic line of blocks, shafts, and gears. Only, it has a serious limitation—it has to be cranked manually to make it spin the Earth around the sun. [Görkem] set out to fix this glaring oversight with some good old-fashioned hardware.

The setup removes just five LEGO pieces from the original design, eliminating the hand crank from the mechanism. In its place, [Görkem] installed a NEMA 17 stepper motor, paired with a custom PCB mounted on the back. That carries an ESP32 microcontroller and a TMC2208 stepper motor driver set up for silent drive. Rigged up like so, the orrery can simulate the motion of the Earth and Moon around the Sun in real time. There’s also a knob to track back and forth in time, and a button to reset the system to the correct real-time position.

The final build looks great, combining the LEGO Technic parts with some chunky electronics and 7-segment displays that make it a wonderful techy desk decoration. Down the line, [Görkem] hopes to offer a plug-and-play kit to others who wish to duly animate their own LEGO orrery sets (set #42179).

We love a good LEGO build around these parts. We’ve featured everything from parts sorters to functional typewriters in the past.

Continue reading “LEGO Orrery Gets A Real-Time Drive Upgrade”