Nanode: A Low-cost Network-enabled Arduino Ethernet Alternative

nanode_ethernet_enabled_arduino_board

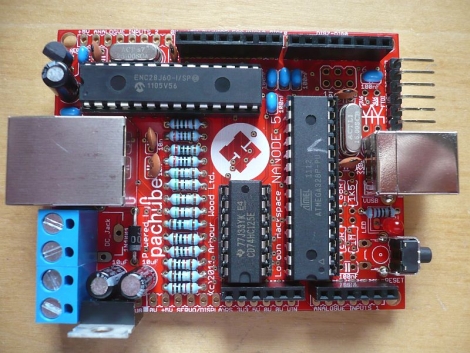
The folks over at Hackspace London have been working hard to create a “very low cost, open source, Internet connected platform on which others can develop their ideas”, which they have dubbed “Nanode”.

Essentially an Arduino with Ethernet networking on-board, the Nanode is armed with an ATMega 328 microcontroller along with all the other standard goodies you would expect from an Arduino-compatible device. The Nanode can be controlled with a web browser right out of the box, thanks to some custom Ethernet libraries. Additionally network of Nanodes can be easily configured to communicate with a “master” unit via a multidrop serial bus, allowing the device to be used for a wide array of distributed control tasks.

Obviously most of these features can be had in the form of an Arduino Ethernet board, or achieved by using an Ethernet shield. The Nanode is a touch cheaper than either option at $40 for a kit, and the native networking capabilities sound like they would be quite handy. That said, we are a bit bummed that it only has 10BaseT networking capabilities, though it is always nice to have options when it comes to choosing a microcontroller board.

[Thanks, TheHypnotist]

FabLab Helps The Developing World Set Up Long-distance Wireless Ethernet

The wooden frame seen above hosts a parabolic reflector making up one side of a wireless network link. This is a Fab Lab project called FabFi which uses common networking hardware to setup long-distance wireless Ethernet connections. It’s a bit hard to tell in the image above, but the reflector focuses radio waves on the antennae of a router we’re quite familiar with, the Linksys WRT54G. It’s held upside-down in an enclosure meant to protect it from the elements. The node above manages to complete a connection spanning 2.41 miles!

One of the core values of the project is to develop hardware that is easy to build with limited resources, then to make that knowledge freely available. Anyone who has the ability to download and print out the 2D design file can build a reflector for themselves. As we’ve seen in other projects, paper stencils and hand tools can handle this job with no need for a laser-cutter (which was used for the prototype). WRT54G routers are inexpensive and the project uses the open source firmware OpenWRT. They can be run from 12VDC power which means a car battery works when mains power is not an option. The system has been running in Afghanistan for two years and hardware failure is still in the low single-digits.

[Thanks das_coach]

Adding Persistent Memory And Ethernet To Vintage Arcade Machines

z80_bus_tapper

If you are a frequent reader, you are undoubtedly familiar with hacker [Sprite_tm]. He has been working with fellow members of the TkkrLab hackerspace to get things ready for their official grand opening on May 28th, and wrote in to share a project he recently completed to kick things off.

As part of their preparations, they have been stocking the joint with all sorts of hacker-friendly goodies including plenty of tools and Club Mate, as well as a vintage ‘1943’ arcade cabinet. The game is a group favorite, though every time the power is turned off, it loses all of the hard-earned high scores. [Sprite_tm] knew he could improve on the current paper-based score register, so he pulled the machine open to see what could be done.

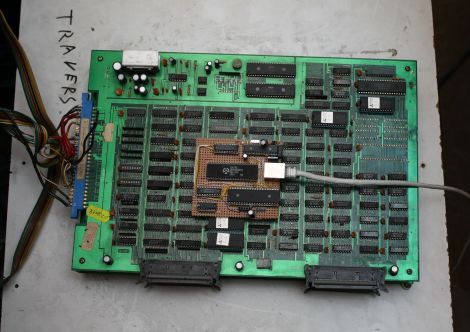
He used an AVR to tap into the machine’s Z80 logic board, allowing him to read and write to the entirety of the game’s RAM whenever he pleased. This enabled him to keep tabs on the high scores, restoring them to memory whenever the machine is powered back on. The addition of the AVR also allowed him to add a TCP/IP interface, which is used to send high scores to Twitter whenever someone beats the previous record.

His modular bus tap can be used in all sorts of Z80-based hardware, so if you have some vintage equipment laying around, be sure to swing by his site for a more detailed look at the build process.

Adding Ethernet Control For A 5.1 Speaker Set

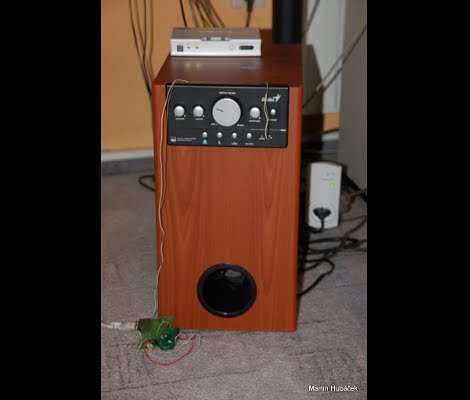
[HuB’s] set of 5.1 surround sound speakers was gobbling up a bunch of electricity when in standby as evidenced by the 50 Hz hum coming from the sub-woofer and the burning hot heat sink on the power supply. He wanted to add a way to automatically control the systems and offer the new feature of disconnecting the power from the mains.

The first part was not too hard, although he used a roundabout method of prototyping. He planned to use the IR receiver on the speakers to control them. At the time, [HuB] didn’t have an oscilloscope on hand that he could use to capture the IR protocol so he ended up using Audacity (the open source audio editing suite) to capture signals connected to the input of a sound card. He used this to establish the timing and encoding that he needed for all eight buttons on the original remote control.

Next, he grabbed a board that he built using an ATmega168 and an ENC28J60 Ethernet chip. This allows you to send commands via the Internet which are then translated into the appropriate IR signals to control the speakers and a few other devices in the room. The last piece of the puzzle was to wrap an RF controlled outlet into the project with lets him cut mains power to the speakers when not in use. You can see the video demonstration embedded after the break.

Continue reading “Adding Ethernet Control For A 5.1 Speaker Set”

Arduino And Open Sound Control Without An Ethernet Shield

Open Sound Control (OSC) is a communications protocol that can be seen as a modern alternative to MIDI. It’s specifically designed to play nicely with network communication systems. The problem with using it along with Arduino-based gadgets is that you then need to use something like an Ethernet shield to provide the network connection. [Liam Lacey] decided to use Processing as a go-between for OSC and the Arduino in lieu of the Ethernet Shield. One of the major benefits of this method is that it gives you some flexibility when it comes to how the Arduino communicates. Since a USB connected Arduino can be addressed by the Processing sketch in the same way as an AVR chip connected via an RS232 serial port, [Liam’s] method will allow you to prototype on an Arduino board, but transition to your own non-USB hardware for the finished project. The one big drawback to this method is the need to have a computer connected to your controller, but we’d bet you’d need one to run MAXmsp anyway.

Sniff Ethernet With A Throwing Star

[Michael Ossmann] came up with a nifty little device that arranges RJ45 plugs into a plus shape for the intent of sniffing Ethernet packets, and named it the “Throwing Star LAN Tap”. While the original design worked fine it does suffer some limitations such as being limited to 10/100 base networks, and one way only. This new version of the “Throwing Star LAN Tap” fixes those and adds some much needed convenience.

Gone are the male plugs, which requires couplers and are prone to break, and fiddly splices in favor of a throwing star shaped pcb, and female sockets. 1000 base networks are supported, but due to the workings of 1000 base and wanting to keep the device passive, capacitors are added to filter out the signal and force the network to drop down to 100 base. Sure, it may be an ugly hack, but it’s an ugly hack that fits in your pocket.

Ethernet Connection Using Capacitive Coupling

Wanting to save space and weight on his project build [Florin] set out to find a way to add Ethernet connectivity without the magnetics. His ill-advised first try involved directly coupling two switches, frying both in the process. After some research he found that Ethernet hardware manufacturers have considered the need for devices without the magnetics and there are several application notes available on the subject. [Florin] followed the information that Realtek has for their devices and learned that they can be couple capacitively. After depopulating the magnetics from a second pair of switches he wired up some resistor-capacitor networks on a breadboard and got the connecting to work.