How To Repair? The Death Of Schematics

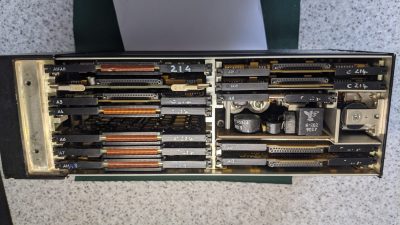
There was a time when, if you were handy with a soldering iron, you could pretty easily open up a radio or TV repair business. You might not get rich, but you could make a good living. And if you had enough business savvy to do sales too, you could do well. These days there aren’t many repair shops and it isn’t any wonder. The price of labor is up and the price of things like TVs drops every day. What’s worse is today’s TV is not only cheaper than last year’s model, but probably also better. Besides that, TVs are full of custom parts you can’t get and jam-packed into smaller and smaller cases.

Case in point, I saw a “black Friday” ad for a 40-inch 1080p flatscreen with a streaming controller for $98. Granted, that’s not huge by today’s standards and I’m sure it isn’t a perfect picture. But for $98? Even a giant high-quality TV these days might cost a bit more than $1,000 and you can get something pretty great for well under $500.

Looking back, a Sears ad showed a great deal on a 19″ color TV in 1980. The price? $399. That doesn’t sound too bad until you realize that today that would be about $1,400. So with a ratio of about 3.5 to 1, a $30/hour service call would be, today, $105. So for an hour’s service call with no parts, I could just buy that 40″ TV. Add even one simple part or another hour and I’m getting close to the big league TVs.

Did you ever wonder how TV repair technicians knew what to do? Well, for one thing, most of the time you didn’t have to. A surprising number of calls would be something simple like a frayed line cord or a dirty tuner. Antenna wires destroyed by critters was common enough. In the tube days, you could pretty easily swap tubes to fix the bulk of actual problems.

Continue reading “How To Repair? The Death Of Schematics”

Making A Do-It-Yourself Sand Battery

Storing energy can be done in many ways, with the chemical storage method of a battery being one of the most common. Another option is a thermal battery, which basically means making something hot, and later extracting that heat again. In this video by [Robert Murray-Smith] the basic concept of a thermal battery that uses sand is demonstrated.

By running a current through a resistive wire that’s been buried inside a container with sand, the sand is heated up to about 200 °C. As [Robert] points out, the maximum temperature of the sand can be a 1000 °C or more. Because sand doesn’t boil like water, the total amount of energy stored in sand is correspondingly higher.

Extracting the thermal energy can be done rather inefficiently using the demonstrated Peltier element. A Stirling engine, or steam generator and turbine, would get a lot more energy out. Either way, the thermal battery itself is made using just plain sand, which makes it an attractive DIY target to tinker with.

Continue reading “Making A Do-It-Yourself Sand Battery”

FDA’s Approval Of Cell Culture Chicken: The Rise Of Fresh Meat Without The Animal?

On November 14th of this year, the FDA cleared the path for Upside Foods to sell its cell-culture-based chicken products within the US. This is the first product of its kind to be cleared for commercial sale within the Americas, with only Singapore having previously cleared a similar product for sale, back in December of 2020. This latter product comes courtesy of another California start-up called Eat Just.

Since that initial approval in Singapore, Eat Just has begun to set up a 2,800 square meter (~30,000 square feet) production facility in Singapore that is scheduled to begin producing thousands of kilograms of slaughter-free meat starting in the first quarter of 2023. This would make it the top-runner in the cultured meat industry, which to this point has seen dozens of start-ups, but precious few actual products for sale.

With CEO Josh Tetrick of Eat Just projecting price equality between their cultured meat and meat from animals by 2030, could the FDA’s approval herald the dawn of slaughter-free meat? There are obviously still hurdles, but as we’ll see, the idea is not nearly as far-fetched as one might think.

Continue reading “FDA’s Approval Of Cell Culture Chicken: The Rise Of Fresh Meat Without The Animal?”

Move Aside Planar, I’m Slicing My Cone Way

Fleetwood Mac puns aside, very little has changed about how we “slice” models for printers in the last 30 years. However, [Stefan Hermann] of CNC Kitchen has a demo that tries to change all that by slicing conically.

For the uninitiated in the dark arts of printing in the third dimension, the canonical definition of non-conical slicing has been to bisect the model at layer height intervals and generate the perimeter and the infill, then output that as g-code. This is easy to implement mathematically and works reasonably well, except when you have overhangs of more than about 60 degrees on most printers. The idea of slicing in a cone rather than a plane isn’t entirely novel as we previously covered RotBot, which offers a vertical axis of rotation and a print head at 45 degrees. What is extraordinary is that the technique [Stefan] walks you through is done with a stock printer without a complex 45-degree tilt and is a software modification rather than a hardware tweak.

[Stefan] references earlier work done by [Michael Wüthrich] of ZHAW School of Engineering, who wrote some scripts that apply the transformation. The slicer is SuperSlicer, a fork of the PrusaSlicer, which is itself a fork of slic3r. The modified g-code is exported and can be sent to a printer of your choice. He even has a link to a pre-sliced model to try it out.

Of course, different printers have different clearance levels, but the Prusa Mini he uses has 16 degrees of clearance with the sensor pushed up. The code is on GitHub. It’s fascinating to note how all these techniques and forks interact and build off each other. Whether tilted slices, conical slices, or something else ultimately becomes the de facto standard, we’re looking forward to more options for slicing.

Video after the break.

Continue reading “Move Aside Planar, I’m Slicing My Cone Way”

Driving E-Paper Displays With Memory Limited MCUs

It’s easy to become jaded by modern microcontrollers: for just a few bucks you can get a MCU that’s powerful enough to give a desktop computer from the early 90s a run for its money while packing in contemporary technology like WiFi and Bluetooth. For many projects we don’t even have to consider optimizing our code, because we aren’t even scratching the surface of what the hardware is capable of.

But sometimes you don’t have the luxury of using the latest-and-greatest chip, and have to play the hand you’re dealt. That’s when folks like [Larry Bank] really shine. In a recent write-up, he goes over his experiments with driving e-paper displays (specifically, salvaged electronic shelf labels) with 8-bit MCUs that on paper shouldn’t have the resources to run them.

A similar trick can be used on OLEDs

The problem is that these displays generally expect to be handed a fully-formed image, which can easily exceed the free RAM on a low-end chip. For example, a 1-bit 128 x 128 image would consume 2 KB of RAM — more than four times the available memory on an ATtiny85.

As [Larry] explains, his alternate approach is to write data to the display in columns that are only one byte wide. Combined with his existing work with image decompression on constrained hardware, he’s able to rapidly draw out full-screen TIFF images using an Arduino UNO as demonstrated in the video after the break. He hopes the work will inspire others to experiment with what’s possible using the dinky MCUs you generally find in second-hand shelf labels.

Continue reading “Driving E-Paper Displays With Memory Limited MCUs”

A Handy OSHW USB Cable Tester For Your Toolkit

There’s no shame in admitting you’ve been burned by a cheapo USB cable — ever since some bean counter realized there was a few cents to be saved by producing “power only” USB cables, no hardware hacker has been safe. But with this simple tester from [Álvaro Prieto] in your arsenal, you’ll never be fooled again.

It’s about as straight-forward a design as possible, utilizing nothing more than a two dozen LEDs, their associated resistors, and a common CR2032 coin cell. Simply plugging both sides of your cable into the various flavors of USB connectors on the tester will complete the necessary circuits to light up the corresponding LEDs, instantly telling you how many intact wires are inside the cable. So whether you’re dealing with some shady cable that doesn’t have the full complement of conductors, or there’s some physical damage that’s severed a connection or two, you’ll know at a glance.

A sage warning for most of the devices we build.

Obviously the tester is designed primarily for the 24 pins you’ll find in a proper USB-C connector, but it’s completely backwards compatible with older cables and connectors. We appreciate that he even included the chunky Type B connector, which we’ve always been fond of thanks to its robustness compared to the more common Mini and Micro variants.

Keep in mind though that this tester will only show you if there’s a connection between two pins, it won’t verify how much power it can actually handle. For that, you’ll need some extra equipment.

New Part Day: Exotic Filament For RF Dielectric Structures

The world of microwave RF design appears to the uninitiated to be full of unimaginably exotic devices, as engineers harness the laws of physics to tame radio signals to their will. Among the weapons in their arsenal are materials of known dielectric properties, from which can be made structures with the desired effects on RF that encounters them. This has traditionally been a difficult and expensive process, but it’s one now made much easier by the availability of 3D printer filaments with a range of known dielectric values.

It’s best to think of the structures which can be designed using these materials as analagous to Fresnel lenses we’re all used to in the light domain. The example piece given by Microwave Journal is a metasurface for use in a steerable antenna, something that would be a much more difficult piece of work by more traditional means.

Normally when we inform you of a new special filament we’d expect it to be more costly than standard PLA, but this filament is in a class of its own at 275 euros per kilogram. So the interest for most readers will probably be more in the technology than the expectation of use, but even then we can see that there will still be microwave experimenters in our range who might be tempted by its unique properties. We look forward to what is developed using it.

Via Microwave Journal. Thanks to [Eric Mockler] for the tip!