You know how it goes — some gadgets stick around in your toolbox far longer than reason dictates, because maybe one day you’ll need it. How many of us held onto ISA diagnostic cards long past the death of the interface?
But unlike ISA, USB isn’t going away anytime soon. Which is exactly why this USB and more tester by [Iron Fuse] deserves a spot in your toolbox. This post is not meant to directly lure you into buying something, but seen how compact it is, it would be sad to challenge anyone to reinvent this ‘wheel’, instead of just ordering it.
So, to get into the details. This is far from the first USB tester to appear on these pages, but it is one of the most versatile ones we’ve seen so far. On the surface, it looks simple: a hand-soldered 14×17 cm PCB with twelve different connectors, all broken out to labelled test points. Hook up a dodgy cable or device, connect a known-good counterpart, and the board makes it painless to probe continuity, resistance, or those pesky shorts where D+ suddenly thinks it’s a ground line.
You’ll still need your multimeter (automation is promised for a future revision), but the convenience of not juggling probes into microscopic USB-C cavities is hard to overstate. Also, if finding out whether you have a power-only or a data cable is your goal, this might be the tool for you instead.
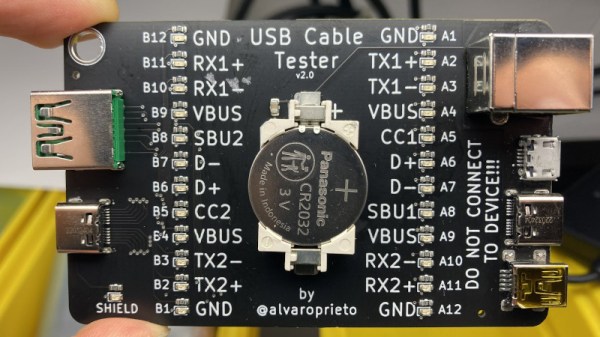
There’s no shame in admitting you’ve been burned by a cheapo USB cable — ever since some bean counter realized there was a few cents to be saved by producing “power only” USB cables, no hardware hacker has been safe. But with this simple tester from [Álvaro Prieto] in your arsenal, you’ll never be fooled again.
It’s about as straight-forward a design as possible, utilizing nothing more than a two dozen LEDs, their associated resistors, and a common CR2032 coin cell. Simply plugging both sides of your cable into the various flavors of USB connectors on the tester will complete the necessary circuits to light up the corresponding LEDs, instantly telling you how many intact wires are inside the cable. So whether you’re dealing with some shady cable that doesn’t have the full complement of conductors, or there’s some physical damage that’s severed a connection or two, you’ll know at a glance.
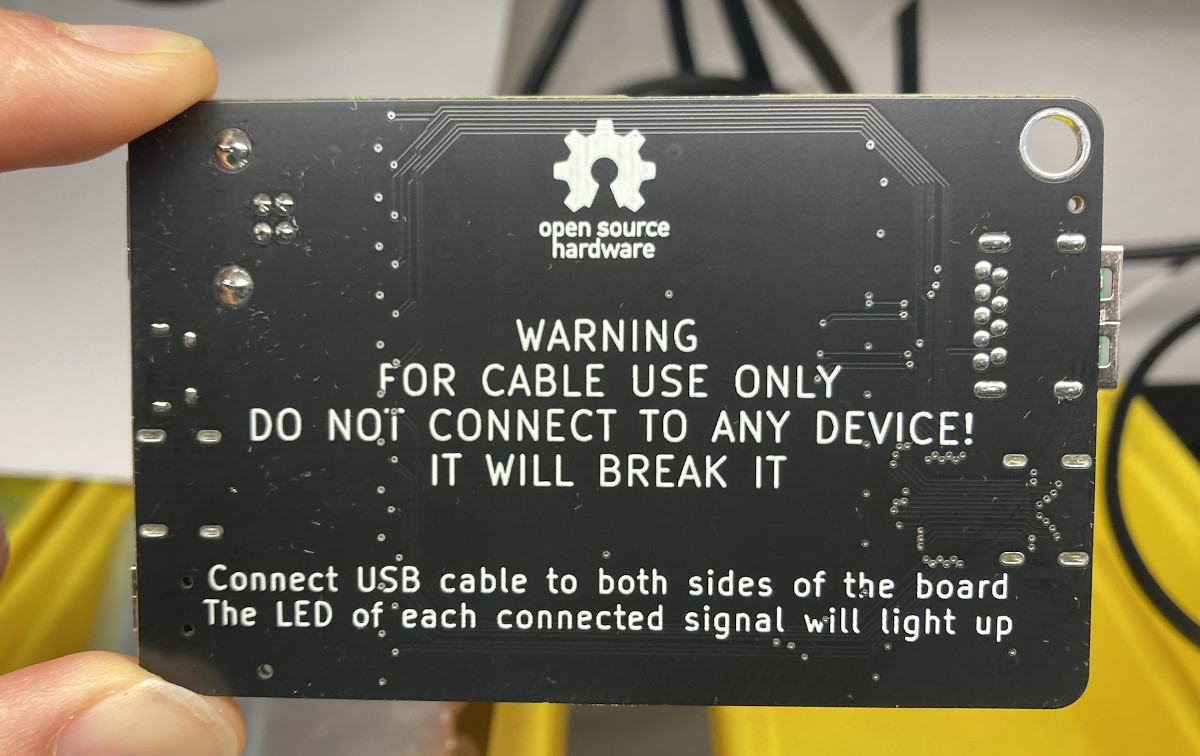
A sage warning for most of the devices we build.
Obviously the tester is designed primarily for the 24 pins you’ll find in a proper USB-C connector, but it’s completely backwards compatible with older cables and connectors. We appreciate that he even included the chunky Type B connector, which we’ve always been fond of thanks to its robustness compared to the more common Mini and Micro variants.
Keep in mind though that this tester will only show you if there’s a connection between two pins, it won’t verify how much power it can actually handle. For that, you’ll need some extra equipment.
The USB interface is being increasingly used as a power supply and charging port for all kinds of devices, besides data transfer. A meter to measure the electrical parameters of devices connected to a USB socket or charger would be handy on any hacker workbench. The folks at [electro-labs] designed this simple USB power meter which does just that.
The device measures voltage and current and displays them, along with the calculated power, on the small 0.5″ OLED display. The circuit is built around an ATmega328. To keep the board size small, and reduce component count, the microcontroller is run off its internal 8MHz clock. A low-resistance shunt provides current sensing which is amplified by the LT6106 a high side current sense amplifier before being fed to the 10 bit analog port of the ATmega. A MCP1525 precision voltage reference provides 2.5V to the Analog reference pin of the microcontroller, resulting in a 2.44mV resolution. Voltage measurement is via a resistive divider that has a range of up to 6V. An Arduino sketch reads voltage and current data on the analog ports and displays measurements on the display. The measured data is averaged to filter out noise.
The OLED display has a SPI interface and requires the u8glib library. The project uses all SMD parts, but is fairly easy to assemble by hand and could be a nice starter project if you want to wet your feet on surface mount assembly techniques. It’s designed using SolaPCB EDA software, and the source files for schematic and board layout are available as a ZIP archive. Download the BoM and Arduino code and you have everything needed to build this nifty device.
Over the last decade or so, USB has somehow changed. It’s not just for connecting printers, keyboards, mice, and webcams any more. It’s not even just for stuff you would have plugged into a serial port. It’s a power outlet. If you want to charge your phone, plug it into a power outlet that can deliver up to 2.5 Watts. Unintended consequences, I guess. If you ever find yourself in 1995 again, go over to Intel and tell them to bump up the current limit.
Being a power outlet, having a device to measure current, voltage, power, and all the other intricacies of the what’s going on inside a USB cable would be neat. The USB Tester from Fried Circuits is that device.
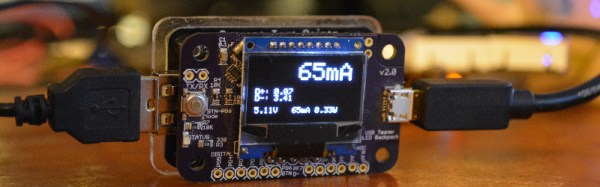
The Fried Circuits USB tester isn’t so much a single device, but a small set of tools that allow you to probe everything going on inside a USB cable. In its simplest form, it’s just a board with a USB A connector at one end, a USB micro connector at the other, and breakouts for measuring current, voltage, the differential data signals, and that weird ID pin that’s useful if you’re working with USB chargers or OTG devices.
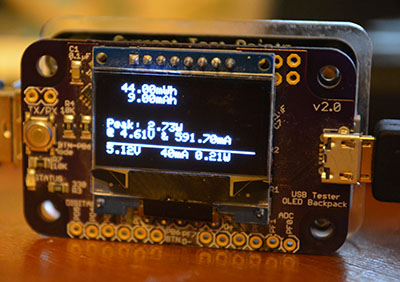
This breakout board also has two rows of five pins broken out. That’s for the USB Tester Backpack, which is really the heart of this device. This backpack features a microcontroller and a 128×64 resolution OLED display for current, voltage, and power monitoring, reading the voltage on the data lines, and graphing everything on the display. Everything you would ever want to know about a USB port – except for the actual bits being shoved through, of course – is right there on the display. Press the button on the side a few times, and whatever info you need will be presented in tall, very readable numbers.
The Entire Reason For Buying One
If you’re only going to use this to look at voltages, amps, and current flowing through a USB cable, you’re throwing your money away with this USB Tester. If simple, at-a-glance monitoring is what you need, you can hop on Amazon and get a USB current/voltage meter for $15. Even Adafruit has one for $7.50. If you only need to read the volts and amps for a USB device, your money is better spent elsewhere.
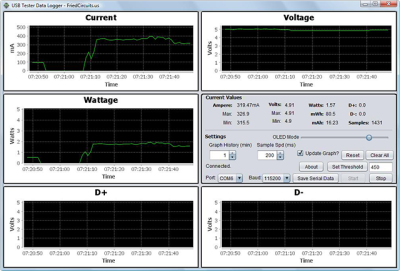
The Fried Circuits Java app.
The Fried Circuits USB tester does something none of these other USB meters can do. It can log all the data to a computer over USB.
In my initial review of the USB Tester for the Hackaday Store, the only ‘official’ option for recording data from the Tester to a computer was a Java app. The developer of the USB Tester, [Will], chose Java because of the ‘write once, run anywhere’ Sun and Oracle have been shoving down our throats for the last 20 years. In theory, Java was an excellent choice for a datalogging solution for the USB Tester.
In practice, however, it just didn’t work. By [Will]’s own admission, it was the first thing he’s ever done in Java, and I think he set some of the options in NetBeans wrong. I could not get the data logging app to run on my Windows 8 box, or my OS X box, or my Linux boxxen. The only way I could run this app was by digging out an old XP box. Apparently, [Will]’s copy of NetBeans was configured for Java 5 or something.
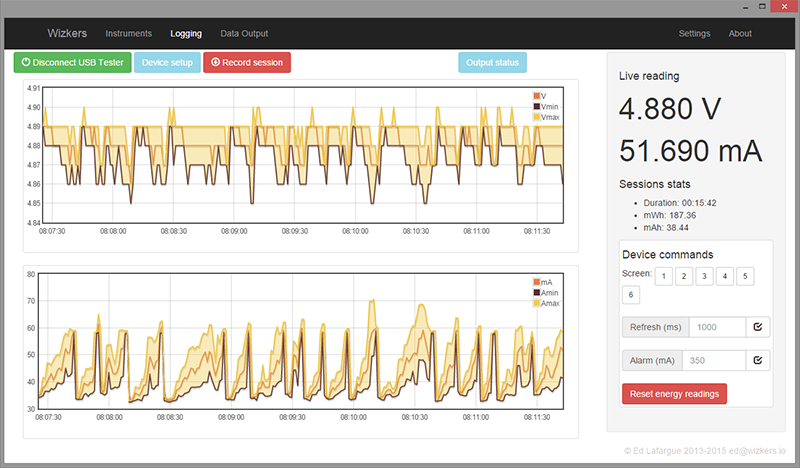
[Will] knew about this problem, and last month he officially teamed up with [Edouard Lafargue] of wizkers.io. This is a platform for scientific instruments that runs in a Chrome App. The choice of running instrumentation in a Chrome app may seem odd, but this is apparently the new hotness; you can program an Arduino in a Chrome app, and there’s a lot of interesting stuff happening in this space.
The Wizkers.io app can do everything you would expect from a datalogging app. It will tell you the volts, amps, watts, mWh, and mAh of the device currently under test. There are pretty graphs, and everything can be downloaded to a computer for further analysis.
It might seem like cheating to review this device with a 3rd party app, but by [Will]’s own admission, there were problems with the Java-based logger, and the Chrome app works perfectly. There’s also the delicious irony that a Chrome app is more portable than one written in Java. I appreciate that.
Of course the USB Tester also outputs this data over a serial connection (in JSON format, too!). If you just want to connect this to a computer, solder up some wires to the TX and RX lines.
Conclusion
If you want a device that just tells you how many mA a USB device is sucking up, you don’t need this. You can buy something for less than $10 that will tell you that. If you’re developing some USB hardware, you’ll eventually want to characterize how much power your device is drawing and when it’s drawing that much power. This will require a data logging tool, and apart from cutting up a few USB cables and wiring it into an expensive power supply, you can’t do better than the Fried Circuits USB tester.